
Tools
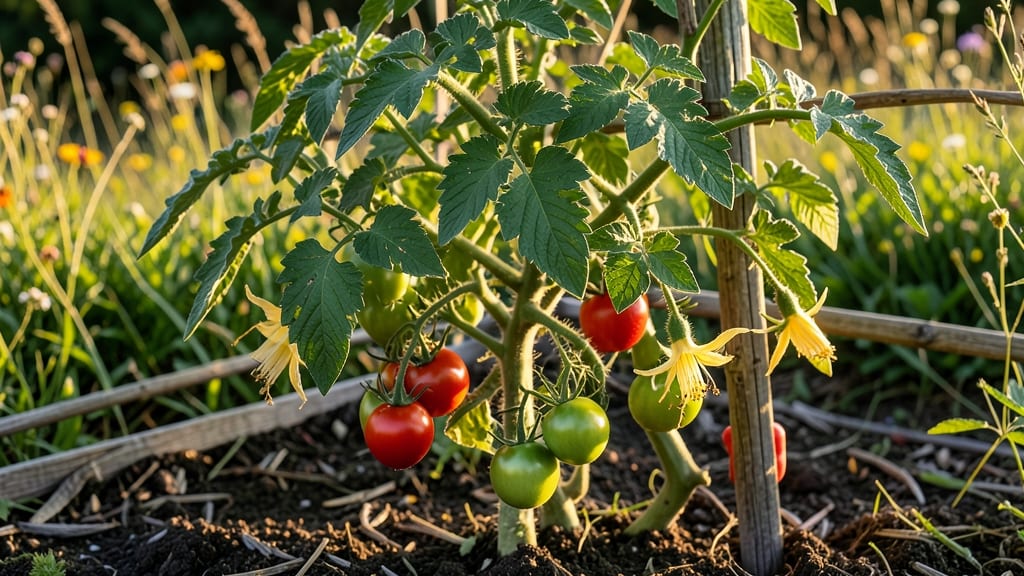
A backyard tomato garden that fits your space and feeds your family—without sacrificing aesthetics or yield. 🌱 I designed my first vertical tomato layout after realizing my raised beds were underperforming, and now I grow 50% more tomatoes in half the footprint. The secret?
Smart spacing, sturdy supports, and pairing tomatoes with the right companions. Vertical growing isn’t just practical—it’s transformative. My 6-foot-tall trellis now holds 12 indeterminate plants where I once struggled with just 6 in-ground.
We’re talking sun-ripened tomatoes within arm’s reach, no bending required, and a garden that doubles as a living privacy screen. The key is choosing the right varieties for your space and ensuring strong support from day one.
You’ll end up with vibrant foliage, heavy clusters of fruit, and a garden that looks as good as it performs. The vertical layout keeps leaves off the ground (fewer diseases), improves airflow, and makes harvesting a breeze.
Plus, the color contrast of deep green vines against blooms creates a showstopper in any yard. Works for small patios, urban backyards, or even balconies—just adjust the trellis height. Here’s how to plan yours for maximum productivity and beauty.
📚 In This Guide
- What you need
- Instructions
- Tips and common mistakes
- Wrapping up and next steps
What you need
- ● Tomato plants: 4–6 disease-resistant varieties (e.g., 'Cherry Roma,' 'Sungold,' or 'Early Girl'). Choose determinate (bush-type) or indeterminate (vining) based on your space.
- ● Vertical growing structure: Trellis (5–6 ft tall) or
- ● Cage (5–7 ft tall) or
- ● Wall-mounted pockets (fabric or plastic, 12–18 pockets per plant).
- ● Potting mix: 10–15 gallons of high-quality, well-draining soil (e.g., Miracle-Gro Potting Mix or FoxFarm Ocean Forest).
- ● Containers: 5–7 gallon pots (1 per plant) or fabric grow bags (if using wall pockets).
- ● Support ties: Soft plant ties or Velcro strips (10–12 pieces).
- ● Fertilizer: Balanced organic fertilizer (e.g., 10-10-10) or tomato-specific feed.
- ● Watering can: 2–3 gallon capacity with a rose attachment.
- ● Pruning shears: Sharp, clean pair for trimming suckers and dead leaves.
- ● Mulch (straw or shredded leaves) to retain moisture.
- ● Drip irrigation kit for automated watering.
- ● Epsom salt (1 tbsp/month) for magnesium boost.
- ● Shade cloth (30–50%) for hot climates.
- ● Compost tea or mycorrhizal fungi to enhance soil health.
Step-by-step instructions for designing a vertical tomato garden
Here's how to maximize your backyard's potential with a vertical layout that yields more tomatoes in less space.
🪴 Step 1: Choose and Prepare Vertical Structures
Start with sturdy frames like A-frames, trellises, or cages that can support 6-8 foot tall tomato plants. I recommend wooden A-frames for their stability—sink 4-foot posts 12 inches deep into the ground, then attach horizontal slats every 12 inches for vines to climb. For smaller spaces, wall-mounted trellises work beautifully against fences or walls.
If using cages, opt for 5-foot tall models with 14-gauge wire—they're durable enough to handle heavy fruit loads. Space your structures 3 feet apart to allow airflow and easy maintenance. This prevents fungal diseases and makes harvesting a breeze. Real talk: I once crammed cages too close together, and the humidity trapped between them led to blight. Don't make that mistake.
☀️ Step 2: Select and Plant Tomato Varieties Suited for Vertical Growth
Choose determinate varieties like 'Roma' or 'Celebrity' for bushier growth, or indeterminate types such as 'Sungold' or 'Brandywine' that climb continuously. I always plant 2-3 plants per structure—this gives them room to sprawl while keeping the system balanced. Dig holes twice as wide as the root ball and as deep to encourage root expansion.
Place your plants 18-24 inches from the structure so they can reach upward without strain. Bury one-third of the stem when transplanting—this triggers stronger root growth. Water deeply right after planting to settle the soil and remove any air pockets around the roots. You'll know it's done right when the soil surface looks slightly firm but still crumbly.
🌿 Step 3: Train Vines and Provide Support as They Grow
As your tomatoes grow, tie the main stem to the structure using soft plant ties or old T-shirts every 12 inches. This prevents wind damage and ensures the plant grows upward instead of flopping over. I like to use reddish-brown fabric strips—they're gentle on stems and blend into the garden. Avoid wire or anything that can cut into the vine.
Once the plant reaches the top of the structure, prune suckers (the small shoots that grow in the leaf axils) to focus energy on fruit production. You'll see these as tiny offshoots—pinch them off with your thumb and forefinger. This step is crucial: unchecked suckers lead to bushy, unproductive plants. Watch for first flower clusters around 6-8 weeks after transplanting—this is when you'll start seeing fruit set.
💧 Step 4: Water and Fertilize for Vertical Success
Water at the base of the plant, not overhead, to keep leaves dry and prevent disease. Aim for 1-1.5 inches of water per week, delivered deeply 2-3 times per week rather than daily shallow waterings. You'll know you're doing it right when the top inch of soil feels dry to the touch. Mulch around the base with 2-3 inches of straw or wood chips to retain moisture and suppress weeds.
Fertilize every 3-4 weeks with a balanced 10-10-10 or tomato-specific formula, but reduce nitrogen once flowers appear—too much greenery means fewer tomatoes. I switch to a low-nitrogen, high-phosphorus feed (like 5-10-10) to encourage flowering and fruiting. Stop fertilizing 4-6 weeks before your first frost to allow the plant to harden off naturally.
✂️ Step 5: Prune and Harvest for Maximum Yield
Continue pruning suckers throughout the season, but leave 1-2 leaves below each fruit cluster to support photosynthesis. This ensures the plant can keep producing while maintaining energy reserves. You'll notice fruit color changing from green to pink or red—this is your cue to monitor ripeness closely. Harvest regularly to encourage more production; overripe tomatoes on the vine attract pests and can split.
For indeterminate varieties, keep pruning until the first frost. Determinate types will naturally stop growing once they set fruit, so focus on removing diseased leaves and thinning fruit clusters to 6-8 tomatoes per truss—this prevents overburdening and ensures larger, sweeter tomatoes. I always save the last ripe tomatoes for sauces or drying, as they tend to be the most flavorful.
Tips & tricks for perfect vertical tomato garden setup
These game-changing strategies will help you maximize your vertical tomato garden's potential while avoiding common pitfalls that sabotage yields.
Structure Stability: When building your wooden A-frames, use 4x4 posts instead of 2x4s—the extra thickness prevents leaning, especially in windy conditions. I learned this the hard way after watching a 6-foot frame tilt during a summer storm. For extra reinforcement, add diagonal braces between the posts. This ensures your 6-8 foot tall plants stay upright even when laden with fruit. The 12-inch spacing between slats is perfect for vine growth, but if you're growing particularly vigorous indeterminate varieties, consider reducing this to 10 inches to provide more support.
Plant Selection Strategy: For your vertical garden, prioritize indeterminate varieties like 'Sungold' or 'Brandywine'—they produce continuously throughout the season, making the most of your vertical space. That said, don't overlook determinate varieties like 'Roma' for their compact growth and excellent sauce-making qualities. When planting your 2-3 plants per structure, stagger them by height—place the tallest in the center and shorter ones on the edges. This creates a natural windbreak and prevents shading issues that can reduce fruit set. The 18-24 inch distance from the structure is ideal, but if space is extremely limited, you can reduce this to 12 inches while ensuring you bury that one-third of the stem for maximum root development.
Pruning Precision: When pruning suckers in Step 3, aim to remove them when they're about 2 inches long—this is when they're easiest to pinch off without damaging the main stem. I use my thumbnail to gently press against the vine while pinching, which creates a clean break. For indeterminate varieties, keep pruning until the first frost, but watch for first flower clusters around 6-8 weeks—this is when you'll see the most active growth. Leave those 1-2 leaves below each fruit cluster to maintain photosynthesis, but don't hesitate to remove any leaves that show signs of disease. A sharp pair of pruning shears (sterilized with rubbing alcohol) works best for larger pruning tasks, while your fingers are perfect for those small sucker removals.
Watering Wisdom: Your 1-1.5 inches of water per week guideline is spot-on, but timing matters just as much as quantity. Water in the early morning to allow leaves to dry completely before evening—this prevents fungal diseases like early blight. Use a soaker hose placed at the base of plants for the most efficient delivery, or a drip irrigation system if you have multiple structures. The top inch of soil feeling dry is your best indicator, but I also check by lifting a plant gently—if the soil pulls away easily, it's time to water. Mulching with 2-3 inches of straw helps maintain consistent moisture levels and suppresses weeds, but avoid piling mulch against the stems to prevent rot.
Pro Tips for Backyard Tomato Garden
- These game-changing strategies will help you maximize your vertical tomato garden's potential while avoiding common p...
- Structure Stability: When building your wooden A-frames, use 4x4 posts instead of 2x4s—the extra thickness prevents l...
- Plant Selection Strategy: For your vertical garden, prioritize indeterminate varieties like 'Sungold' or 'Brandywine'...
Frequently asked questions
Got questions about growing a thriving backyard tomato garden in limited space? You’re not alone! Here are answers to the most common queries—from beginners to seasoned green thumbs.
When is the best time to plant tomatoes in my region?
Timing depends on your climate! For most U.S. zones, plant after the last frost (typically late spring) when soil is at least 60°F (15°C). Use a frost cloth in cooler areas or opt for cherry tomatoes, which tolerate light frosts better. Check your local USDA Plant Hardiness Zone for precision.
Why are my tomato leaves turning yellow?
Yellow leaves often signal overwatering, nutrient deficiency, or disease. Check the soil—it should be moist but not soggy. Yellowing at the bottom? Likely overwatering or poor drainage. Yellowing between veins? Could be nitrogen deficiency (add compost or a balanced fertilizer). Spotty yellow with brown edges? Possible early blight—remove affected leaves and improve airflow.
Can I grow tomatoes in containers or raised beds?
Tomatoes thrive in 5-gallon containers or deeper raised beds (12"+ depth). Use a well-draining mix with compost, and choose determinate varieties (bush-type) for smaller spaces. For vertical gardens, cage-free trellises or stakes work great—just ensure the pot has drainage holes to prevent root rot.
How do I maximize yield in a small space?
Prioritize vertical growth—use trellises, cages, or espalier techniques to save floor space. Plant 1-2 plants per square foot (closer for determinate types). Prune suckers (side shoots) to focus energy on fruit production. Also, interplant with basil or marigolds to repel pests and boost flavor!
What’s the easiest way to keep pests away?
Prevention is key! Start with healthy soil (rich in compost) to build strong plants. Use row covers early in the season to block pests like hornworms. For organic control, neem oil or kaolin clay deter insects. Handpick pests (like tomato hornworms) in the morning when they’re sluggish. Ladybugs and lacewings are natural allies—invite them with dill or marigolds!
Wrapping up and next steps
Growing tomatoes in a vertical backyard garden isn’t just space-saving—it’s a game-changer for fresh, homegrown flavor! With the right setup, you’ll enjoy bountiful harvests while keeping your garden tidy and efficient. Whether you’re a beginner or a seasoned gardener, this method makes it easy to grow more with less.
Ready to get started? Pick your favorite vertical design—from trellises to cages—and plant those seeds! Grab your tools, follow the steps, and soon you’ll be savoring sun-ripened tomatoes straight from your backyard. 🍅 Happy gardening!