
Vegetables
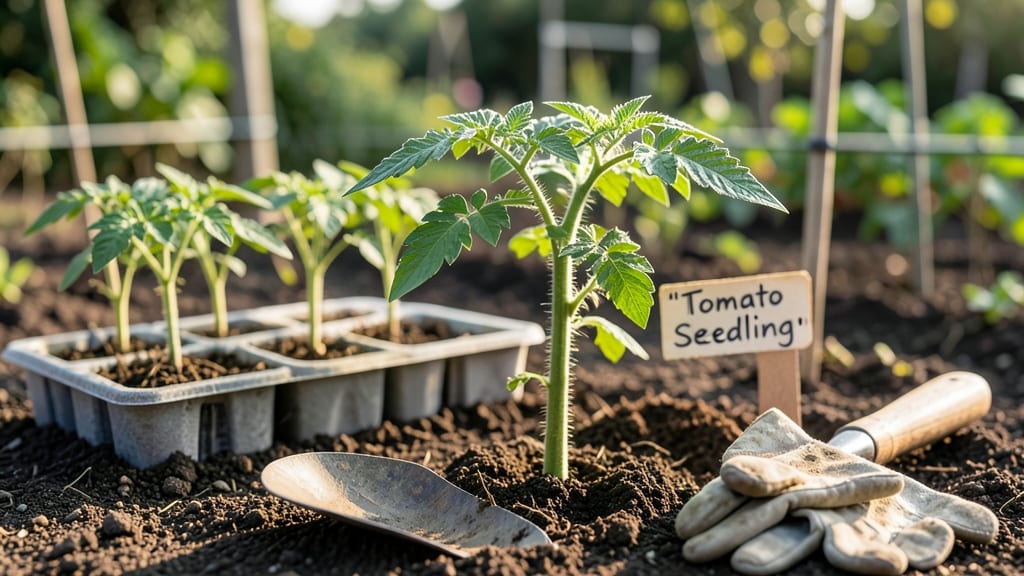
Starting tomato seeds outdoors means frost-proof transplants that thrive from day one—no more leggy, shocked seedlings. 🌱 The key is timing: wait until soil warms to 60°F and nighttime temps stay above 50°F, usually 2-3 weeks after your last frost date.
My first attempt failed when I rushed it; now I check soil temp with a thermometer and mark the calendar for my zone's average last frost. Hardening off takes 7-10 days of gradual exposure, but it's worth it.
Begin with 2-3 hours of sunlight daily, then increase time outside while protecting from wind. I use a small cold frame or shade cloth on breezy days—this mimics real growing conditions and prevents transplant shock.
Most gardeners skip this step, which is why so many seedlings struggle in their first week outdoors. By the time you plant, your seedlings will be sturdy and dark green, not pale and stretched. They'll set roots faster, establish quicker, and start flowering within 3-4 weeks of transplanting.
The payoff? A tomato harvest that starts earlier and lasts longer than store-bought plants ever could. Works for all tomato varieties—heirlooms, cherry, beefsteak—just adjust timing based on your zone. Here's how to do it right the first time.
📚 In This Guide
- What you need
- Instructions
- Tips and common mistakes
- Wrapping up and next steps
What you need
- ● Tomato seeds: 10–20 seeds (depending on variety and desired yield). Choose heirloom, hybrid, or disease-resistant types based on your climate.
- ● Seed-starting trays or biodegradable pots: 2–4 inch deep (6–12 packs recommended for 10–20 seeds). Opt for peat or coconut fiber pots for easy transplanting.
- ● Seed-starting mix: 1–2 bags of sterile, well-draining potting soil (avoid garden soil—it’s too dense!). Look for mixes labeled "seed-starting" or "organic."
- ● Grow lights or sunny windowsill: A full-spectrum LED grow light (12–16 hours/day) or a south-facing window with consistent sunlight (6+ hours/day).
- ● Misting bottle or spray nozzle: For gentle watering to avoid disturbing seeds.
- ○ Plastic wrap or humidity dome: To retain moisture during germination (optional but helpful for first 7–10 days).
- ○ Heat mat (optional but helpful): For faster germination (70–80°F is ideal).
- ● Hardening-off supplies: Shade cloth (30–50% coverage) for gradual sun exposure.
- ● Small fans or outdoor space with wind exposure.
- ● Watering can or hose with a gentle nozzle.
- ● Fertilizer: A balanced, water-soluble fertilizer (5-10-5 or 10-10-10) for when seedlings develop their first true leaves.
- ● Plant labels: To track varieties and planting dates.
- ● Thermometer: To monitor soil and air temperatures during hardening off.
- ● Row covers or cloches: For extra protection during late frosts.
- ● Compost or worm castings: To boost soil health before transplanting.
Step-by-step guide to starting tomato seeds outdoors
Here's how I prepare tomato seedlings to thrive from the first frost date onward.
🌱 Step 1: Time Your Planting for Optimal Germination
Calculate your last frost date and plant seeds 6-8 weeks before that date. Tomatoes need warmth to germinate, so wait until soil temperatures reach at least 60°F—use a soil thermometer to check. I like to start seeds in biodegradable peat pots (they eliminate transplant shock) and place them directly in the garden where they'll grow.
Push seeds ½ inch deep in loose, well-drained soil—too deep delays germination. Space them 2-3 inches apart in rows 18 inches apart. Water gently until the surface is damp but not soggy. This early planting gives seedlings time to develop strong roots before summer heat arrives.
💧 Step 2: Protect Seedlings from Frost and Pests
Cover newly planted seeds with row covers or plastic mulch to trap heat and speed germination. Remove covers once seedlings emerge to prevent overheating. Watch for cutworms—they sever young stems at soil level. I wrap stems with cardboard collars (cut from egg cartons) to block them without chemicals.
Keep the soil consistently moist but never waterlogged—dry soil slows growth. Use a drip irrigation system if possible; overhead watering spreads disease. When seedlings reach 2 inches tall, thin them to 12 inches apart to reduce competition.
☀️ Step 3: Harden Off Gradually for Outdoor Resilience
Start hardening off 2 weeks before transplanting. On a sunny day, remove row covers for 1-2 hours, then return them. Each day, extend the time outside by 30 minutes, moving seedlings to a sheltered, shaded spot first. This mimics natural wind and temperature shifts.
After 7-10 days, leave seedlings uncovered during the day but cover them at night if frost threatens. You'll know they're ready when they stand upright in full sun without wilting. Strong stems and deep green leaves signal they can handle outdoor conditions.
✂️ Step 4: Transplant with Care for Maximum Success
Choose an overcast day to transplant to reduce stress. Dig holes twice as wide as the root ball but no deeper—burying stems too deep causes rot. Space plants 18-24 inches apart in rows 36 inches apart for airflow. Water deeply before and after transplanting to settle roots.
Remove any yellow or damaged leaves before planting—they harbor disease. Mulch with 2-3 inches of straw to retain moisture and suppress weeds. Within 7-10 days, you'll see new growth, proving the seedlings have taken root.
🌿 Step 5: Support and Maintain for Bountiful Harvests
Install stakes or cages at transplanting to prevent wind damage. Prune suckers (side shoots) regularly to direct energy to fruit production. Watch for early blight (brown spots on lower leaves)—remove infected foliage immediately to protect the plant.
Water at the base in the morning to avoid fungal issues. Tomatoes need 1-2 inches of water weekly, but adjust for rain. You'll know you're doing it right when plants produce steady blossoms and fruit sets consistently.
Tips & tricks for perfect tomato seedling transplants
These practical insights will help you navigate the delicate transition from seed to thriving outdoor plant—without losing a single seedling to frost or stress.
Soil Temperature Matters: The 60°F minimum soil temperature is non-negotiable for germination. I've seen seeds planted too early fail completely when nighttime temps dropped below 55°F. Use a soil thermometer to verify—don't guess! If your soil runs cooler, consider using black plastic mulch to absorb and retain heat before planting.
Harden Off Like a Pro: During the 2-week hardening process, I recommend starting with just 1 hour of uncovered exposure on day one, then gradually adding 30-minute increments. Watch for wilting—this is your plant's way of saying "too much too soon." A gentle breeze test works too: if seedlings bend but don't break, they're ready for more sun.
Transplanting Day Strategy: The overcast day recommendation isn't just about cloud cover—it's about humidity. Cloudy skies mean higher relative humidity, which reduces water loss during transplant shock. If you must transplant on a sunny day, do it in the late afternoon when temperatures peak and water loss is minimized. I've also found that transplanting after a light rain gives roots an instant hydration boost.
Post-Transplant Care: After planting, I water deeply but avoid creating puddles around the base. The 1-2 inches of weekly water should be delivered consistently—drip irrigation is ideal. If you notice leaves curling upward during the day but flattening at night, it's a classic sign of underwatering. This usually means you need to increase frequency rather than volume.
Pro Tips for Starting Tomato Seeds Outdoors
- These practical insights will help you navigate the delicate transition from seed to thriving outdoor plant—without l...
- Soil Temperature Matters: The 60°F minimum soil temperature is non-negotiable for germination. I've seen seeds plante...
- Harden Off Like a Pro: During the 2-week hardening process, I recommend starting with just 1 hour of uncovered exposu...
Frequently asked questions
Got questions about starting tomato seeds outdoors? You’re not alone! Here are some of the most common concerns—and their answers—to help you grow strong, frost-resistant tomato plants with confidence.
Can I start tomato seeds outdoors if I don’t have a greenhouse or indoor setup?
Many gardeners direct-sow tomato seeds outdoors in warm climates or use cold frames, row covers, or even black plastic mulch to protect seedlings from frost. Just wait until soil temps reach at least 60°F (15°C)—tomatoes hate cold soil. For cooler areas, start seeds indoors first, then harden them off before transplanting.
How do I know when it’s safe to transplant hardened-off seedlings outdoors?
Wait until after the last frost date in your zone, and only transplant when nighttime temps stay above 50°F (10°C). A simple trick: bury seedlings deeper than they were in pots—up to the first true leaves—to encourage strong root growth. Water thoroughly before and after transplanting to reduce shock.
What should I do if my hardened-off seedlings look wilted or stressed after moving them outside?
Wilted seedlings are often just adjusting! Provide light shade for the first few days and keep soil moist (not soggy). If leaves turn yellow, it might be transplant shock—give them a week to recover. Avoid fertilizing right away; focus on water and gradual sun exposure instead.
How long does hardening off take, and what’s the best schedule?
Hardening off typically takes 7–14 days. Start with 2–3 hours of sunlight/day, then gradually increase exposure by 1–2 hours daily. By day 7, seedlings should handle full sun. Use a shade cloth if temps exceed 85°F (29°C)—tomatoes can get sunburned!
Are there any tomato varieties that tolerate cold better for outdoor starts?
Yes! Try early-maturing varieties like ‘Stupice’ (a cold-hardy heirloom) or ‘Mountain Merit’ (disease-resistant and fast-growing). For cooler climates, cherry tomatoes (e.g., ‘Sweet Million’) often perform better than large slicing types. Always check your seed packet for days to maturity to match your growing season.
Wrapping up and next steps
Starting tomato seeds outdoors is a rewarding way to grow healthy, frost-proof plants—and you’ve got all the tools to succeed!
From gathering the right materials to mastering hardening off, each step brings you closer to a thriving harvest. Don’t let hesitation slow you down: grab those seeds, roll up your sleeves, and give your tomatoes the strong start they deserve.
Ready to take the next step? Head to your garden, follow your hardened-off seedlings into the soil, and watch your efforts bloom into juicy, homegrown tomatoes! 🌱🍅