
Vegetables
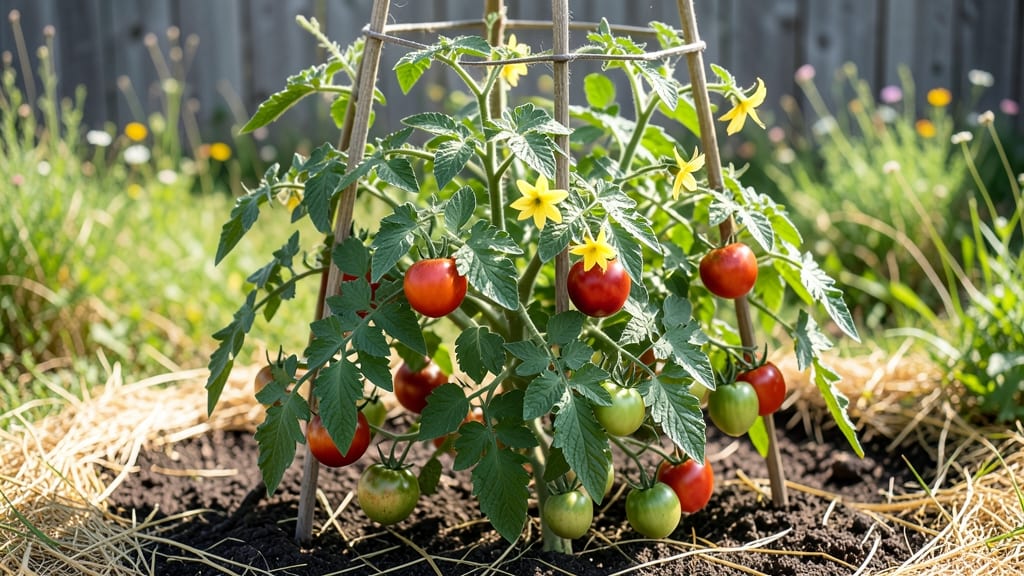
Growing the heirloom tomato inside starts with fast germination—something I perfected after my first batch took three weeks to sprout. 🌱 The secret isn’t fancy equipment; it’s a warm, moist environment and the right varieties that thrive in containers.
My favorite? 'Tiny Tim' and 'Patio Princess'—compact but packed with flavor, perfect for small spaces.
You’ll need a seed-starting tray, high-quality seedling mix, and a heat mat or sunny windowsill. Keep the soil consistently moist but not soggy—think damp sponge, not swamp. Within 5-7 days, you’ll see those first green shoots pushing through, signaling success. The key is patience and warmth, not pressure.
By week 4, you’ll have sturdy seedlings ready for transplanting into larger containers. These plants will reward you with earlier harvests than store-bought tomatoes, and the flavors? Unmatched. The first ripe tomato indoors is a moment of pure triumph—especially when you’ve grown it from seed.
This method works year-round, regardless of your climate. Whether you’re battling short summer days or winter blues, heirloom tomatoes indoors deliver fresh, homegrown produce whenever you want it. Let’s get those seeds sprouting!
📚 In This Guide
- What you need
- Instructions
- Tips and common mistakes
- Wrapping up and next steps
What you need
- ● Heirloom tomato seeds (choose 1-2 varieties for best results—think Brandywine, Cherokee Purple, or Sungold!)
- ● Seed-starting mix (sterile, peat-based or coco coir blend—avoid garden soil!)
- ● Seed trays or small pots (3-4" deep, with drainage holes—2-4 seeds per pot is ideal).
- ● Clear plastic dome or plastic wrap (to create a mini greenhouse effect).
- ● Spray bottle (for gentle watering—no soaking!).
- ● Grow lights or sunny windowsill (6-8 hours of light daily—south-facing windows work if natural light is strong!).
- ○ Heat mat (optional but helpful) (70-75°F keeps seeds cozy and speeds germination!).
- ● Tweezers or pencil (for planting tiny seeds—precision is key!).
- ● Plant labels & marker (track varieties—trust us, you’ll forget!).
- ● Fertilizer (balanced, water-soluble) (like 5-5-5 or fish emulsion—wait until sprouts appear!).
- ● Humidity tray (DIY with pebbles & water) (keeps moisture steady without drowning seeds).
- ○ Thermometer (optional) (monitor soil temps—ideal range: 70-85°F).
- ○ Pre-soak seeds (optional): Soak heirloom seeds in lukewarm water for 4-6 hours to soften the shell—speeds up germination!
- ● Sterilize tools: Wipe trays and tweezers with rubbing alcohol to prevent mold.
- ● Label early: Write seed names before planting—ink smudges are a nightmare!
Step-by-step guide to germinating heirloom tomatoes indoors
Here’s the method I’ve used for years to get heirloom tomato seeds sprouting in just 5-7 days—no waiting weeks.
🌱 Step 1: Prep Seeds for Faster Germination
Heirloom tomato seeds have tough outer shells that slow things down. To speed it up, soak them overnight in a bowl of lukewarm water—just enough to cover them. I like to use a small glass jar with a lid so they stay submerged. The water should feel warm to the touch, not hot.
Leave them in the water for 12-24 hours—you’ll see the seeds swell slightly when they’re ready. This softens the seed coat so roots can break through faster. Don’t skip this step; it cuts germination time nearly in half. After soaking, drain the water and let the seeds sit on a paper towel for an hour to dry slightly before planting.
💧 Step 2: Set Up the Perfect Germination Environment
Fill a seed tray or small pots with sterile seed-starting mix (not garden soil—it’s too dense). Moisten it until damp but not soggy, then press it down lightly so it’s firm but still loose. Plant the soaked seeds ¼ inch deep, spacing them 1 inch apart in rows.
Cover the tray with a clear plastic dome or plastic wrap to trap warmth and moisture. Place it in a spot where the soil stays between 75-85°F. A seedling heat mat helps if your home runs cooler—just plug it in under the tray. You’ll see condensation on the plastic, which is perfect. Check daily but don’t remove the cover yet; humidity is key for fast sprouts.
☀️ Step 3: Monitor for Sprouts and Adjust Conditions
Germination usually starts in 3-5 days, but some heirloom varieties can take up to 7 days. Watch for tiny green shoots pushing through the soil—this is your cue that it’s working. Once 50% of seeds sprout, immediately remove the plastic cover to prevent damping-off (a fungal disease that kills seedlings overnight).
Move the tray to a bright, indirect light source—like a south-facing window or under a grow light. If seedlings stretch toward the light (called "legginess"), they need more intensity. Keep the soil evenly moist but never soggy; water from the bottom by placing the tray in an inch of water for 10 minutes, then drain excess.
⏰ Step 4: Thin and Strengthen Seedlings
When seedlings have 2-3 true leaves (not the first tiny cotyledons), thin them so the strongest one remains in each cell. Use scissors to snip weak seedlings at soil level—this prevents disturbing roots. The remaining seedling should have a thick stem and vibrant green leaves.
Now’s the time to introduce a balanced fertilizer (like 5-5-5) at half strength. Water deeply, then let the top inch of soil dry before fertilizing again. Keep them in 14-16 hours of light daily, rotating the tray weekly so they grow straight. You’ll know they’re thriving when new leaves appear every 5-7 days.
Tips & tricks for perfect heirloom tomato germination
Took me years of trial and error to perfect these tricks—here's how to avoid the most common pitfalls while keeping your heirloom tomato seeds sprouting on schedule.
Soaking Strategy: The 12-24 hour soak is non-negotiable for heirloom seeds, but here's the secret: use a glass jar with a lid to prevent evaporation, and add a pinch of hydrogen peroxide (3%) to the water to sterilize the seeds and prevent mold. This keeps your seeds safe while they soften—just don't exceed 24 hours or you risk weakening the seeds. The seeds should look slightly plump when ready, not mushy.
Temperature Precision: That 75-85°F range is critical, but most homes don't naturally stay in this zone. If your kitchen runs cooler, place the tray on top of your fridge (not inside) or use a seedling heat mat set to 75°F. Too cold? Sprouts will take weeks. Too hot? They'll rot before emerging. I keep a small thermometer near the tray to monitor—it's worth the investment for heirloom varieties that are particularly sensitive.
Light Transition: When you remove the plastic cover after 50% germination (Step 3), don't rush to move to direct sunlight. Start with bright, indirect light—like a south-facing window with sheer curtains—to prevent shock. The seedlings' first true leaves are delicate and can scorch if exposed too quickly. I use a grow light on a timer for 14-16 hours daily once they've adapted to indirect light for 2-3 days.
Thinning Technique: The moment you thin seedlings (Step 4), use sterilized scissors to cut at soil level rather than pulling. This prevents disturbing the roots of your remaining seedlings and gives you cleaner cuts that heal faster. I find that thinning when seedlings have 2-3 true leaves gives them enough energy to recover quickly, while also preventing overcrowding that leads to leggy growth.
Pro Tips for Heirloom Tomato Inside
- Took me years of trial and error to perfect these tricks—here's how to avoid the most common pitfalls while keeping y...
- Soaking Strategy: The 12-24 hour soak is non-negotiable for heirloom seeds, but here's the secret: use a glass jar wi...
- Temperature Precision: That 75-85°F range is critical, but most homes don't naturally stay in this zone. If your kitc...
Frequently asked questions
about growing heirloom tomatoes from the inside out—because even the best gardeners need a little help!1. Can I grow heirloom tomatoes from store-bought seeds inside a tomato?
Yes! Just scoop out the seeds, rinse them, and let them dry for 1-2 days before planting. Store-bought heirloom tomatoes (like Brandywine or Cherokee Purple) work best—avoid hybrid varieties, as they may not produce true seeds.
2. How long does it take for heirloom tomato seeds to sprout inside?
With the right warmth (70-85°F) and moisture, seeds typically sprout in 5-14 days. If your kitchen is cooler, try a seedling heat mat or place them near a sunny window. Patience is key—some varieties (like Black Krim) can be slower!
3. What if my seeds rot or mold instead of sprouting?
Overwatering or poor drainage is usually the culprit. Ensure your growing medium (soil or paper towel) stays moist but not soggy. If mold appears, discard the seeds and start fresh with a new batch—fungus can kill seedlings fast!
4. Can I grow heirloom tomatoes indoors year-round?
Use a grow light (14-16 hours/day) and a sunny windowsill for natural light. Dwarf or bush varieties (like Tiny Tim) thrive indoors, while vining types need trellises. Just watch for pests—indoor gardens can attract gnats!
5. What’s the best way to transplant seedlings outdoors?
Wait until nighttime temps stay above 50°F and harden off seedlings for 7-10 days (gradually expose them to outdoor conditions). Plant deep—bury stems up to the first leaves to encourage strong roots. Mulch afterward to retain moisture and deter weeds!
Wrapping up and next steps
Growing heirloom tomatoes from seed is a rewarding adventure—one that starts with patience, the right techniques, and a dash of curiosity! 🌱 By mastering pre-soaking, optimal temperature, and gentle handling, you’ll unlock faster, healthier sprouts and set your plants up for a bountiful harvest.
Whether you’re a seasoned gardener or a beginner, these secrets will help you grow with confidence.
Ready to take the next step? Start small—pick one heirloom variety, gather your supplies, and try the method that excites you most. Before you know it, you’ll be savoring homegrown tomatoes straight from your own garden! 🍅✨