
Propagation
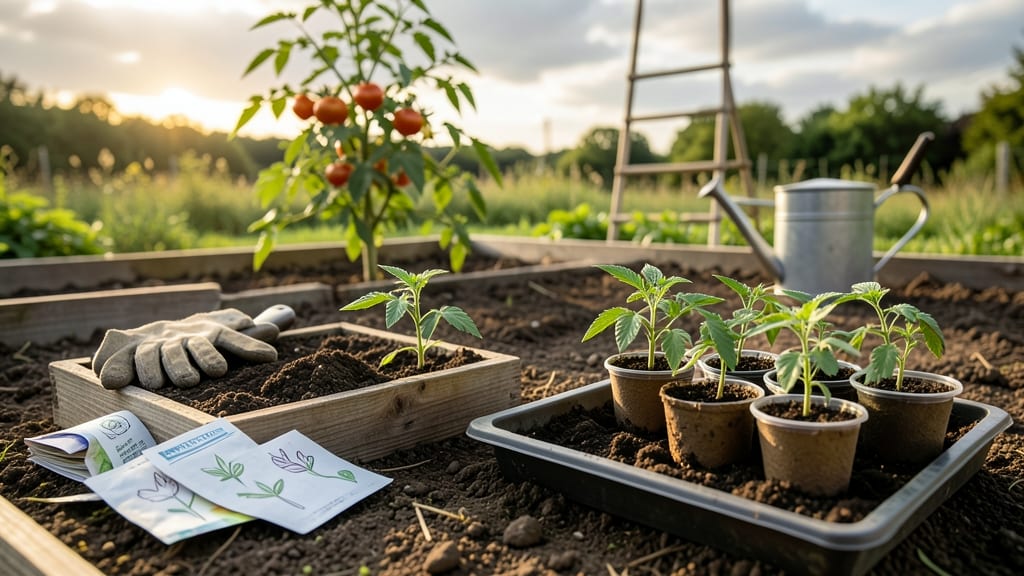
Planting tomato seeds from tomatoes lets you grow heirloom varieties you’ll never find in stores—and it’s easier than you think. 🌱 All you need is a ripe tomato, a little patience, and a sunny windowsill.
I’ve saved seeds from my best-tasting cherry tomatoes for years, and the seedlings always outperform store-bought plants.
The process starts with fermenting the seeds to remove the gel that clings to them—just 2-3 days in water—then drying them on a paper towel. Once planted, they sprout in 5-10 days with warmth and light.
The key is keeping the soil moist but not soggy; too much water drowns those tiny roots before they get a chance to grow.
By week 6, you’ll have sturdy seedlings ready to transplant, packed with the same flavor and vigor as their parent plants. The first harvest? Even sweeter because you grew it from seed. Plus, it’s a fun project for kids—nothing beats watching a seed turn into a tomato plant.
Works for any tomato variety—heirlooms, slicers, or cherry—and scales from a single pot to a seed-starting tray. Here’s how to do it without losing a single seed to mold or rot.
📚 In This Guide
- What you need
- Instructions
- Tips and common mistakes
- Wrapping up and next steps
What you need
- ● Mature tomato seeds – Save seeds from heirloom or non-hybrid tomatoes (store-bought hybrids won’t work). Aim for 3–5 seeds per variety to ensure success.
- ● Seed-starting trays or small pots – Use 2–3 inch pots or a seed tray with individual cells (biodegradable options are eco-friendly!).
- ● Seed-starting mix – A lightweight, sterile mix (like peat-based or coconut coir) works best. Avoid garden soil—it’s too dense!
- ● Spray bottle or watering can with a fine nozzle – Gentle watering prevents seed displacement.
- ● Plastic wrap or humidity dome – Keeps moisture in until seeds germinate (a clear plastic bag works in a pinch!).
- ● Grow lights or sunny windowsill – Seedlings need 12–16 hours of light daily. A LED grow light (or a south-facing window) is ideal.
- ○ Fertilizer (optional but helpful) – A balanced, water-soluble fertilizer (like 5-5-5 or fish emulsion) at half-strength for young seedlings.
- ● Tweezers or pencil – For gently placing tiny seeds into the soil.
- ○ Heating mat (optional) – Speeds up germination (aim for 70–75°F if your home runs cool).
- ● Labels & marker – Track varieties (especially if testing multiple types!).
- ● Fertilizer spray (foliar feed) – Boosts seedling health as they grow.
Step-by-step instructions for planting tomato seeds from tomatoes
Here's how I turn grocery-store tomatoes into thriving plants—no fancy supplies needed.
🌱 Step 1: Extract and Dry the Seeds
Cut open a ripe tomato and scoop out the gel-like seeds along with their surrounding pulp. Place the seed mixture in a small bowl and add just enough water to cover it completely. Stir gently, then let it sit at room temperature for 3-5 days. The seeds will sink to the bottom while the fermenting pulp rises and smells faintly sweet—this removes the natural coating that slows germination.
After fermentation, pour the mixture through a fine-mesh strainer to separate seeds from pulp. Rinse the seeds thoroughly with water, then spread them in a single layer on a paper towel or coffee filter. Place this setup in a warm, dry spot away from direct sunlight. The seeds will dry completely in 5-7 days—they're ready when they look wrinkled and hard to the touch.
💧 Step 2: Prepare Containers and Planting Mix
Use small containers like 2-3 inch pots or even egg cartons with drainage holes punched in the bottom. Fill them with a sterile seed-starting mix—never garden soil, as it's too dense and may harbor diseases. I like to mix mine with 20% perlite to improve drainage. Moisten the mix until it holds together when squeezed but doesn't drip water.
Press the soil down lightly so the surface is firm but not packed. You want air pockets gone but the mix loose enough for tender roots to push through. Tap the container on the table once or twice to settle everything evenly. This ensures the seeds won't float to the surface when watered.
🌱 Step 3: Plant the Seeds at the Right Depth
Plant 2-3 seeds per container at a depth of about ¼ inch—roughly the diameter of the seed itself. Sowing too deep delays germination because the seedling exhausts its energy before reaching light. Cover lightly with a sprinkle of additional mix, then mist the surface gently with a spray bottle until evenly moist. A heavy watering can will dislodge the seeds and bury them too deep.
I label each pot with the tomato variety and date—after a week of watching identical green sprouts, you'll forget which is which. Place the containers in a warm spot (75-85°F) for germination. A seedling heat mat keeps the soil 10°F warmer than ambient and dramatically improves germination speed. Expect sprouts in 5-10 days—don't rush it by overwatering.
☀️ Step 4: Provide Light and Care for Seedlings
The instant seedlings break through the soil, they need 14-16 hours of light daily. A south-facing window rarely provides enough intensity, so I use a full-spectrum LED grow light positioned 2-4 inches above the plants. Raise it as they grow to maintain that gap. Without sufficient light, seedlings stretch desperately upward (called "leggy") and never recover proper strength.
You'll see strong seedlings have thick stems, deep green color, and compact spacing between leaves. Water from the bottom by placing the pots in a shallow tray of water for 10-15 minutes—this prevents damping-off disease that collapses stems overnight. Keep the soil surface dry to discourage fungal growth.
⏰ Step 5: Thin and Harden Off Before Transplanting
Once seedlings show 2-3 true leaves (the first set of leaves after the initial cotyledons), thin to the strongest plant per container. Use scissors to snip the weaker stems at soil level—this prevents disturbing the roots of the remaining plant. After thinning, wait 7-10 days before transplanting to give the seedlings time to recover.
Two weeks before your last frost date, start hardening off the seedlings by placing them outside in a sheltered, shaded spot for 1-2 hours the first day. Gradually increase outdoor time by 1 hour daily over 10-14 days, slowly introducing more sun and wind. This prepares them for the garden and prevents transplant shock. Once seedlings tolerate a full day outside without wilting, they're ready for the garden.
Tips & tricks for perfect tomato seedlings
Here's what I wish I knew when I first grew tomato plants from grocery-store seeds.
Fermentation Matters: During the 3-5 day fermentation step in Step 1, you'll notice a sweet smell as the pulp breaks down. This isn't just about removing the seed coating—it also helps eliminate potential pathogens. If you're impatient, you can speed this up slightly by placing the bowl in a warm spot (around 75°F), but don't exceed 5 days or you risk weakening the seeds. The seeds are ready when they sink to the bottom and the pulp smells pleasantly sweet, not sour or putrid.
Seedling Heat Hack: The instructions mention using a heat mat to keep soil 10°F warmer than ambient during germination. I've found that placing containers on top of a refrigerator (not inside) works just as well—it creates that warm environment without needing special equipment. This is especially helpful if your home stays cool at night, as tomato seeds need consistent warmth to germinate reliably.
Lighting Troubleshooting: When your seedlings first emerge, you might notice them stretching toward the light (called "leggy" growth). This happens when they don't get enough 14-16 hours of light daily as specified. To fix this, move your grow light closer (2 inches instead of 4 inches) for a few days while they recover. Strong seedlings should have thick stems and dark green leaves—if yours look pale and spindly, they need more intense light immediately.
Hardening Off Strategy: During the 10-14 day hardening off period in Step 5, I recommend starting with just 30 minutes outside on the first day rather than the full 1-2 hours. This gives seedlings time to adjust gradually. Watch for signs of stress like wilting or yellowing leaves—if you see these, bring them back inside and extend the outdoor time more slowly. The goal is to prepare them for outdoor conditions without shocking their systems.
Pro Tips for Planting Tomato Seeds From Tomatoes
- Here's what I wish I knew when I first grew tomato plants from grocery-store seeds.
- Fermentation Matters: During the 3-5 day fermentation step in Step 1, you'll notice a sweet smell as the pulp breaks ...
- Seedling Heat Hack: The instructions mention using a heat mat to keep soil 10°F warmer than ambient during germinatio...
Frequently asked questions
Got questions about growing tomatoes from seeds? We’ve got answers! Here are some of the most common queries—plus expert tips to help you succeed.
Can I save seeds from store-bought tomatoes?
It depends! Hybrid tomatoes (like most grocery-store varieties) may not produce true-to-type seeds. Opt for heirloom or organic tomatoes labeled "open-pollinated" for reliable, homegrown results. If unsure, try it anyway—worst case, you’ll get a fun surprise!
How long does it take for tomato seeds to germinate?
Germination usually takes 5–14 days at 70–85°F (21–29°C). Keep soil moist but not soggy, and place seeds in a warm, sunny spot (or use a heat mat). Patience is key—some varieties are slower starters!
Do I need to scarify or stratify tomato seeds?
Nope! Tomato seeds don’t require scarification (scratching) or stratification (cold treatment). Just rinse them, dry, and plant—nature handles the rest. For faster sprouting, soak seeds in warm water for 24 hours before planting.
What if my tomato seeds don’t sprout?
Don’t panic! Try these fixes:
- Check moisture: Keep soil damp (not waterlogged).
- Adjust temperature: Move to a warmer spot (or use a seedling heat mat).
- Test viability: Cut open a seed—if it’s hard and white inside, it’s likely good.
- Try again: Some seeds need light to germinate; press them lightly into soil instead of burying.
Can I grow tomatoes from seeds indoors year-round?
Yes! Use grow lights (14–16 hours/day) and maintain warm temps (65–75°F/18–24°C). Just remember: Tomatoes need long daylight hours to thrive. Start seeds 6–8 weeks before your last frost date for outdoor planting.
Pro Tip:
Label your seeds! Tomato varieties can look alike, and saving seeds from different plants might lead to unexpected hybrids. A simple popsicle stick with the name works perfectly.
Wrapping up and next steps
Growing tomatoes from seed is a rewarding journey that connects you to the roots—literally!—of your garden’s future harvest. With just a ripe tomato, a little patience, and the right care, you’ll soon be enjoying homegrown, heirloom-quality tomatoes in as little as six weeks.
Whether you’re a beginner or a seasoned gardener, this method is a fantastic way to save money, experiment with unique varieties, and savor the taste of truly fresh produce.
Now that you’re armed with the know-how, take the next step: pick a sunny spot in your garden or balcony, grab those saved seeds, and start planting! 🌱 Before you know it, you’ll be harvesting tomatoes that are sweeter, juicier, and packed with pride. Happy growing!