
Planting
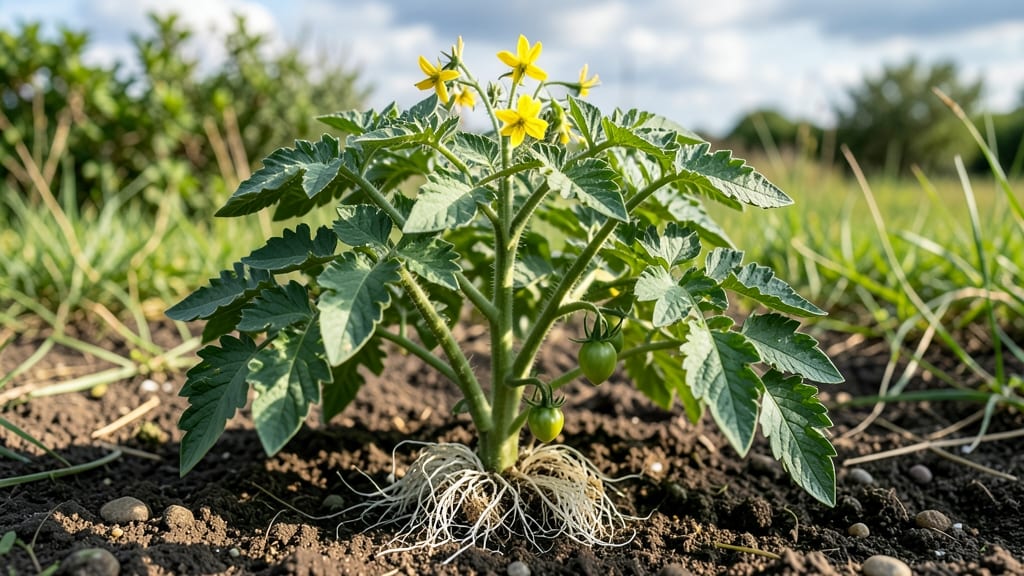
Tomato plant roots are the hidden powerhouse behind every juicy vine and heavy fruit. 🌱 I’ve watched my own plants transform from spindly seedlings to sturdy producers—and it all starts underground.
Those fibrous roots don’t just anchor the plant; they’re the reason your tomatoes taste sweeter and ripen faster than store-bought varieties.
The ideal root system thrives in loose, well-draining soil with plenty of organic matter. Too much clay or compacted dirt? Roots suffocate, and your plants struggle.
I learned this the hard way when my first garden produced tiny, bland tomatoes—until I amended the soil with compost. The difference was night and day.
With proper care, you’ll see roots spreading 12-18 inches deep and 24+ inches wide by midsummer. That’s what turns a decent harvest into a bountiful one. Prune wisely, water deeply, and avoid over-fertilizing—roots need space to breathe as much as nutrients to grow.
Even experienced gardeners make mistakes here—like over-pruning roots or ignoring soil health. But once you understand how these roots work, you’ll grow tomatoes that outperform anything from a nursery. Let’s dig into the details that make the difference.
📚 In This Guide
- What you need
- Instructions
- Tips and common mistakes
- Wrapping up and next steps
What you need
- ● Tomato Seeds or Seedlings: Choose disease-resistant varieties like Early Girl or Roma. For seeds, you’ll need 2–4 per pot (plant extra in case of failure). For seedlings, 1–2 healthy plants per container.
- ● Growing Containers or Garden Bed: Containers: At least 5-gallon pots (18" deep) for dwarf varieties, 7+ gallons (24" deep) for indeterminate types. Use fabric pots or plastic with drainage holes.
- ● Garden Bed: Ensure 12–18" deep soil with loose, well-draining texture. Avoid compacted or rocky soil.
- ● High-Quality Potting Mix: 1–2 bags (2–3 cubic feet each) of organic, peat-free mix (e.g., Miracle-Gro Organic Potting Soil or FoxFarm Ocean Forest). Avoid garden soil—it compacts too easily!
- ● Fertilizer: Balanced Starter Fertilizer: 5–10–10 NPK ratio (e.g., Jack’s Classic) for seedlings.
- ● Slow-Release Granules: 1 cup per container (e.g., Osmocote Smart-Release) for ongoing root nourishment.
- ● Drainage Medium: ½ inch of perlite or pumice per container to prevent root rot.
- ● Hand Trowel or Transplant Spade – For digging and aerating soil.
- ● Watering Can or Hose with Adjustable Nozzle – 1–2 gallons capacity for deep watering.
- ○ pH Test Kit – Optional but helpful! Aim for 6.0–6.8 pH for optimal root health.
- ○ Root Stimulator (Optional) – Seaweed extract or Mycorrhizal fungi to boost root growth.
- ● Garden Gloves – Protect your hands from thorns and soil.
- ● Sunlight: 6–8+ hours of direct sun daily. Roots need warmth to thrive!
- ● Temperature: Ideal soil temp: 70–85°F. Use a seedling heat mat if starting indoors.
- ● Water Access: Consistent moisture (but not soggy). Drip irrigation or self-watering pots help maintain even moisture.
- ● Space: 18–24" apart for determinate tomatoes, 24–36" apart for indeterminate varieties.
How to cultivate healthy tomato plant roots for maximum yield
Strong roots are the secret weapon behind your tomato plant's ability to support heavy fruit loads.
🌱 Step 1: Prepare the Soil for Optimal Root Development
Tomatoes thrive in loose, well-draining soil that encourages deep root penetration. Work in 2-3 inches of compost into the top 12 inches of native soil to create a nutrient-rich zone. I like to mix in a handful of pelletized mycorrhizal fungi—this beneficial soil organism forms symbiotic relationships with roots, dramatically increasing water and nutrient uptake.
Break up any compacted layers with a broadfork or tiller to create channels for roots to grow downward. The goal is a soil profile that feels like a moist sponge rather than dense clay. Test your work by pressing your finger into the soil—it should give slightly but not crumble apart completely.
☀️ Step 2: Plant at the Correct Depth for Strong Root Systems
When transplanting, bury the stem up to the first 4-6 leaves—this isn't burying the plant, it's encouraging new root growth along the buried stem. I always make a small trench around the base of the plant and gently pack soil into it. This technique, called "hill planting," creates an instant root system that can support the plant's needs.
Space plants 18-24 inches apart in rows 36 inches apart to allow roots to spread without competition. The extra space also improves air circulation, reducing the risk of soil-borne diseases that can weaken roots. Water deeply after planting to settle the soil around the buried stem and encourage immediate root contact with moist soil.
💧 Step 3: Maintain Consistent Moisture for Deep Root Growth
Deep roots develop when plants experience consistent moisture rather than frequent shallow watering. I aim for 1-1.5 inches of water per week, delivered either through rainfall or irrigation. The key is to water deeply 2-3 times per week rather than daily shallow watering, which encourages roots to stay near the surface.
Check soil moisture by pushing your finger 2-3 inches deep—if it feels dry, it's time to water. For container-grown tomatoes, let the top 1-2 inches of soil dry out between waterings. Mulch with 2-3 inches of straw or shredded leaves to retain moisture and prevent soil temperature fluctuations that can stress roots.
✂️ Step 4: Prune Strategically to Improve Root Health
Regular pruning removes competing growth that diverts energy from root development. I remove suckers (the small shoots that form in the leaf axils) when they're no larger than a pencil, using clean pruners to avoid damaging the main stem. This redirection of energy allows the plant to focus on establishing a robust root system.
For indeterminate varieties, I also prune lower leaves that touch the soil to improve airflow and reduce disease pressure. Limit pruning to 20-30% of the foliage—over-pruning stresses the plant and can actually reduce root growth. Always prune in the morning when plants have had time to recover from nighttime cooling.
🌿 Step 5: Monitor and Protect Roots Throughout the Season
Healthy roots have a white, fibrous appearance when exposed. If you notice roots that are black, mushy, or smell foul, you're dealing with disease or rot. I prevent this by avoiding overhead watering after transplanting and maintaining proper spacing for airflow. For container-grown tomatoes, I check drainage holes regularly to ensure they remain clear.
As the season progresses, I add 2-3 inches of compost around the base of the plant in early summer to feed the expanding root system. This mid-season feeding prevents nutrient deficiencies that can stunt root growth. Watch for signs of stress like yellowing leaves or stunted growth—they often indicate root problems before you see visible damage.
Tips & tricks for cultivating strong tomato roots
Here's what nobody tells you about giving your tomato plants the root support they deserve.
Soil Texture Matters: After amending your top 12 inches with compost, I recommend adding a handful of coarse sand or perlite to the mix—this creates tiny air pockets that roots absolutely crave. The goal is soil that holds moisture like a sponge but doesn't suffocate roots. Think "moist crumbly" rather than "packed dirt." For container plants, mix in 20% perlite by volume to prevent compaction.
Planting Depth Secret: When you bury those first 4-6 leaves, make sure the soil around the stem is gently packed—not tamped down like concrete. Create a small well around the base to catch water during irrigation. This simple adjustment can double your root mass because it encourages roots to grow outward from the buried stem rather than just downward.
Watering Strategy: The 2-3 times per week guideline works best when you deliver that 1-1.5 inches of water all at once rather than splitting it. Use a rain gauge or tuna can to measure—this ensures you're actually meeting the moisture requirement. For containers, water until it runs freely from drainage holes, then let it dry slightly before the next watering to prevent root rot.
Pruning Timing: I've found that morning pruning (between 8-10am) gives plants the full day to recover from any stress. Never prune when leaves are wet—this creates perfect conditions for fungal infections. And here's a pro tip: always sterilize your pruners with rubbing alcohol between cuts to prevent spreading disease through the plant's open wounds.
Pro Tips for Tomato Plant Roots
- Here's what nobody tells you about giving your tomato plants the root support they deserve.
- Soil Texture Matters: After amending your top 12 inches with compost, I recommend adding a handful of coarse sand or ...
- Planting Depth Secret: When you bury those first 4-6 leaves, make sure the soil around the stem is gently packed—not ...
Frequently asked questions
Got questions about nurturing those essential tomato plant roots? You’re not alone! Here are some of the most common queries—plus straightforward answers to keep your plants thriving.
How deep should tomato roots grow for a healthy harvest?
Tomato roots typically grow 18–24 inches deep (or deeper in loose soil), but they spread 2–3 feet wide. To encourage deep roots, avoid over-watering at the surface—let the top inch dry out slightly. This pushes roots downward for better stability and nutrient access. Pro tip: Planting in raised beds or deep containers helps!
When is the best time to transplant tomato seedlings to avoid root damage?
Transplant seedlings after the last frost when soil temps hit 60°F+. Do it in the early morning or evening to reduce stress. Water deeply 1–2 days before moving plants, and handle roots gently—never pull by the stem. A root stimulator (like mycorrhizal fungi) can speed recovery.
Why are my tomato plant roots rotting? How can I fix it?
Root rot (often from overwatering or poor drainage) turns roots mushy and black. Stop watering immediately and improve drainage by:
- Amending soil with compost or perlite.
- Ensuring containers have drainage holes.
- Using fungicide (copper-based) if needed.
Can I grow tomatoes in containers? What’s the ideal root space?
Yes! Containers work great—just ensure they’re at least 12–18 inches deep (deeper for indeterminate varieties). Use a well-draining potting mix with added compost. Roots need room to spread, so avoid tiny pots. Dwarf or bush varieties thrive in 5-gallon containers, while vining types need 10+ gallons.
What’s a natural way to boost tomato root growth without chemicals?
Try these organic root boosters:
- Compost tea: Rich in microbes that strengthen roots.
- Fish emulsion: Adds nitrogen for leafy growth (and roots!).
- Crushed eggshells: Provide calcium to prevent blossom-end rot.
- Mycorrhizal fungi: Forms a symbiotic bond with roots for better nutrient uptake.
Wrapping up and next steps
Healthy tomato plant roots are the backbone of a thriving garden—strong, deep, and full of potential! By understanding their needs, from proper soil prep to smart watering, you’ve unlocked the secret to bountiful harvests. 🌱✨
Now’s your chance to put that knowledge into action! Start by selecting a sunny spot, enriching your soil, and giving those roots the love they deserve. Ready to grow? Grab your gloves, dig in, and watch your tomato plants flourish—one root at a time.