
Vegetables
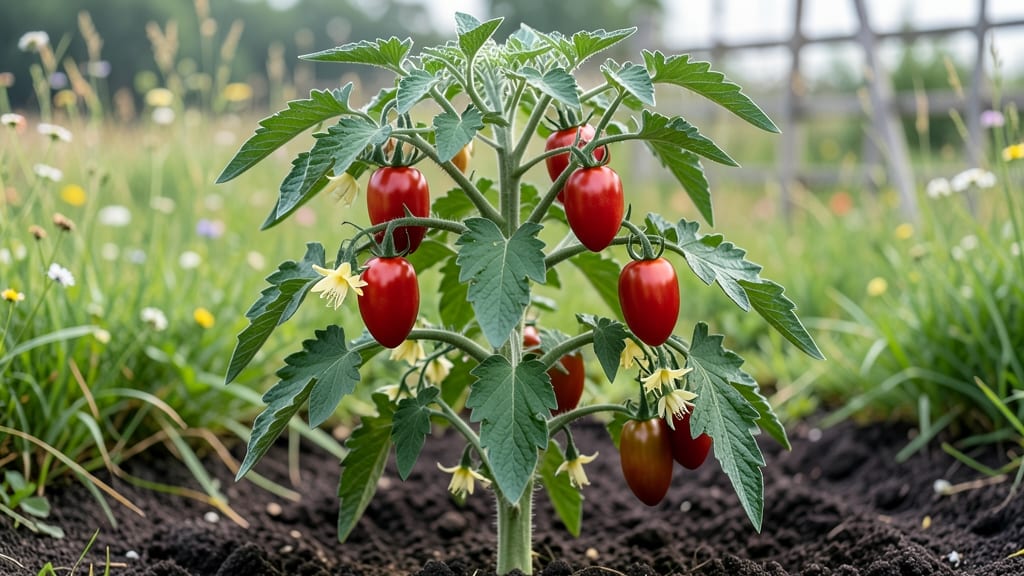
Growing Roma plum tomatoes delivers 60 days of sun-ripened sweetness that store-bought varieties can’t match. 🌞 I’ve grown them for years, and the key is mimicking their Mediterranean roots—warm soil, consistent moisture, and full sun exposure.
These tomatoes aren’t just for sauces; their rich, meaty texture makes them perfect for slicing too.
The secret starts with well-draining soil (amend with compost) and sturdy cages—Roma plants grow tall but need support to avoid sprawling. Plant seeds indoors 6-8 weeks before last frost, then transplant after soil warms to 60°F.
In containers, use 5-gallon pots for each plant, ensuring drainage holes prevent root rot.
Once established, water at the base (not overhead) to keep fruit from cracking, and prune suckers regularly to focus energy on fruit production. Watch for early blight (remove infected leaves immediately) and hornworms (handpick or use BT spray). With proper care, you’ll harvest glossy, 2-inch fruits by mid-summer.
For storage, keep tomatoes at room temperature until fully ripe—never refrigerate. Roma plum tomatoes thrive in zones 4-11 and can even overwinter in mild climates. Whether in-ground or containers, this variety rewards patience with bold flavor and versatility in the kitchen.
📚 In This Guide
- What you need
- Instructions
- Tips and common mistakes
- Wrapping up and next steps
What you need
- ● Roma Plum tomato seeds or seedlings: 3–5 plants (check seed packets for heirloom or hybrid varieties).
- ● High-quality potting mix: 10–15 lbs (4.5–7 kg) of well-draining, organic soil (avoid garden soil—it’s too dense!).
- ● Containers or garden bed: Containers: 5-gallon pots or larger (1 per plant; Roma Plums need space!).
- ● Garden bed: Full sun (6+ hours/day) + fertile, loose soil (amend with compost if needed).
- ● Fertilizer: Balanced organic fertilizer (e.g., 10-10-10) or compost tea for a nutrient boost.
- ● Support system: Cages (5–6 ft tall) or stakes (6 ft long) to keep vines upright.
- ● Hand trowel or small shovel for planting.
- ● Watering can or hose with a gentle spray nozzle (Roma Plums dislike soggy roots!).
- ● Pruning shears (to trim suckers and encourage fruit production).
- ○ Mulch (optional but recommended): Straw or shredded leaves to retain moisture.
- ○ Plant markers (optional):** Label seeds/seedlings to track progress!
- ● Start seeds indoors 6–8 weeks before last frost (or buy sturdy seedlings).
- ● Transplant after soil warms to 60°F+ (15°C+)—cold kills Roma Plums!
- ● Hardiness: Thrives in USDA Zones 4–11 (adjust for short seasons with containers).
Step-by-Step guide to growing Roma plum tomatoes
Here’s how to cultivate these flavor-packed tomatoes from seed to harvest in just 60 days.
🌱 Step 1: Start Seeds Indoors 6-8 Weeks Before Last Frost
Roma plum tomatoes thrive when started indoors early. Fill biodegradable seedling pots (2-3 inches deep) with sterile seed-starting mix—never garden soil, as it compacts and harbors disease. Moisten the mix until it’s damp but not soggy, then press it down lightly to eliminate air pockets. Plant 2-3 seeds per pot at a depth of ¼ inch, just below the soil surface.
Cover the pots with a clear plastic dome or wrap to retain moisture and warmth, which speeds germination. Place them in a warm spot (75-85°F)—a seedling heat mat works wonders if your home runs cooler. You’ll see sprouts in 5-10 days, but avoid disturbing them until all seeds have germinated. Once 50% of seedlings emerge, remove the dome immediately to prevent damping-off, a fungal disease that collapses young stems overnight.
☀️ Step 2: Provide 14-16 Hours of Light Daily
Roma plum tomatoes need bright, direct light from day one to prevent leggy growth. A south-facing window rarely provides enough intensity, so supplement with a full-spectrum LED grow light positioned 2-4 inches above the seedlings. Raise the light as plants grow to maintain that gap—leggy seedlings with pale stems mean the light is too far away.
Rotate pots a quarter turn daily so seedlings grow straight instead of leaning toward the light. You’ll know you’ve got it right when stems are thick and sturdy, with leaves spaced 1-2 inches apart. Avoid overwatering now; let the top inch of soil dry between waterings to prevent root rot.
🪴 Step 3: Harden Off and Transplant After Last Frost
Two weeks before your last frost date, begin hardening off seedlings by placing them outside in a sheltered, shaded spot for 1-2 hours the first day. Gradually increase outdoor time by 1 hour daily over 10-14 days, slowly introducing more sun and wind. This prepares them for the garden without shock.
Transplant after the soil warms to at least 60°F and all frost risk has passed. Bury seedlings deeper than the pot—Roma plums respond well to being planted up to their first true leaves, which encourages stronger root systems. Space plants 18-24 inches apart in rows 3 feet apart to allow airflow and prevent disease.
✂️ Step 4: Prune and Support for Maximum Yield
Roma plum tomatoes benefit from pruning and staking. Remove suckers (the small shoots that form in the leaf axils) regularly to direct energy into fruit production. Use strong bamboo stakes or cages to support the plants, tying the main stem loosely with soft plant ties every 6-8 inches as it grows.
Pinch off flowers on the first 6-8 inches of the plant to encourage bushier growth. Once the plant reaches 3-4 feet tall, allow it to flower and fruit freely. Water at the base (not overhead) to keep leaves dry and prevent fungal diseases like early blight. Mulch with 2-3 inches of straw or shredded leaves to retain moisture and regulate soil temperature.
🍅 Step 5: Harvest at Peak Ripeness for Best Flavor
Roma plum tomatoes ripen in 60-70 days from transplant, but harvest time depends on your climate. In warm regions, they’ll ripen fully on the vine, turning deep red and slightly soft to the touch. In cooler areas, pick them when they’re pale green and firm and finish ripening indoors at room temperature.
Harvest by gently twisting the fruit from the stem—don’t pull, or you’ll damage the plant. You’ll know they’re ready when they yield slightly when pressed and smell sweetly fruity. Store ripe tomatoes at 55-60°F in a single layer (never refrigerate—it ruins flavor). Use them fresh in sauces, salads, or sun-dried for year-round enjoyment.
Tips & tricks for perfect Roma plum tomatoes
Here's what nobody tells you about growing these sun-kissed gems from seed to harvest.
Germination Secrets: The 75-85°F temperature range for germination is non-negotiable—any cooler and you'll wait forever. I learned this the hard way after watching seeds sit for 14 days without sprouting. Use a seedling heat mat if your home runs cooler than 70°F, and keep the soil consistently moist but never soggy during this critical phase. A spray bottle works best for gentle watering without disturbing the seeds.
Lighting Strategy: Those 14-16 hours of daily light aren't just about quantity—they're about quality. I recommend a full-spectrum LED grow light on a timer rather than relying on natural light. Position it 2-4 inches above the seedlings and adjust as they grow. Watch for leggy stems with pale green leaves—this is your plant's SOS signal that it needs more light or needs to be moved closer.
Transplanting Technique: Burying seedlings deeper than their pots might seem counterintuitive, but Roma plum tomatoes actually develop stronger root systems when planted this way. Aim to cover up to the first true leaves. After transplanting, water deeply to help settle the soil around the roots. The 60°F soil temperature requirement is crucial—colder soil can shock the plants and delay establishment.
Pruning Precision: When removing suckers in Step 4, be surgical with your fingers or pruners—don't tear the stems. The goal is to redirect the plant's energy toward fruit production rather than foliage growth. I recommend checking for suckers every 7-10 days once the plant reaches 18 inches tall. These small shoots form in the leaf axils and can quickly become a drain on your plant's resources if left unchecked.
Pro Tips for Tomato Roma Plum
- Here's what nobody tells you about growing these sun-kissed gems from seed to harvest.
- Germination Secrets: The 75-85°F temperature range for germination is non-negotiable—any cooler and you'll wait forev...
- Lighting Strategy: Those 14-16 hours of daily light aren't just about quantity—they're about quality. I recommend a f...
Frequently asked questions
Got questions about growing or using Roma plum tomatoes? You’re not alone! Here are some of the most common queries—and their answers—to help you grow (and enjoy) these sun-kissed gems like a pro.
How long does it take for Roma plum tomatoes to mature?
Roma plum tomatoes typically mature in 60–70 days from transplanting, depending on your climate and growing conditions. If you start seeds indoors, add another 6–8 weeks to that timeline. Patience pays off—these beauties are worth the wait!
Why are my Roma plum tomatoes cracking?
Cracking is common in fast-growing varieties like Roma plums, especially during uneven watering or heavy rain after dry spells. To prevent it, keep soil consistently moist (but not soggy) and mulch to stabilize moisture levels. Harvest promptly when ripe to minimize stress!
Can I grow Roma plum tomatoes in containers?
Roma plums thrive in 5-gallon containers or larger with proper drainage. Use a high-quality potting mix, stake or cage the plants for support, and ensure they get 6–8 hours of sunlight daily. Just avoid overcrowding—these plants love space to stretch!
Are Roma plum tomatoes good for sauces, or should I use another variety?
Roma plums are perfect for sauces! Their thick flesh and low water content mean fewer seeds and a richer, meatier texture. For even more intensity, pair them with San Marzano tomatoes. Pro tip: Remove the cores before blending for ultra-smooth results!
How do I store Roma plum tomatoes to keep them fresh?
Store unripe Roma plums at room temperature (like other tomatoes) to ripen naturally. Once ripe, refrigerate them in a paper bag (not plastic) for up to a week. For long-term storage, freeze them whole or as sauce—just peel and crush before freezing!
Wrapping up and next steps
The Roma plum tomato isn’t just a garden gem—it’s a versatile, fast-growing powerhouse that rewards patience with bursting sweetness and bold flavor in just 60 days!
Whether you’re a seasoned gardener or a curious beginner, this variety proves that growing your own food can be simple, satisfying, and delicious. 🌱
Ready to dive in? Start by gathering your supplies, then plant those seeds and watch your garden transform into a sun-drenched tomato paradise. Your next homegrown meal—or sauce—is just 60 days away! 🍅✨