
Planting
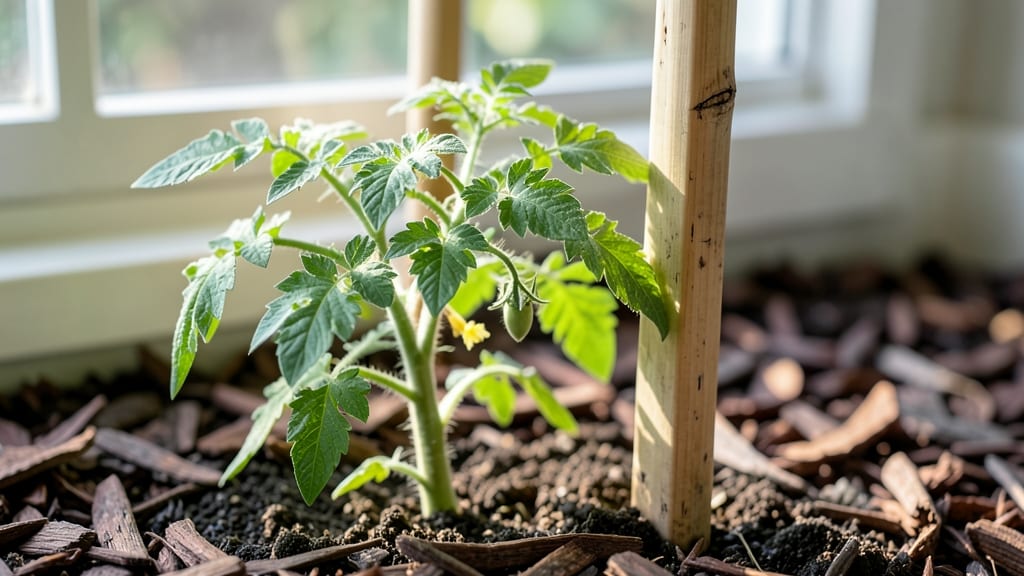
Your 4-month-old tomato plant 🍅 is now in its prime—this is where smart care makes all the difference between a handful of tomatoes and a bountiful harvest.
Picture this: You’ve nurtured your plant through seedlings and early growth, but now it’s time to step up your game. At this stage, pruning, staking, and feeding aren’t just optional—they’re the key to preventing disease, boosting fruit production, and keeping your vine from toppling over.
Without the right support, your plant could waste energy on weak stems instead of setting fruit. And if you’ve ever watched a tomato plant sprawl uncontrolled, you know how quickly it turns from a thriving vine into a tangled mess.
In this guide, I’ll walk you through pruning techniques to maximize airflow, the best staking methods for your plant’s size, and how to fertilize without overdoing it—so you can enjoy a strong, productive tomato plant all season long.
How to prune a 4-Month-old tomato plant for maximum yield
Your 4-month-old tomato plant has reached a pivotal stage where proper pruning techniques can dramatically boost fruit production. At this age, your plant should have developed several main stems and early flower clusters.
The key is to remove suckers while preserving the plant's energy for fruit development rather than excessive foliage. Pruning also improves air circulation, reducing disease risks and helping your tomatoes ripen faster.
Before you begin, gather your tools: sharp pruning shears, sterilized scissors, and a small notebook to track your pruning progress. Work on a dry morning when the plant is hydrated but not wet from dew.
Remember, indeterminate varieties (like Cherry or Beefsteak) need more aggressive pruning than determinate varieties (like Roma or Bush Early Girl). Let's get started with a clear, step-by-step approach.
Locate your tomato plant's central leader—the thickest, most dominant stem growing upward. This is your plant's backbone and should never be pruned.
Look for suckers—small shoots growing in the leaf axils (where leaves meet the stem). These appear as tiny offshoots between the main stem and branches. Suckers below the first flower cluster should be removed first.
Use your sterilized shears to snip suckers 1/4 inch above the leaf axil. Avoid leaving stubs, which can attract pests. For indeterminate varieties, keep 1-2 strong suckers below each fruit cluster to encourage branching.
Remove any yellow or diseased leaves from the bottom of the plant. Trim back any overly dense foliage to improve air circulation. Aim to leave 3-4 main stems for indeterminate varieties, spaced evenly around the plant.
For indeterminate tomatoes, remove every other flower cluster on the main stem to prevent overloading. This ensures larger, healthier fruit. For determinate varieties, leave all flowers but prune suckers aggressively to redirect energy to fruit production.
After pruning, sterilize your tools with rubbing alcohol or a 10% bleach solution to prevent spreading disease. Store tools in a dry place until your next pruning session, which should occur every 1-2 weeks during peak growth.
Timing is everything when it comes to pruning your 4-month-old tomato plant. Avoid pruning during hot afternoons or rainy days, as this can stress the plant. Instead, choose cool mornings when humidity is low.
If you notice new suckers forming within a week, repeat the process—consistency is key to maintaining a well-shaped tomato plant.
One common mistake is over-pruning your tomato plant, which can reduce its ability to photosynthesize and produce fruit. Never remove more than 20-30% of the foliage at once. Another error is pruning too late in the season, which can delay fruit ripening.
Stop pruning 6-8 weeks before your first frost to allow remaining energy to focus on ripening existing fruit.
For indeterminate varieties, consider using the "open vase" method, where you remove all suckers except those growing directly below a fruit cluster. This creates a balanced canopy that maximizes sunlight exposure and air flow.
If you're growing determinate tomatoes, focus on removing suckers entirely and keeping the plant bushy to support heavy fruit loads.
After pruning, give your tomato plant a light fertilizer application to help it recover. Use a balanced 10-10-10 fertilizer or a compost tea to provide essential nutrients without overwhelming the plant. Water deeply at the base to help the roots absorb nutrients efficiently.
Within a few days, you should see new growth emerging from the pruned areas, signaling that your plant is thriving.
Monitor your pruned tomato plant closely for signs of stress or disease. If you notice yellowing leaves, it may indicate over-pruning or nutrient deficiency. Adjust your approach by reducing future pruning or adding a foliar feed.
If you see dark spots or mold, increase air circulation by trimming back additional foliage and applying a copper fungicide
Best staking methods for stronger tomato plant support at 4 months
At 4 months old, your tomato plant is entering its most vigorous growth phase, especially if it's an indeterminate variety. Without proper support, those heavy vines and fruit can snap under their own weight.
The key is choosing the right staking method now to prevent damage and encourage upward growth. I've tested all three major options—cages, trellises, and stakes—and each has distinct advantages depending on your variety and space.
Determinate tomatoes (like Roma or Celebrity) grow in compact bushes, while indeterminate types (such as Sungold or Brandywine) can reach 6-10 feet without support. Your plant's growth habit determines which staking system will work best.
For example, cages are ideal for determinate varieties, while trellises or individual stakes suit indeterminate climbers better. Let's break down the options so you can make an informed choice.
Install staking support within 1-2 weeks of transplanting your 4-month-old plant to prevent root disturbance later. If you're retrofitting support now, gently tie the main stem to the structure using soft plant ties or old t-shirts. Never use wire or anything that can cut into the stem—this can restrict growth and invite pests. The goal is to guide the plant upward while allowing natural flexibility.
| Support Type | Best For | Pros | Cons | DIY Option |
|---|---|---|---|---|
| Tomato Cages | Determinate varieties, small spaces | Easy to install, contains sprawl, no tying needed | Can restrict airflow, hard to clean, may need reinforcement | Weld wire mesh into 5-ft cages |
| Trellis System | Indeterminate varieties, vertical gardens | Maximizes space, improves airflow, easy to prune | Requires more space, needs frequent tying | Use bamboo poles + twine or PVC pipes |
| Individual Stakes | Both types, large plants, windy areas | Strongest support, easy to monitor, reusable | Takes up space, requires tying, less containment | Bamboo stakes or wooden dowels (6-8 ft tall) |
For indeterminate varieties, I recommend a trellis system or individual stakes because these plants keep growing all season. A simple DIY trellis can be made with bamboo poles (6-8 feet tall) tied together at the top with twine, creating a teepee shape.
This allows the plant to climb naturally while improving air circulation around the foliage. If you're short on space, vertical trellises against a fence work beautifully too.
If you're growing determinate tomatoes, a tomato cage is your best bet for low-maintenance support. Look for cages that are at least 5 feet tall to accommodate the plant's mature height.
For a budget-friendly DIY option, cut welded wire mesh into 5-foot squares and bend the top into a cone shape. This creates a sturdy, reusable cage that won't collapse under the weight of fruit. Just be sure to leave enough space between cages for airflow.
Regardless of the method you choose, tie the plant every 6-10 inches as it grows to prevent stem damage. Use soft materials like old t-shirts, strips of fabric, or commercial plant ties—avoid anything that can girdle the stem.
At this stage, your plant is putting energy into both vegetative growth and fruit production, so proper support ensures it doesn't waste energy trying to stay upright. With the right staking, you'll see stronger stems, better fruit development, and fewer broken branches.