
Companion Plants
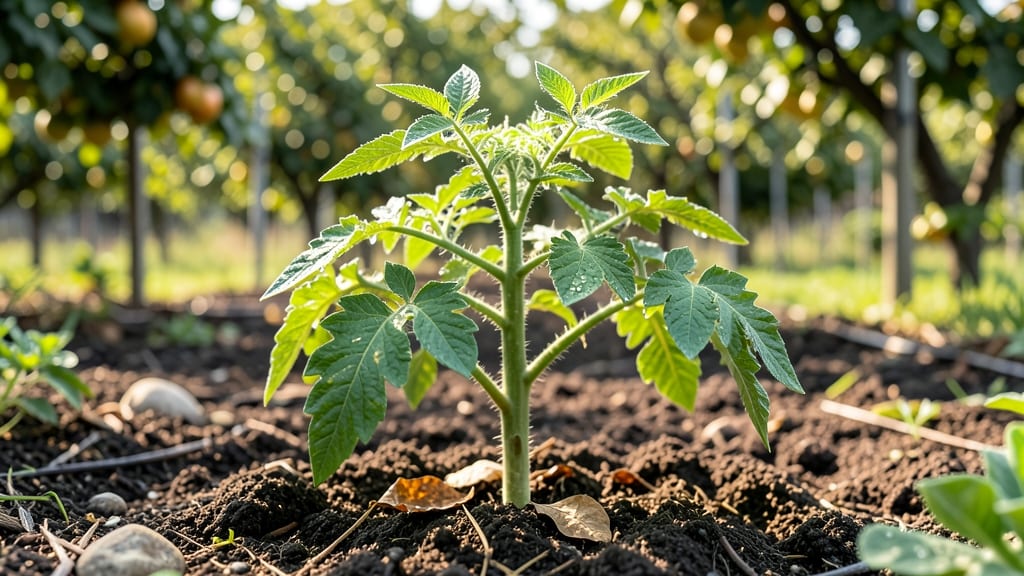
Your six-week-old tomato plants are about to reach their growth explosion—if you prune and stake them right now. ✂️ I’ve seen seedlings go from scraggly to 6-foot vines in just two months when given the right support, and the secret starts with these early steps that most gardeners miss.
The first rule? Transplant outdoors only after nighttime temps stay above 55°F—cold snaps stunt growth permanently. Indoors, move them to a south-facing window or under a grow light for 12-14 hours daily, or they’ll stretch leggy and weak.
Water at the soil level (not overhead) to prevent fungal diseases that thrive in damp foliage. Pruning now shapes future harvests: pinch off the first few sets of leaves below the first flower cluster to redirect energy to fruit production.
Use soft ties (old T-shirts work) to stake them—tightening too soon will girdle stems as they grow. The payoff? Heavier, disease-resistant vines that support more tomatoes without snapping. This works for both determinate (bush) and indeterminate (vining) varieties, though indeterminates need sturdier stakes.
Skip the plastic cages if you want vertical space efficiency—trellises let you grow twice as many plants in the same footprint. Let’s get those plants standing tall!
📚 In This Guide
- What you need
- Instructions
- Tips and common mistakes
- Wrapping up and next steps
What you need
- ● Pruning shears: Bypass pruners (sharp, clean, and sanitized with rubbing alcohol to prevent disease).
- ● Stakes or cages: Option 1: 6–8 ft tall bamboo stakes (3–4 per plant).
- ● Option 2: Tomato cages (5–6 ft tall, sturdy metal or plastic).
- ● Option 3: Florida weave fabric (for DIY trellises, 3–4 ft wide).
- ● Twine or plant ties: 100% jute or soft raphia twine (avoid plastic—it can damage stems).
- ● Gloves: Lightweight gardening gloves (to protect from thorns and dirt).
- ● Watering can or hose: With a gentle spray nozzle for post-pruning hydration.
- ● Pruning sealant: (e.g., tree wound dressing) to coat cut stems and reduce disease risk.
- ● Mulch: Straw or shredded leaves (2–3 inches) to retain moisture and suppress weeds.
- ● Support clips: Plastic or metal clips for securing vines to stakes without twine.
- ○ Plant food: Balanced 10-10-10 fertilizer (optional, if your soil needs a boost).
Instructions: pruning and staking your 6-Week-old tomato plants
Here’s how to shape strong, productive vines before they hit their growth spurt.
🌱 Step 1: Assess Plant Health and Remove Damaged Growth
Start by inspecting each plant closely. Look for yellowing leaves (a sign of overwatering or disease), brown spots (likely early blight), or weak, spindly stems (a light deficiency). Use clean, sharp pruners to snip away any damaged foliage at the base of the problem area—never tear leaves, as this invites infection.
Focus on the bottom 2-3 leaves of each stem. These are the oldest and often the first to show stress. If they’re yellow or crispy, remove them entirely. Healthy leaves should be deep green, firm to the touch, and free of blemishes. This cleanup gives your plant energy to focus on new growth rather than maintaining weak areas.
✂️ Step 2: Prune for Airflow and Shape the Main Stem
Tomatoes thrive when air circulates freely around the plant, so your first pruning goal is to open up the center. Locate the main stem (the thickest vertical shoot) and identify the first flower cluster. If it’s already formed, leave it—but if it’s tiny or just a bud, pinch it off. You’re aiming to delay fruiting until the plant has 4-5 sets of true leaves and a sturdy stem.
Next, remove any suckers—those small shoots growing in the V-shaped junction between the main stem and a branch. These compete for nutrients and weaken the plant. Use your thumb and forefinger to gently pinch suckers when they’re 1-2 inches tall. If they’re larger, cut them at the base with pruners. I always check for suckers weekly, as they grow fast once the plant hits its growth spurt.
🪴 Step 3: Install Stakes or Cages Before Plants Get Top-Heavy
Now’s the time to stake before the vines become too heavy to handle. Drive a 5-6 foot stake (or insert a 6-foot tomato cage) into the soil 2-3 inches from the main stem, burying half its length to ensure stability. For stakes, tie the main stem loosely to the stake with soft plant ties or strips of old T-shirt—never wire, as it can girdle the stem as it thickens.
If using a cage, gently weave the main stem through the openings as it grows, securing it every 12 inches. The goal is to guide growth upward without restricting it. Avoid tying too tightly—you want the plant to move slightly in the wind, which strengthens its stem naturally. Check ties weekly and loosen them as the stem thickens to prevent constriction.
☀️ Step 4: Adjust Light and Water for Post-Pruning Recovery
After pruning, your plants will focus energy on new growth rather than maintaining leaves. Increase watering slightly—aim for 1-1.5 inches per week, delivered at the soil level to avoid wetting foliage. Water in the early morning so leaves dry quickly, reducing disease risk. If your plants look wilted midday, they need more frequent watering, but never let them sit in soggy soil.
Monitor light exposure closely. Leggy growth after pruning often means insufficient light. Move plants within 6 inches of a south-facing window or adjust grow lights to 12-14 hours daily. You’ll see new leaves emerge within 5-7 days—that’s your signal everything’s working. If growth stalls, check for pests like aphids or spider mites, which thrive in crowded, shaded plants.
⏰ Step 5: Plan Your Pruning Schedule for Ongoing Growth
From now on, prune suckers weekly to maintain an open, airy structure. Focus on removing suckers that grow below the first flower cluster, as these drain energy from fruit production. Leave suckers above the first cluster to encourage bushier growth. By the time your plants hit 18 inches tall, you’ll be pinching off 3-4 suckers per week—it’s a rhythm that keeps plants productive.
Every 2-3 weeks, check your stakes or cages and adjust ties. The main stem should have one hand’s width of space between it and the support—any tighter, and it’ll struggle to thicken. If you’re growing indeterminate varieties (like Cherry or Beefsteak), keep pruning until the first frost. Determinate types (like Roma) can stop pruning once they set their first fruit cluster.
Tips & tricks for pruning and staking your 6-Week-old tomato plants
Between us, I've spent years watching tomato plants struggle—and these are the tricks that transformed my garden from scrappy survivors to towering, fruit-laden giants.
Health Assessment: In Step 1, when you're removing those bottom 2-3 leaves, take a closer look at the stems you're cutting. If you see a thin, watery layer just beneath the surface (a sign of blight), don't just remove the leaf—snip a half-inch below the visible damage. The disease often hides below what you can see, and this extra precaution stops it from spreading up the stem. I've saved plants this way that would've otherwise collapsed by summer.
Sucker Pinching Rhythm: The weekly sucker check in Step 2 is non-negotiable, but here's what nobody tells you—timing matters. Do your pinching in the morning when the plants are turgid (full of water). Suckers are easier to remove cleanly, and the plant recovers faster. I've seen gardeners struggle with stubborn suckers because they tried pinching after a hot afternoon when everything's limp and weak. Think of it like giving your plants a fresh start each day.
Staking Stability: When installing those 5-6 foot stakes in Step 3, bury them deeper than you think you need to. The top half should be above ground, but the bottom half should disappear completely—at least 3 feet down. This creates a natural anchor that won't topple when vines get heavy with fruit. I learned this after watching stakes lean dramatically mid-summer. Also, if your soil is particularly loose, mix in some compost around the buried portion to create a more stable base.
Light Optimization: For that 12-14 hours of light in Step 4, here's my secret: rotate your plants every 2-3 days. Even if they're getting full sun, one side will inevitably get more exposure than the other. This rotation creates more uniform growth and prevents the plant from leaning toward the light source. I use a simple wooden dowel marked with the direction to remember which way to turn each time. The difference in plant symmetry is night and day.
Pro Tips for 6 Week Old Tomato Plants
- Between us, I've spent years watching tomato plants struggle—and these are the tricks that transformed my garden from scrappy survivors to towering, fruit-laden giants.
- Health Assessment: In Step 1, when you're removing those bottom 2-3 leaves, take a closer look at the stems you're cutting.
- Sucker Pinching Rhythm: The weekly sucker check in Step 2 is non-negotiable, but here's what nobody tells you—timing matters.
Frequently asked questions
Got questions about your 6-week-old tomato plants? You’re not alone! Here are answers to the most common concerns—so you can keep those vines thriving and climbing toward big harvests.
When should I start pruning my 6-week-old tomato plants?
Hold off on heavy pruning! At this stage, focus on removing only the bottom leaves that touch the soil to prevent disease. Once your plants hit 12–18 inches tall (usually 2–3 weeks later), you can start pruning suckers (those little shoots in the leaf axils). Think of it as shaping a tree—not hacking it back!
Why are my tomato plant leaves turning yellow?
Yellow leaves can mean overwatering, underwatering, or nutrient issues. Check the soil—it should stay consistently moist but not soggy. If the yellowing starts at the bottom leaves, it’s likely age-related (prune them off). For upper leaves, consider adding a balanced fertilizer or compost tea.
What’s the best way to stake 6-week-old tomato plants?
Use soft ties (like old T-shirts or plant clips) and a 5–6 foot stake or cage to avoid damaging stems. Bury the stake halfway into the soil and loosely tie the main stem to it as the plant grows. Avoid wrapping too tight—you want to guide, not strangle!
Can I transplant my 6-week-old tomato plants now?
If your plants are hardened off (acclimated to outdoor temps for 7–10 days) and nighttime temps stay above 50°F (10°C), go for it! Transplant on a cloudy day or in the evening to reduce stress. Bury 1/3 of the stem to encourage root growth—just like a superhero getting a power boost!
What if my tomato plants get too hot or cold?
Tomatoes hate extremes—keep them in 60–85°F (15–29°C). If temps drop below 50°F (10°C), use row covers or cold frames. For heatwaves, provide afternoon shade and mulch to retain moisture. No recovery? Watch for wilting or discoloration—adjust care or move pots to a shadier spot.
Wrapping up and next steps
Your 6-week-old tomato plants are ready for a growth boost—pruning and staking now will set them up for bountiful, healthy harvests all season long! 🌱 With the right techniques, you’ll encourage stronger vines, better airflow, and bigger fruit.
Don’t wait—start today, and soon you’ll be enjoying homegrown tomatoes straight from your garden.
Next step: Grab your tools and head outside! Pick a sunny day, follow the steps you’ve learned, and watch your plants thrive under your care. Happy gardening! 🌟