
Planting
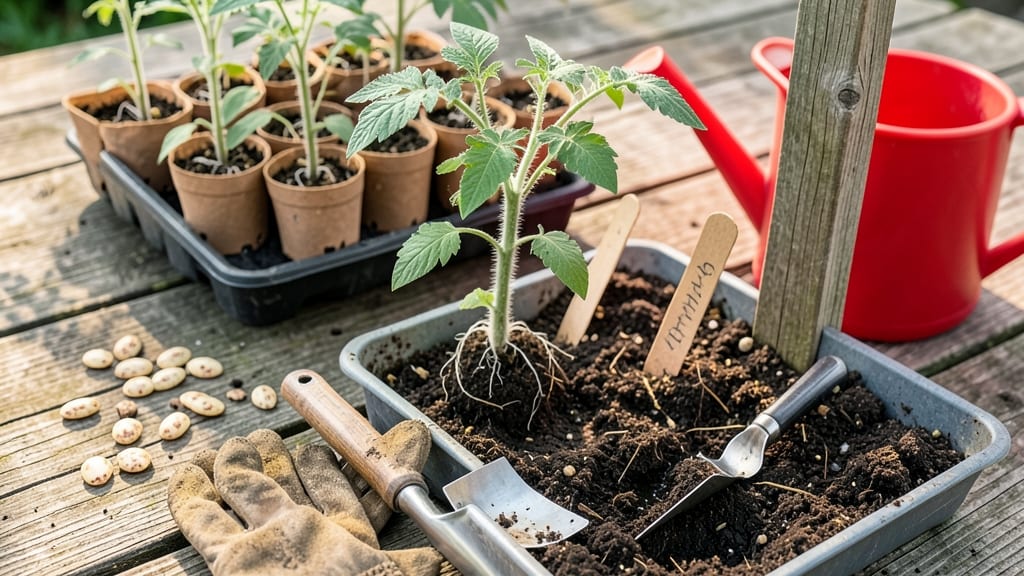
Planting fresh tomato seeds isn't rocket science—but it does require patience and a few key tricks to get those seedlings popping in 5-7 days instead of weeks. 🌱 I’ve watched my own seeds sit stubbornly dormant for two weeks before finally cracking the code: warm soil, consistent moisture, and just the right depth.
The difference between a thriving seedling and a sad, shriveled one often comes down to these small details.
First, grab your supplies: a seed-starting tray or small pots, sterile seed-starting mix (not garden soil), a spray bottle for gentle watering, and plastic wrap or a humidity dome. The secret weapon?
A heating mat—it speeds germination by keeping soil temps between 70-85°F, which is exactly what tomato seeds crave. Plant seeds about ¼ inch deep, press them lightly into the mix, and keep them moist but never soggy.
Within a week, you’ll see tiny sprouts pushing through the soil—this is where the magic happens. Keep them in bright, indirect light (no direct sun yet!) and water from the bottom to avoid disturbing the roots.
Once they’ve got their first set of true leaves, it’s time to introduce them to sunlight gradually. The payoff? Stocky, disease-resistant seedlings that outpace anything you’d buy at a nursery.
Whether you’re a first-timer or a seasoned grower looking to refine your method, these tricks cut down on wasted seeds and give you a head start on the growing season.
And yes, I’ve killed more tomato seedlings than I’d like to admit—this method finally worked for me. Let’s get those seeds growing!
📚 In This Guide
- What you need
- Instructions
- Tips and common mistakes
- Wrapping up and next steps
What you need
- ● Fresh tomato seeds: Start with heirloom or hybrid seeds (your choice!)—about 5-10 seeds per plant (you’ll thin them later). Opt for organic seeds if possible!
- ● Seed-starting mix: A lightweight, sterile potting mix (avoid garden soil—it’s too dense!). A 10-15 lb bag should cover multiple starts.
- ● Seed trays or small pots: Use biodegradable peat pots, cell packs (72+ cells), or 4-6 inch pots (one per seed). Drainage holes are a must!
- ● Grow lights or sunny windowsill: Tomatoes need 12-16 hours of light daily. A LED grow light (or a south-facing window) works best.
- ● Misting bottle or spray nozzle: For gentle watering—avoid soaking the soil!
- ● Plastic wrap or humidity dome: Keeps moisture in while seeds germinate (a clear plastic bag or store-bought dome works).
- ○ Heat mat (optional but helpful): Speeds up germination—aim for 70-80°F. A 10x20 inch mat covers most setups.
- ● Labels & markers: Track varieties (e.g., Cherry Roma, Beefsteak). Use toothpicks + masking tape or pre-labeled trays.
- ● Small hand trowel: For gently pressing seeds into soil (a 1-2 inch blade is perfect).
- ● Fertilizer (balanced or seed starter): A 5-10-5 or 2-3-1 ratio (diluted to half-strength) after sprouts appear.
- ● Fungicide (preventative): A copper-based spray or neem oil to fend off mold (especially in humid climates).
- ● Transplanting pots (later stage): 3-4 inch pots for seedlings before moving to the garden (4-6 weeks after germination).
Step-by-Step instructions for planting fresh tomato seeds
Here’s how to get those seeds sprouting fast and strong—no guesswork, just proven results.
🌱 Step 1: Soak Seeds Overnight for Faster Germination
Place your tomato seeds in a small bowl and cover them with lukewarm water for 12 hours. This softens the seed coat, which can slow germination. You’ll see seeds swell slightly—that’s your signal they’re ready. Drain and pat them dry with a paper towel before planting.
I always soak seeds in a clear bowl so I can spot any that float (those won’t sprout). Discard them now to avoid wasting time later. Soaking also helps prevent uneven germination, so all your seedlings emerge around the same time.
🪴 Step 2: Fill Containers with Moist Seed Starting Mix
Fill your 2-3 inch deep containers with a lightweight seed-starting mix—never garden soil. Press the mix down gently so it’s firm but not compacted. The goal is to create a loose, airy medium that roots can easily push through. Moisten the mix until it feels like a damp sponge, not soggy.
Tap the container once or twice to settle the soil evenly. If you’re using peat pots, place them in a seed tray to catch excess water. Overwatering now will drown seeds before they sprout, so just keep the mix consistently moist—not wet.
🌱 Step 3: Plant Seeds at the Right Depth
Drop 1-2 seeds per cell into the soil, pressing them in just ¼ inch deep. Planting too deep forces seedlings to work harder to reach the surface, delaying germination. Cover lightly with a thin layer of mix, then mist the surface with water until it’s evenly damp.
I like to label each container with the variety and date—after a week of identical green sprouts, you’ll forget which is which! Avoid pressing seeds too firmly; a gentle touch ensures they stay in place without compacting the soil around them.
💧 Step 4: Cover and Keep Warm for Germination
Place a clear plastic dome or plastic wrap over the tray to trap warmth and moisture. Tomatoes germinate fastest at 75-85°F, so a seedling heat mat helps if your home runs cooler. Check daily but only remove the cover to water—never let the soil dry out completely.
Germination usually takes 5-10 days. Once 50% of seeds have sprouted, remove the cover immediately to prevent damping-off disease, which causes seedlings to collapse overnight. Keep the tray in bright, indirect light until sprouts appear.
☀️ Step 5: Move to Bright Light Immediately
The instant seedlings break through the soil, they need 14-16 hours of light daily. A south-facing window often isn’t enough, so I use a full-spectrum LED grow light positioned 2-4 inches above the plants. Raise it as they grow to maintain that distance.
Without enough light, seedlings stretch leggy and weak. Strong starts have thick stems, deep green leaves, and compact spacing between leaves. If stems bend toward the light, your light is too far away—adjust it immediately.
Tips & tricks for perfect tomato seedling starts
Here's what I learned after years of growing weak tomato seedlings—and how to avoid those same mistakes.
Soaking Secret: That 12-hour soak isn't just about speed—it's about quality control. Floaters are your first clue to discard, but also watch for seeds that sink but don't swell. These might be old or damaged. After soaking, I spread them on a paper towel to dry completely before planting, which prevents mold from developing in Step 1. The towel also helps you see every seed clearly for that final check.
Temperature Matters: The 75-85°F range in Step 4 is non-negotiable for tomato seeds. If your home runs cooler, invest in a seedling heat mat—it's the difference between 5-day germination and waiting two weeks. I place mine under the seed tray during the day and remove it at night to prevent overheating. A simple laser thermometer helps monitor the exact temperature without guessing.
Lighting Strategy: That 14-16 hours of light in Step 5 is crucial, but timing matters just as much. I set my grow light on a timer to turn on at 6am and off at 8pm—consistency is key. If you notice seedlings leaning dramatically toward the light, it's too far away. The ideal distance should be where you can just barely see your hand between the light and plants. Raise it gradually as they grow to maintain this position.
Troubleshooting Tip: If you see black, mushy stems after removing the cover in Step 4, you've got damping-off disease. This happens when soil stays too wet. The fix? Improve air circulation by spacing containers 1 inch apart and using a small fan on low setting for 10 minutes daily. It strengthens stems and prevents this common killer of young seedlings.
Pro Tips for Plant Fresh Tomato Seeds
- Here's what I learned after years of growing weak tomato seedlings—and how to avoid those same mistakes.
- Soaking Secret: That 12-hour soak isn't just about speed—it's about quality control. Floaters are your first clue to ...
- Temperature Matters: The 75-85°F range in Step 4 is non-negotiable for tomato seeds. If your home runs cooler, invest...
Frequently asked questions
Got questions about growing tomatoes from seed? You’re not alone—here are answers to the most common ones to help you avoid pitfalls and grow like a pro!
How long does it take for tomato seeds to germinate?
Most tomato seeds sprout in 5–14 days when kept warm (70–85°F). Speed up germination with a heat mat or sunny windowsill. If seeds don’t sprout in 3 weeks, they may be old or damaged—try replanting fresh ones!
Can I plant tomato seeds outside in cold weather?
Nope! Tomato seeds need warm soil (at least 60°F) to germinate. Start indoors 6–8 weeks before your last frost date, or wait until soil is consistently warm (use a soil thermometer). Cold soil = sad, slow sprouts.
What’s the best way to save money on tomato seeds?
Skip store-bought seeds and harvest your own! Let a ripe tomato ferment in water for 2–3 days, then scoop out the seeds, rinse, and dry them on paper towels. Store in a cool, dark place for next season’s free plants!
Why are my tomato seedlings wilting or turning yellow?
Common culprits: overwatering (roots need air!), underwatering (keep soil moist but not soggy), or pests (check for aphids or fungus). Move seedlings to bright, indirect light and avoid crowding—thin them if needed!
Can I grow tomatoes from grocery store seeds?
Technically yes, but heirloom or seed-saving varieties work best. Hybrid grocery-store tomatoes (like beefsteaks) may not grow true from seed. For reliable results, opt for seeds labeled “open-pollinated” or “heirloom” from nurseries.
Wrapping up and next steps
You’ve got everything you need to grow juicy, homegrown tomatoes from seed—no green thumb required! 🌱 By following these speed-germination tricks, you’re setting your plants up for a thriving, bountiful harvest.
Now that you’re armed with knowledge, it’s time to get your hands dirty and watch those little seeds transform into robust seedlings.
Ready to take the next step? Start small—try a few seeds in a sunny windowsill or a mini greenhouse to build confidence. Once you’ve mastered the basics, you can expand your garden and experiment with varieties. Happy planting—your future tomato sandwiches are waiting! 🍅😋