
Vegetables
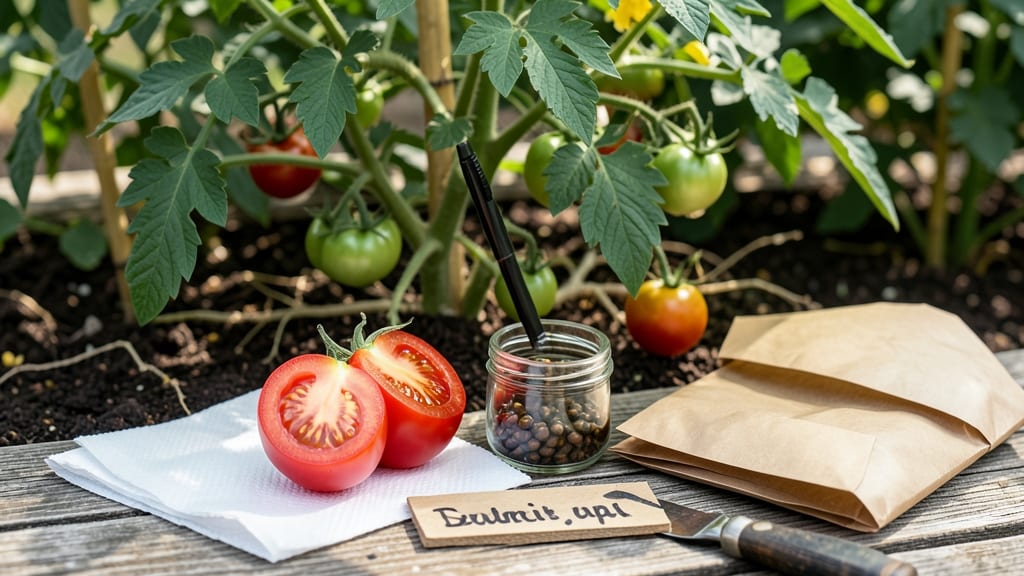
How to keep tomato seeds from your best homegrown varieties is the easiest way to guarantee next year’s harvest will taste like summer. 🌱 I’ve rescued heirloom tomatoes from the grocery store and turned them into seeds that produce plants just like the original—no fancy equipment needed, just time and a little patience.
The process starts with fermenting the seeds in their jelly-like pulp for 3-5 days—this lets the good seeds sink while the bad ones float. After that, it’s all about drying them properly on paper towels until they’re completely dry and ready for storage.
I’ve saved seeds this way for five seasons now, and they’ve always germinated like new.
You’ll end up with a collection of seeds that grow into plants identical to your favorite tomatoes—no store-bought mystery varieties here. The best part?
You can store them in paper envelopes in a cool, dark place for up to 5 years, and they’ll still sprout reliably when you’re ready to plant.
Whether you’re saving seeds from your garden’s stars or rescuing them from store-bought tomatoes, this method works for any variety. Let’s get those seeds ready for next season’s harvest!
📚 In This Guide
- What you need
- Instructions
- Tips and common mistakes
- Wrapping up and next steps
What you need
- ● Ripe tomatoes: Choose heirloom or hybrid varieties (organic is best to avoid contaminants). Aim for 3–5 medium-sized tomatoes for a good seed yield.
- ● Small bowl or container: A glass or ceramic bowl (8–12 oz) works best—avoid metal to prevent reactions with fermentation acids.
- ● Water: 1–2 cups of non-chlorinated water (let tap water sit out for 24 hours or use filtered water).
- ● Spoon or spatula: For scooping out seeds and pulp.
- ● Fine mesh strainer or cheesecloth: To separate seeds from fermenting liquid.
- ● Paper towels or coffee filters: For drying seeds (use unbleached, seed-free paper).
- ● Small paper plates or seed envelopes: For storing dried seeds (label clearly!).
- ● Permanent marker or labels: To write seed names, varieties, and harvest dates.
- ● Hydrogen peroxide (3% solution): A few drops in water can speed up fermentation and reduce mold risk.
- ● Plastic zip-top bags: For a quick, no-mess drying method (place seeds + paper towel in a bag, seal, and let air dry).
- ● Desiccant packets: To absorb excess moisture during seed storage.
- ● Notebook: To log seed characteristics (color, size, germination notes) for future reference.
Step-by-Step instructions for harvesting and storing tomato seeds
Here's the foolproof method I use every year to save seeds from my best tomatoes.
🍅 Step 1: Select and Extract Ripe Tomatoes
Choose tomatoes that are fully ripe but still firm—overripe ones ferment too quickly and lose viability. Cut the tomato in half lengthwise and scoop out the gel and seeds into a clean bowl. I always use a spoon with a smooth edge to avoid damaging the seeds. Add 1 cup of water to the bowl and stir gently to release any seeds still clinging to the pulp.
Let the mixture sit at room temperature for 2-3 days. You'll notice the seeds sink while the pulp and moldy material float to the top. This fermentation process breaks down the gel, making seed cleaning easier. Stir the mixture once daily to prevent mold growth on the surface.
💧 Step 2: Clean and Rinse the Seeds
After 2-3 days, skim off the moldy pulp and discard it. Pour the remaining liquid and seeds through a fine-mesh strainer or cheesecloth into a clean bowl. Rinse the seeds thoroughly under cool water until the water runs clear. This removes any remaining gel that could inhibit germination.
Spread the seeds on a clean, dry paper towel or screen tray. I like to use a coffee filter in a colander for this step—it lets excess water drain while keeping the seeds contained. Gently pat them dry with another paper towel, but don't press too hard, as this could damage the seed coats.
☀️ Step 3: Dry the Seeds Completely
Place the seeds in a single layer on a clean, dry surface. I use a small cardboard box lined with parchment paper for this step. Keep the seeds in a warm, dry place with good air circulation—70-75°F is ideal. Avoid direct sunlight, as it can overheat and crack the seeds.
Turn the seeds every 12 hours to ensure even drying. They're ready when they feel dry to the touch and break with a crisp snap when bent. This typically takes 5-7 days, depending on humidity levels. If your home is particularly humid, use a small fan on low setting to speed up the process.
🪴 Step 4: Store the Seeds Properly
Once completely dry, transfer the seeds to a small envelope or airtight container. I label each container with the tomato variety and the year harvested. Store the seeds in a cool, dark place—35-40°F is perfect for long-term storage. A refrigerator works well for this purpose.
Seeds stored properly can remain viable for 4-5 years, though germination rates may decrease over time. Check the seeds annually and replant the freshest ones first. If you notice any signs of moisture or mold during storage, transfer the seeds to a new, dry container immediately.
Tips & tricks for perfect tomato seed preservation
Saving tomato seeds successfully comes down to patience and attention to detail—here's how to avoid the most common pitfalls while maximizing your seeds' viability.
Fermentation Timing: The 2-3 day fermentation in Step 1 is critical for breaking down the gel that coats seeds. If you notice mold forming before day 3, simply skim it off and continue—this won't harm the seeds. I've found that warmer rooms (70-75°F) speed up fermentation, while cooler spaces may need the full 3 days. The key visual cue is when seeds sink cleanly while the pulp floats completely.
Cleaning Efficiency: For Step 2, I recommend using a fine-mesh strainer with a deep bowl underneath to collect the seeds. The gel can be stubborn, so I rinse the seeds in batches of 2-3 tablespoons at a time, gently swirling them in cool water. This prevents overcrowding and ensures thorough cleaning. A coffee filter in a colander works beautifully for drying—it creates perfect airflow while containing the tiny seeds.
Drying Strategy: The 12-hour turning schedule in Step 3 prevents uneven drying. I've learned the hard way that skipping this step can lead to some seeds drying faster than others, creating inconsistent viability. For humidity control, place a small dish of silica gel near your drying seeds—it absorbs excess moisture without affecting the seeds. The crisp snap test is foolproof: if a seed breaks cleanly, it's ready for storage.
Pro Tips for Keep Tomato Seeds
- Saving tomato seeds successfully comes down to patience and attention to detail—here's how to avoid the most common p...
- Fermentation Timing: The 2-3 day fermentation in Step 1 is critical for breaking down the gel that coats seeds. If yo...
- Cleaning Efficiency: For Step 2, I recommend using a fine-mesh strainer with a deep bowl underneath to collect the se...
Frequently asked questions
Got questions about saving tomato seeds? You’re not alone—here are answers to the most common ones to help you master the process!
How long do tomato seeds need to ferment before drying?
Fermentation typically takes 2–5 days, depending on temperature. Keep the mixture in a warm spot (around 70–80°F) and stir daily. If mold appears (fuzzy spots), toss it—fermentation is done when seeds sink and the liquid smells tangy. Pro tip: A sunny windowsill speeds this up!
Can I skip the drying step and plant seeds straight from the pulp?
Nope! Wet seeds will rot in soil. Always dry them thoroughly (3–7 days) on paper towels or a screen. Think of it like making homemade jerky—patience pays off for viable seeds! Alternative: Use a fan on low to speed drying in humid climates.
What if my seeds don’t sprout after drying?
Check for these issues:
- Old seeds: Store them in a cool, dark place (like a jar in the fridge) for up to 4 years—but germination drops after 2 years.
- Poor drying: If seeds look shriveled or sticky, re-dry them for another 24 hours.
- Bad storage: Moisture or heat kills seeds. Use a sealed, airtight container with a silica gel packet.
Can I save seeds from hybrid or heirloom tomatoes?
Heirloom seeds will true to type (same traits as the parent plant), but hybrid seeds may produce unpredictable results. For consistency, stick to heirlooms or labeled "open-pollinated" varieties. Fun fact: Hybrid seeds are often sterile—check the tag!
How should I store tomato seeds long-term?
Label a paper envelope (not plastic—it traps moisture!) with the variety and year. Store in a cool, dark place (like a fridge or basement) where temps stay 40–50°F. Add a silica gel packet to absorb humidity. Test a few seeds yearly to ensure viability!
Wrapping up and next steps
Saving tomato seeds is a rewarding way to ensure next year’s harvest thrives with heirloom flavors and vigor! By fermenting and drying them properly, you’ll unlock a treasure trove of homegrown potential—no fancy tools or expertise required.
Whether you’re a seasoned gardener or just starting out, these simple steps turn scraps into seeds ready for planting.
Ready to take the next step? Grab those ripe tomatoes, follow your saved seeds, and watch your garden flourish with homegrown goodness! 🌱✨