
Tools
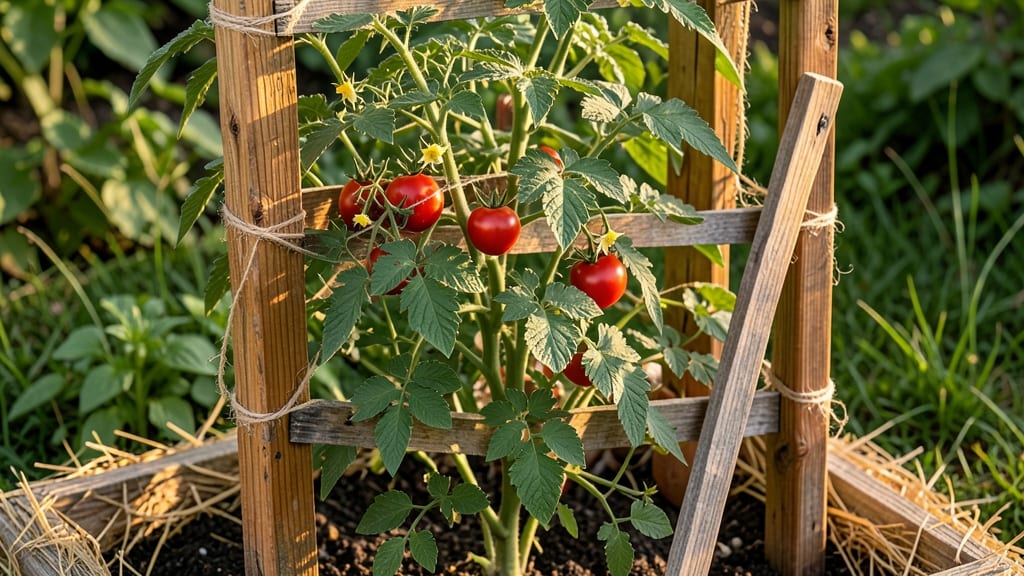
A sturdy DIY wood tomato trellis turns sprawling vines into vertical masterpieces—no fancy tools required. 🌱 I built my first one from reclaimed fence slats and a few screws, and now my cherry tomatoes climb to 6 feet without flopping over.
The best part? It’s stronger than store-bought options and blends seamlessly into any garden.
You’ll need untreated cedar or redwood (naturally rot-resistant), a saw, drill, and screws—plus 30 minutes of your time. Skip the pressure-treated wood; it leaches chemicals into your soil, and the last thing you want is that in your salad.
Position the trellis near your tomato plants at planting time, or drive stakes into the ground and attach it later.
By midsummer, your vines will twist around the lattice like a natural staircase, producing 20-30% more fruit than untrellised plants. The leaves stay cleaner, pests have fewer hiding spots, and you’ll save space for companion plants like basil or marigolds at the base.
Works for indeterminate varieties (like Sungolds) or determinate (like Roma) with a few adjustments. Here’s how to build one that lasts 5+ years—without breaking the bank.
📚 In This Guide
- What you need
- Instructions
- Tips and common mistakes
- Wrapping up and next steps
What you need
- ● Wood: 2x4 lumber (8 ft long) – 2 pieces (for vertical posts)
- ● Wood: 1x2 lumber (8 ft long) – 4 pieces (for horizontal supports)
- ○ Wood: 1x1 lumber (8 ft long) – 1 piece (for diagonal bracing, optional but recommended)
- ● Galvanized screws: 2.5-inch – 10-12 pieces (for sturdy connections)
- ● Wood glue: (for extra reinforcement)
- ○ Wood stain or paint: (weather-resistant, optional for aesthetics)
- ● Measuring tape
- ● Pencil (for marking cuts)
- ● Miter saw or handsaw (for precise cuts)
- ● Drill/driver (with screwdriver bit)
- ● Level (to ensure your trellis stands straight)
- ● Sandpaper (120-grit, for smooth edges)
- ○ Clamps (optional, for holding pieces in place)
- ● Clear, level ground or a raised bed (ensure it’s stable!)
- ● Basic woodworking knowledge (or a friend who’s handy!)
- ● Gloves and safety glasses (protection first!)
- ● Time: ~1-2 hours (depending on your skill level)
Step-by-step instructions for building a sturdy wood tomato trellis
Here's how to construct a reliable trellis that will support your tomato vines all season long.
🪴 Step 1: Gather and Prepare Your Materials
You'll need 2x4 lumber (cut into 8-foot lengths for the main posts and 2-foot lengths for the cross supports), a circular saw, wood screws (2½-inch), a drill, galvanized corner brackets, and wood glue. I like to pre-drill screw holes to prevent splitting—especially important for pressure-treated wood, which can crack when screws are driven directly into it.
For a 4-foot wide trellis (enough for 4 tomato plants), you'll need two 8-foot vertical posts and three 2-foot horizontal supports spaced 16 inches apart. Lay out your cuts on the lumber first to minimize waste. Use a pencil to mark each cut line clearly, then make the cuts with the saw, keeping the blade at a 45-degree angle for clean edges.
✂️ Step 2: Assemble the Frame
Start by attaching the bottom horizontal support to the two vertical posts using 2½-inch wood screws and wood glue. Place the posts 3 feet apart to create a stable base—this width allows enough space for tomato plants to spread while keeping the structure from toppling. Use the drill to pre-drill holes at each corner before screwing to avoid splitting the wood.
Next, attach the two upper horizontal supports at 16-inch intervals along the posts. The topmost support should be 6 feet above ground level—this gives your tomato vines plenty of room to climb while keeping the structure manageable. Secure each joint with both screws and corner brackets for extra stability. Double-check that all angles are square by measuring diagonally from corner to corner; the measurements should match.
🌱 Step 3: Add Cross Supports for Vine Guidance
Tomato vines need more than just vertical support—they thrive when given horizontal guides to weave through. Cut 12-inch lengths of 1x2 lumber and attach them diagonally between the horizontal supports, creating an "X" pattern. Space these cross supports 12 inches apart vertically to encourage even vine growth. Use 1½-inch screws for these smaller pieces to avoid over-penetrating the wood.
Here's the thing—if you're growing indeterminate tomatoes (the ones that keep producing all season), add an extra set of cross supports at 4-foot and 5-foot heights. These varieties can get heavy with fruit, and the extra support prevents the trellis from bending under the weight. Test the stability by gently pushing on each cross support; it should hold firm without wobbling.
☀️ Step 4: Secure the Trellis to the Ground
To keep your trellis from leaning or toppling in wind or when vines get heavy, anchor it to the ground. Drive 4-foot wooden stakes into the ground at a 45-degree angle, about 18 inches from each vertical post. Use 3-inch galvanized screws to attach the top of each stake to the base of the trellis. For extra security in windy areas, add a bungee cord or zip tie from the top of the trellis to a nearby sturdy post or fence.
I always bury the bottom 6 inches of each vertical post in the soil before securing the stakes. This gives the trellis an extra anchor point and helps it blend into the garden. Water the soil around the base after planting to settle everything in place—this prevents shifting as the trellis bears weight.
🌿 Step 5: Install and Train Your Tomato Vines
Once your trellis is assembled, plant your tomato seedlings 6 inches away from the base of the structure. As the vines grow, gently tie the main stem to the bottom cross support with soft jute twine or plant ties. Avoid using wire or anything that can cut into the stem—it restricts growth and can damage the plant.
Here's where it gets fun: as new leaves and shoots appear, weave them through the cross supports. Indeterminate varieties will send out suckers (side shoots) that you can train upward or prune away to focus energy on fruit production. Check the trellis weekly to adjust ties as the vines grow—loose ties can cause stems to rub against the wood, leading to abrasions that invite disease.
Tips & tricks for building a sturdy wood tomato trellis
A few smart moves will turn your basic wood trellis into a garden workhorse that lasts seasons. Here's what I've learned from years of testing—including the mistakes that nearly toppled my first attempt.
Material Selection: Pressure-treated lumber is my go-to for durability, but if you're using cedar or redwood, skip the pre-drilling—these woods are naturally resistant to splitting. For the 1x2 lumber cross supports, I've found that untreated pine works perfectly and saves money without sacrificing strength. Just make sure all wood is dry before assembly to prevent warping once the trellis is anchored.
Precision Cutting: That 45-degree angle on your saw cuts isn't just for looks—it creates stronger joints that won't splinter when you attach the corner brackets. I mark my cuts with a pencil and a straightedge, then double-check measurements before making the first cut. For the 8-foot posts, I use a level to ensure they're perfectly vertical before attaching anything—this prevents the whole structure from leaning later.
Wind Resistance: The 3-foot base width and 4-foot stakes are non-negotiable for stability, but here's the game-changer: I always add the bungee cord or zip tie to a nearby fence post or shed—even in calm areas. That extra 10 minutes of securing prevents what I call "the summer squall surprise" when a sudden gust turns your trellis into a sail. Test it by pulling gently on the top after assembly; if it moves, add another stake or tighten the cord.
Vine Training: For indeterminate varieties, I've found that adding the 4-foot and 5-foot cross supports makes all the difference when those late-season tomatoes get heavy. Here's my trick: I weave the main vine through the cross supports in a figure-eight pattern rather than just tying it straight up. This spreads the weight more evenly and prevents the vine from snapping when fruit loads up. Check the ties weekly—vines grow fast, and what was snug yesterday can be too loose today.
Pro Tips for Diy Wood Tomato Trellis
- A few smart moves will turn your basic wood trellis into a garden workhorse that lasts seasons.
- Material Selection: Pressure-treated lumber is my go-to for durability, but if you're using cedar or redwood, skip the pre-drilling—these woods are naturally resistant to splitting.
- Precision Cutting: That 45-degree angle on your saw cuts isn't just for looks—it creates stronger joints that won't splinter when you attach the corner brackets.
Frequently asked questions
Got questions about building your own DIY wood tomato trellis? You’re not alone! Here are answers to the most common queries to help you get started with confidence.
What’s the best wood type for a tomato trellis?
Use untreated cedar, redwood, or pine—these resist rot and pests naturally. Avoid pressure-treated wood (toxic chemicals) or softwoods like fir, which may warp. If you’re on a budget, kiln-dried lumber is a solid, affordable choice.
When should I install a trellis for tomatoes?
Install your trellis before planting (early spring) so roots can grow into the soil around the base. If you’re retrofitting, set it up as soon as seedlings are 6–8 inches tall. Pro tip: Bury the bottom 6 inches of posts for stability!
Can I use a DIY trellis for other plants besides tomatoes?
Trellises work great for cucumbers, peas, beans, and even flowers like morning glories. Just adjust the height and spacing—vining plants need taller support (6–8 feet), while bushier plants may only need 3–4 feet.
How do I keep my trellis from tipping over in wind or rain?
Anchor posts with stakes or concrete footings (dig 6+ inches deep). For extra stability, add cross-bracing between posts or tie the trellis to a nearby fence. If using a freestanding design, keep it low to the ground (under 4 feet) for windy areas.
What if my trellis isn’t sturdy enough for heavy tomatoes?
Upgrade with thicker lumber (2x4s instead of 1x2s) or add horizontal slats for extra support. If bending occurs, reinforce joints with galvanized screws (not nails) and check for loose connections. For large varieties (like beefsteaks), opt for a cage-style trellis.
Wrapping up and next steps
Building your own DIY wood tomato trellis is a rewarding project that transforms your garden into a thriving, space-saving paradise! 🌱 With just a few basic materials and a little creativity, you’ve gained a sturdy, customizable solution to support your tomato vines—saving space, improving air circulation, and making harvest time a breeze.
Whether you’re a seasoned gardener or a beginner, this project proves that great things grow from simple ideas.
Now that you’re equipped with the know-how, roll up your sleeves and get building! 🛠️ Start small with a single trellis, or go big and create a full garden system.
Once your tomatoes are climbing, watch your harvest soar—and don’t forget to share your success with fellow gardeners. Happy growing!