
Tools
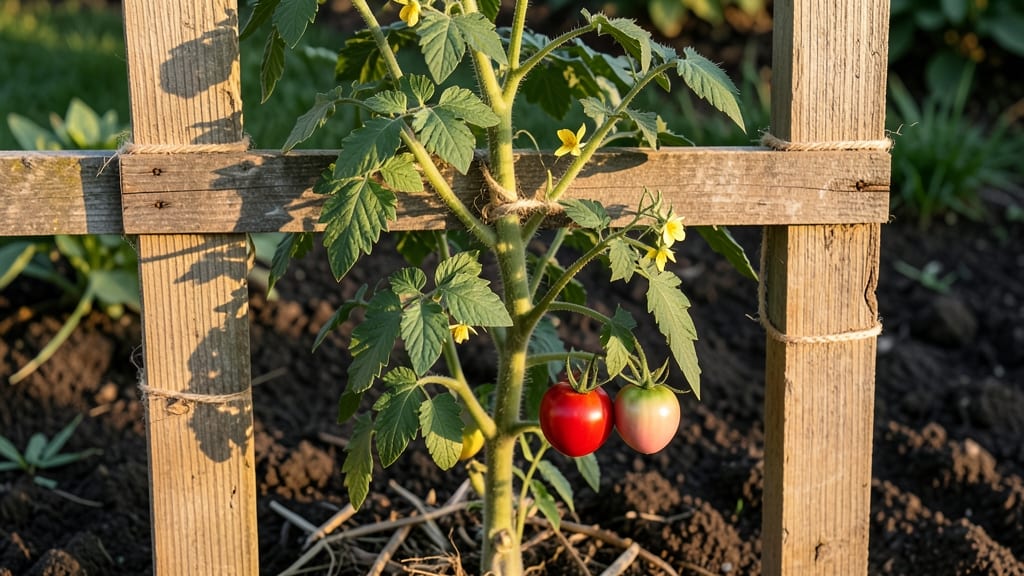
A DIY wooden tomato trellis transforms floppy vines into productive vertical gardens. 🌱 I built my first one after watching my heirloom tomatoes sprawl across the yard, and the difference in yield and plant health was immediate.
You'll need just 3-4 hours and basic tools: a saw, drill, screws, and 2x4 lumber (cedar lasts longest). The design supports 8-10 plants per trellis, with crossbars every 12 inches to prevent sagging. No fancy carpentry skills required—just straight cuts and pre-drilled holes.
By mid-summer, your plants will climb 6-8 feet tall, producing more fruit with less garden space. The wood's natural look blends seamlessly with any yard, and you can paint it to match your garden decor.
Works for both determinate (bush) and indeterminate (vining) varieties. Here's how to build it in 4 simple steps—no measuring twice, no guesswork.
📚 In This Guide
- What you need
- Instructions
- Tips and common mistakes
- Wrapping up and next steps
What you need
- ● Wooden posts (4x4 or 2x2) – 4 pieces, 6-8 feet long (or 4-5 feet if space is limited). Cedar or pressure-treated lumber works best for durability.
- ○ Wooden stakes (optional but helpful) – 4-6 pieces, 12-18 inches long (for extra stability).
- ● Galvanized screws or nails – 2.5-3 inches long (about 20-30 pieces). Stainless steel or coated screws prevent rust.
- ● Horizontal wooden slats or lattice panels – 1x4 or 1x6 boards, cut to fit between posts (4-6 pieces, depending on trellis height).
- ○ Wood glue – For extra reinforcement at joints (optional but recommended).
- ● Measuring tape – For precise cuts and spacing.
- ● Saw (hand saw, circular saw, or miter saw) – To cut wood to size.
- ● Drill or hammer – For driving screws or nails.
- ● Level – Ensures your trellis stands straight and true.
- ● Pencil and ruler – For marking cuts and measurements.
- ● Sandpaper (80-120 grit) – Smooths rough edges for safety and aesthetics.
- ● Wood stain or paint – Protects wood and matches your garden decor.
- ● Twigs or vine ties – For gently guiding tomato plants upward.
- ● Concrete or gravel – Anchors posts securely in the ground.
- ● Post caps or decorative finials – Adds a polished touch to your trellis.
Step-by-Step instructions for building a DIY wooden tomato trellis
Here’s my go-to method for constructing a trellis that holds up to 6-foot-tall tomato plants without bending or breaking.
🪴 Step 1: Gather Materials and Prep Wood
Start with 2x4 lumber (6 feet long) for the vertical posts and 1x2 lumber (8 feet long) for the horizontal slats. You’ll need 4 posts and 6 slats for a sturdy 4-foot-wide trellis. Sand all wood edges to prevent splinters—rough surfaces can damage stems as vines grow. I use cedar because it naturally resists rot, but pine works too if treated with outdoor wood sealant.
Measure and mark the posts at 12-inch intervals for horizontal slat attachment points. A pencil works, but I like using a carpenter’s square for precision. This spacing keeps the trellis stable while allowing airflow to prevent fungal diseases. Pre-drill pilot holes at each mark to avoid splitting the wood when you attach the slats later.
✂️ Step 2: Assemble the Frame
Set two posts upright 3 feet apart and secure them with a 2x4 base at the bottom using 3-inch deck screws. Repeat for the second pair of posts, keeping them parallel. The frame should form a rectangle—measure diagonally to ensure the corners are square. If the diagonals aren’t equal, adjust the posts until they are.
Now attach the horizontal slats between the posts at your marked 12-inch intervals. Use 2.5-inch exterior screws to secure them, driving them in at a slight angle for extra strength. Space the slats 1 inch apart vertically to create a lattice effect—this gives vines plenty of grip as they climb. I like to stagger the joints for added stability.
🌱 Step 3: Reinforce and Position
For extra durability, add diagonal braces from the top of each post to the center of the base. Cut 2x4 pieces at a 45-degree angle and attach them with 3-inch screws. This prevents the trellis from leaning or toppling in windy conditions. If building near a fence or wall, anchor one side to it with lag screws for additional support.
Position the trellis where it gets full sun (6+ hours daily) and has 6+ inches of clearance from the ground to prevent soil-borne diseases from splashing onto leaves. I like placing mine near the garden’s edge so I can easily tie vines as they grow. Water the base area thoroughly before planting to settle the soil and reduce early movement.
💧 Step 4: Plant and Train Vines
After planting your tomatoes, wait 2-3 weeks until the main stem reaches the bottom slat. Gently tie the stem to the trellis with soft plant ties or strips of old T-shirt fabric—avoid wire or plastic ties that can cut into the stem as it thickens. I train indeterminate varieties (like 'Sungold') upward, while determinate types (like 'Roma') can stop at 4-5 feet to focus energy on fruit production.
As vines grow, weave the suckers (side shoots) through the lattice for natural support. Prune suckers that grow below the first flower cluster to direct energy upward. Watch for leaf yellowing—this often signals overwatering or nutrient deficiency. Adjust watering to keep soil 1-2 inches deep moist but never soggy.
⏰ Step 5: Maintain and Winterize
Check the trellis weekly for loose screws or splintering wood. Tighten any that come loose, and sand down rough spots immediately. If using untreated wood, apply a waterproof sealant every 2-3 years to extend its life. I like to do this in early spring before the growing season starts.
At season’s end, remove all plant debris and store the trellis in a dry place. If leaving it outdoors, tilt it slightly to shed rainwater and prevent rot. I mark the posts with a permanent marker to note the year—this helps track how well the wood holds up over time.
Tips & tricks for perfect DIY wooden tomato trellis construction
Building a sturdy trellis is all about precision and smart prep—here's how to avoid common pitfalls and create a structure that lasts seasons.
Wood Selection Wisdom: Cedar is my go-to for its natural rot resistance, but if you choose pine, treat it with outdoor wood sealant before assembly. Untreated pine can warp or splinter within a single growing season, especially in wet climates. For extra longevity, consider pressure-treated lumber as an alternative—just make sure it's labeled "ground contact" to prevent chemical leaching into your soil.
Precision Cutting Tip: When marking your 12-inch intervals for slat attachment in Step 1, use a speed square or carpenter's square instead of a pencil alone. I've found that even a slight misalignment can create weak spots where the trellis might sag under heavy tomato loads. For the diagonal braces in Step 3, cut your 2x4 pieces at exactly 45 degrees using a miter saw—this creates a stronger joint than trying to eyeball it with a handsaw.
Assembly Stability Hack: Before securing your horizontal slats in Step 2, temporarily clamp them in place to test the frame's square. I've seen many DIY trellises that look square at the base but develop a lean when fully loaded. The diagonal braces in Step 3 are non-negotiable for wind resistance—if you're in a particularly breezy area, consider adding a cross brace between the center posts for additional reinforcement. This simple addition has saved my trellises from toppling during summer storms.
Plant Training Pro Tip: For indeterminate varieties like Sungold, I recommend installing a second set of horizontal slats about 3 feet above the first in Step 2. This gives the vines more surface area to grip as they grow taller, preventing the weight of the fruit from pulling the lower slats downward. The 2-3 week wait before tying in Step 4 is crucial—waiting ensures the main stem is strong enough to support the plant's weight without snapping when you first attach it.
Pro Tips for Diy Wooden Tomato Trellis
- Building a sturdy trellis is all about precision and smart prep—here's how to avoid common pitfalls and create a structure that lasts seasons.
- Wood Selection Wisdom: Cedar is my go-to for its natural rot resistance, but if you choose pine, treat it with outdoor wood sealant before assembly.
- Precision Cutting Tip: When marking your 12-inch intervals for slat attachment in Step 1, use a speed square or carpenter's square instead of a pencil alone.
Frequently asked questions
Got questions about building your DIY wooden tomato trellis?
Here are answers to the most common ones—so you can get growing with confidence!
What’s the best wood to use for a tomato trellis?
Opt for cedar, redwood, or untreated pine—they’re rot-resistant and sturdy. Avoid pressure-treated wood (chemicals can harm plants) unless labeled "ACQ-treated" (safe for veggies). For extra longevity, stain or seal the wood before assembly.
When should I assemble the trellis?
Build it before planting—ideally 2–3 weeks ahead. This gives you time to:
- Stake the base firmly into the soil.
- Adjust height (aim for 6–8 feet for indeterminate tomatoes).
- Let the wood weather slightly to prevent warping.
Can I use this trellis for other plants?
It works for:
- Pole beans (lightweight, fast-growing).
- Cucumbers (train vines with soft ties).
- Peas or flowers (like nasturtiums or morning glories).
What if my trellis wobbles or sags?
Check these fixes:
- Base issues: Drive stakes deeper or add diagonal supports.
- Wood warping: Tighten screws or add a crossbeam midway.
- Heavy vines: Use soft plant ties (not wire) to distribute weight.
Is a DIY trellis cheaper than buying one?
Yes! A basic 6-foot trellis costs $10–$25 in materials (wood, screws, stain) vs. $30–$60+ for pre-made kits. Plus, you customize size and design. Savings tip: Repurpose old fence pickets or pallet wood to cut costs further!
Wrapping up and next steps
Building your own DIY wooden tomato trellis is a rewarding project that transforms your garden into a thriving, space-saving paradise! With just a few materials and a little elbow grease, you’ve created a sturdy support system that will help your tomatoes grow tall, healthy, and bountiful. 🌱
Now that you’re equipped with the knowledge, roll up those sleeves and give it a try! Start small with a single trellis, then expand as your green thumb grows. Happy gardening—and enjoy those delicious, vine-ripened tomatoes all season long! 🍅✨