
Vegetables
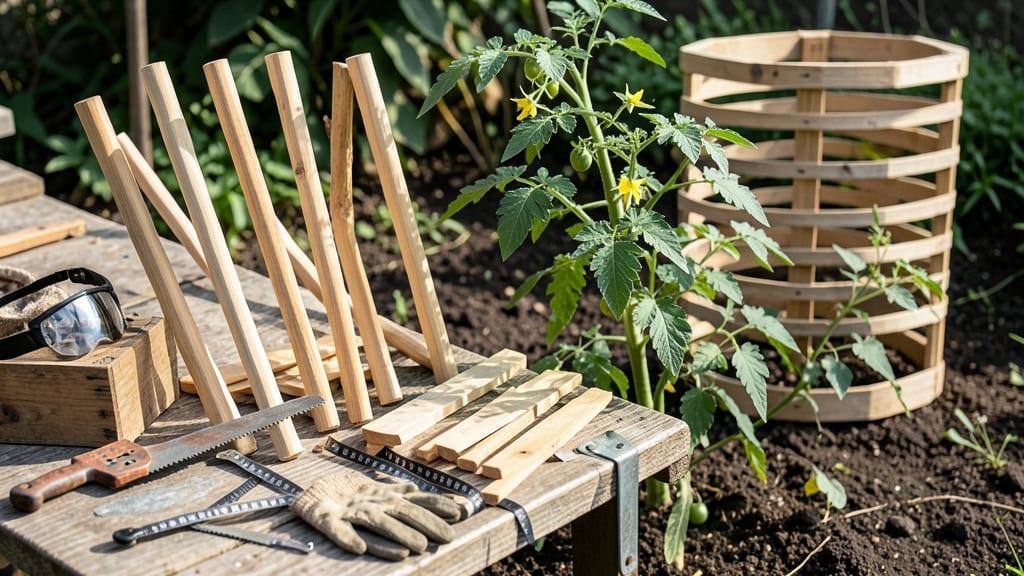
Building wood tomato cages transforms floppy vines into neat, productive towers—and the best part? You can customize them to match your garden’s style. 🌱 I’ve spent years perfecting my design, and these sturdy supports keep even the heaviest beefsteak tomatoes upright without bending or toppling.
The key lies in the right wood, precise cuts, and reinforced joints that last through multiple harvests.
You’ll need just 4 pieces of 2x2 lumber (cut to 48 inches each), a few basic tools, and about 30 minutes to assemble. Cedar or pine works best—cedar resists rot, while pine is budget-friendly and holds up well with a sealant.
Avoid pressure-treated wood near edible plants, and skip flimsy wire cages that sag under weight. My design uses simple lap joints and screws for strength, plus optional diagonal braces for extra stability in windy areas.
Once built, these cages become a game-changer for your garden. Tomatoes grow taller, fruit ripens faster, and pests have fewer hiding spots. The 6-foot height accommodates indeterminate varieties, while the wide base prevents tipping.
Plus, you’ll avoid the heartbreak of broken stems or lost harvests from weak supports. With a little paint or stain, they’ll even blend into your landscape instead of looking like store-bought afterthoughts.
For extra durability, add a base plate or sink the screws slightly below the surface to prevent splitting. If you’re growing in windy areas, consider adding a fifth vertical support.
The same principles work for trellises too—just adjust the height and spacing. Ready to build yours? Let’s get started with the exact steps that’ve kept my cages standing for years.
📚 In This Guide
- What you need
- Instructions
- Tips and common mistakes
- Wrapping up and next steps
What you need
- ● 1x4 or 2x2 lumber – 4 to 6 pieces, each 6 to 8 feet long (cedar or pine work well for durability).
- ● Wood screws (1.5" to 2") – 10 to 15 screws (stainless steel or galvanized to prevent rust).
- ● Wood glue – Small bottle (for extra reinforcement).
- ● Sandpaper (80-120 grit) – To smooth rough edges.
- ○ Wood stain or paint (optional but recommended) – Outdoor-grade for weather resistance.
- ● Measuring tape – For precise cuts.
- ● Miter saw or handsaw – For clean, angled cuts.
- ● Drill/driver – With screwdriver bit.
- ○ Clamps (optional but helpful) – To hold pieces steady while assembling.
- ● Pencil – For marking cuts and screw placements.
- ● Corner braces – For added stability in high-wind areas.
- ● Non-slip pads or feet – To protect garden beds from scratches.
- ● Decorative lattice or trellis panels – For a rustic or modern look.
- ● Waterproof sealant – Extra protection for outdoor use.
Step-by-Step instructions for building wood tomato cages
Here's the straightforward method I use to build cages that hold 6-foot-tall tomato plants without bending or toppling.
🪴 Step 1: Gather Materials and Cut Wood Pieces
You'll need four 6-foot-long 2x2-inch wood stakes and eight 18-inch-long 1x2-inch wood slats for each cage. I use untreated cedar because it resists rot naturally—just make sure the wood is dry and straight. Cut the stakes to your desired height (6 feet works for most indeterminate varieties). For the slats, mark 18-inch lengths and cut them precisely; uneven slats make wobbly cages.
Lay out the materials before cutting to avoid mistakes. If you're building multiple cages, cut all pieces at once for consistency. Sand any rough edges lightly—this prevents splinters when handling and planting.
✂️ Step 2: Assemble the Cage Frame
Start by driving the four 6-foot stakes into the ground at 12-inch intervals in a square formation. Use a post hole digger or mallet to sink them 4-6 inches deep—this ensures stability. The stakes should stand perfectly vertical; use a level to check and adjust as needed. Once all four are firmly planted, tie them together at the top with jute twine or zip ties to create a square frame.
Here's the thing—if your stakes lean inward or outward, the cage will collapse under a heavy tomato plant. I tie the twine in a loose square knot so I can adjust tension later if needed. Leave about 6 inches of slack at the base for flexibility.
🌱 Step 3: Add Horizontal Slats for Support
Attach the eight 18-inch slats horizontally between the stakes. Start by placing two slats 6 inches apart near the base, then add another pair 6 inches above that. Repeat this pattern up the cage, alternating sides so the slats form an X pattern when viewed from the front. Secure each slat with staples or screws—I prefer decking screws because they hold better than staples in windy conditions.
Space the slats evenly to prevent the plant from slipping through gaps. If you're building for heirloom varieties, add an extra row of slats midway up for extra support. Test the cage's stability by gently shaking it—if it wobbles, reinforce the connections or drive the stakes deeper.
☀️ Step 4: Reinforce and Position the Cage
Once all slats are in place, reinforce the top of the cage by adding a final horizontal slat around the perimeter. This prevents the plant from poking through the gaps at the very top. If you're in a windy area, tie the top slat to the stakes with additional twine for extra security. Bury the base of the cage 2-3 inches deeper in the soil to anchor it further—this is especially important for tall indeterminate tomatoes that can weigh 20+ pounds when laden with fruit.
Position the cage immediately after transplanting your tomato seedlings. Wait until the plant has 4-6 leaves before staking to avoid disturbing the roots. If you're using pruning ties, loop them loosely around the main stem and a slat—tighten only as the plant grows to prevent stem damage.
Tips & tricks for sturdy wood tomato cages
Building a strong tomato cage doesn't have to be complicated—just a few key details make all the difference for those towering plants.
Material Selection: Cedar is my go-to wood because it naturally resists rot, but if you're on a budget, untreated pine works too. Just avoid pressure-treated wood—it can leach chemicals into your soil. For the 2x2-inch stakes, look for straight, dry pieces without knots. Bendable or warped wood will make your cage wobbly, no matter how well you assemble it.
Precision Cutting: When marking your 18-inch slats, use a tape measure and pencil to draw lines before cutting. I find it helps to clamp the wood pieces together in pairs before cutting to ensure both slats in a pair are identical. This symmetry makes assembly in Step 3 much easier—no more struggling to match uneven pieces. A sharp handsaw or miter box will give you cleaner cuts that fit together better.
Stability Secrets: The 4-6 inch deep planting for stakes is crucial—don't skimp! I've seen cages topple when stakes weren't buried deep enough, especially after heavy rain. For extra wind resistance, drive stakes into the ground at a slight outward angle (about 5 degrees) before tying them together. This creates a wider base that resists tipping. Test stability by gently pushing the top of the cage before planting.
Windproofing: In windy areas, add an extra 18-inch slat diagonally between opposite stakes at the top (optional but recommended). This creates a triangular support that prevents the cage from collapsing inward. I also like to bury the base 2-3 inches deeper than specified and add a loop of twine around the bottom stakes to anchor them to nearby plants or a stake in the ground.
Pro Tips for Build Tomato Cages Wood
- Building a strong tomato cage doesn't have to be complicated—just a few key details make all the difference for those...
- Material Selection: Cedar is my go-to wood because it naturally resists rot, but if you're on a budget, untreated pin...
- Precision Cutting: When marking your 18-inch slats, use a tape measure and pencil to draw lines before cutting. I fin...
Frequently asked questions
Got questions about building your own wooden tomato cages? You’re not alone! Here are some of the most common concerns—and their practical solutions—to help you get started with confidence.
What’s the best wood to use for tomato cages?
Opt for cedar, pine, or pressure-treated lumber (if untreated). Cedar resists rot and insects naturally, while pine is budget-friendly. Avoid untreated wood near soil—it can harbor mold. For extra durability, use 2x2 or 2x4 lumber and seal with outdoor paint or varnish.
How long does it take to build a tomato cage?
For a 4-foot-tall cage, most DIYers finish in 30–60 minutes. Break it into steps: cutting (10 mins), assembling (15 mins), and securing stakes (5 mins). Pro tip: Pre-cut pieces and use a clamp or zip ties to hold joints while screwing—saves time and frustration!
Can I make tomato cages without screws?
Use galvanized nails, heavy-duty zip ties, or wooden dowels for a rustic look. For extra stability, tie cages with burlap strips or wire. Just ensure connections are tight—tomatoes can get heavy (10+ lbs per plant!) and windy conditions test even the sturdiest designs.
When should I build tomato cages before planting?
Assemble cages 1–2 weeks before transplanting seedlings (or right after planting). This gives roots time to establish while the cage prevents stem damage from bending. Pro tip: Bury the bottom 6 inches of the cage in soil for unshakable support—like a plant-sized anchor!
Why is my tomato cage leaning or collapsing?
Check for loose joints, shallow stakes, or weak wood. Reinforce with diagonal braces or tie the cage to a T-post or fence. If using 1x1 lumber, upgrade to 2x2s—thinner wood bends under vines. For extra wind resistance, space cages 18–24 inches apart and angle stakes outward.
Wrapping up and next steps
Building your own wooden tomato cages is a rewarding project that saves money and adds a personal touch to your garden! With just a few basic materials and some elbow grease, you’ve got a sturdy, custom support system for your towering tomato plants.
Plus, it’s a great way to repurpose scrap wood and reduce waste—win-win!
Now that you’re equipped with the know-how, roll up those sleeves and get building! Once your cages are ready, watch your tomatoes thrive with proper support. Next up? Consider adding a few tips for planting and caring for your tomatoes to maximize your harvest. Happy gardening! 🌱🍅