
Companion Plants
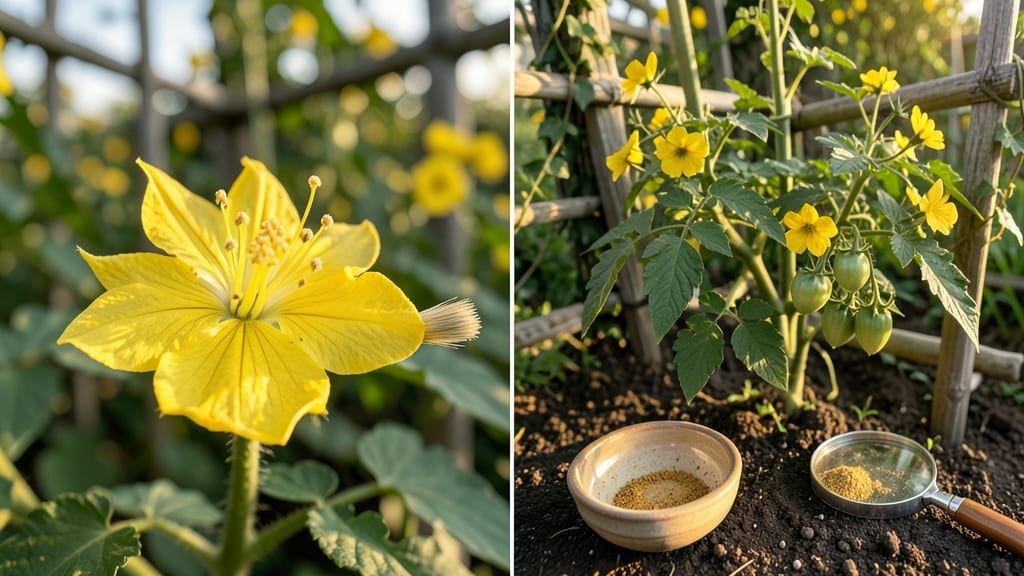
Hand pollinating tomato plants isn't just for greenhouse growers—it's the secret to bigger, more uniform fruits that ripen faster. 🌱 I learned this trick after struggling with small, misshapen tomatoes in my urban greenhouse, where bees and wind just couldn't reach the flowers.
The process is simpler than it sounds, and once you master it, you'll never go back to hoping for natural pollination.
All you need is a small paintbrush, cotton swab, or even a toothpick to transfer pollen from the male anthers to the female stigma. The best time to pollinate is mid-morning when flowers are fully open and pollen is most active.
Most gardeners spend just 5-10 minutes per plant a few times a week, and the results—plump, disease-resistant fruits—are worth every second.
You'll know pollination worked when the flower wilts slightly and a tiny green fruit begins forming within 7-10 days. The fruits will grow heavier and more flavorful, with fewer cracks or deformities.
This method works especially well for cherry tomatoes, beefsteaks, and heirlooms that rely on consistent pollination for maximum yield.
Whether you're growing in a greenhouse, on a balcony, or in a high-rise apartment, hand pollination gives you control over fruit set. The technique scales easily, so you can apply it to a single plant or an entire garden. Here's how to get started without missing a beat.
📚 In This Guide
- What you need
- Instructions
- Tips and common mistakes
- Wrapping up and next steps
What you need
- ● Tomato plants – Healthy, flowering varieties (e.g., cherry, beefsteak, or heirloom). Ensure flowers are open and mature (petals fully unfurled).
- ● Soft-bristle paintbrush – A new, clean brush (e.g., makeup or artist’s brush) with fine, flexible bristles (size #2 or #4). Avoid stiff or frayed brushes!
- ○ Q-tips or cotton swabs – Optional alternative to brushes for delicate flowers (sterilize with rubbing alcohol first!).
- ● Rubbing alcohol (70% isopropyl) – 2–4 oz to sterilize tools between plants (prevents disease spread).
- ● Spray bottle with water – 8–16 oz for misting flowers (keeps pollen moist and sticky).
- ● Notebook & pen – To track pollination dates and observe fruit set progress.
- ● Pruning shears (sterilized) – For trimming excess foliage or dead flowers if needed.
- ● Pollen collection kit – Small vial or container to store excess pollen for later use (great for cloudy days!).
- ● Handheld magnifying glass – Helps spot tiny pollen grains on anthers (especially useful for beginners).
- ● Gloves (nitrile or cotton) – Protects hands from sap and dirt while working.
- ● Timer or phone alarm – Ensures you spend 10–15 seconds per flower for optimal pollen transfer.
Step-by-step guide to hand pollinating tomato plants
Here’s the hands-on method I’ve used to boost fruit set and size—no bees required.
🌱 Step 1: Identify Flowers Ready for Pollination
Wait until flowers open fully but haven’t yet wilted—this is your 24-48 hour window for hand pollination. The perfect flower will have a bright yellow center and fully extended petals. I check my plants daily in the morning; tomatoes bloom early and close by afternoon if unpollinated.
Gently shake the plant near the flowers to dislodge any existing pollen. You’ll see tiny yellow dust on your fingers—this is natural pollen from nearby flowers. If you don’t see any, the flowers may be too young or the plant isn’t producing viable pollen yet. This happens more often in cool weather or with stressed plants.
☀️ Step 2: Collect and Transfer Pollen
Use a small paintbrush or cotton swab to collect pollen from the anthers (the yellow parts in the flower’s center). I prefer a soft-bristle brush because it picks up pollen without damaging delicate flower parts. Gently brush the anthers in a circular motion to release as much pollen as possible.
Transfer the pollen to the stigma (the sticky, cone-shaped tip at the center of the flower). You’ll see it cling immediately—this is your confirmation that pollination worked. If the stigma looks dry or doesn’t hold pollen, the flower may not be ready. I always pollinate 3-5 flowers per cluster to maximize fruit set, especially on determinate varieties that set fruit all at once.
💧 Step 3: Ensure Post-Pollination Care
After pollinating, water the base of the plant deeply but avoid wetting the flowers. Moisture on petals can wash away pollen or encourage fungal diseases. I use a watering can with a narrow spout to direct water precisely to the soil, keeping the foliage dry.
Move plants to a location with full sun (6-8 hours daily) and temperatures above 55°F—these are critical for fruit development. Tomatoes need consistent warmth to metabolize sugars into growing fruit. If nights dip below 50°F, cover plants with lightweight row fabric to protect developing blooms and fruits.
⏰ Step 4: Monitor Fruit Set and Repeat
Check pollinated flowers every 3-5 days—you’ll see the petals drop and a tiny fruit begin to form. I mark these with a small flag or note in my garden journal to track progress. If a flower doesn’t set fruit within 7 days, it may need repollination or the plant is stressed.
Repeat the process every morning for 7-10 days during peak blooming. Determinate tomatoes set fruit in one flush, while indeterminate varieties produce continuously. I always pollinate the newest flowers first—they’ll develop into the largest fruits. Avoid over-pollinating; focus on healthy, open blooms for the best results.
✂️ Step 5: Prune for Optimal Fruit Development
Once you see fruit set, prune suckers (the small shoots that grow between the main stem and branches) to redirect the plant’s energy into existing fruits. I remove any leaves below the first fruit cluster to improve air circulation and reduce disease risk. This isn’t mandatory but helps prevent overcrowding and ensures larger, healthier tomatoes.
Thin fruits if necessary—leave 6-8 inches between tomatoes on indeterminate plants. Overcrowded fruits compete for nutrients and often stay small. I always harvest early in the morning when fruits are firmest, which prevents cracking and extends shelf life.
Tips & tricks for hand pollinating tomato plants
Here’s what nobody tells you about getting the most out of your hand-pollination efforts—these details make all the difference between decent fruit set and a bumper crop.
Timing Secret: The 24-48 hour window for pollination is non-negotiable, but here’s the real trick: morning is always best. Flowers open when temperatures rise, making pollen more viable. I’ve found that pollinating between 7-9 AM gives me the highest success rate—pollen is freshest then, and the stigma is most receptive. If you’re working with determinate varieties that bloom all at once, focus on the newest flowers first; they’ll develop into your largest fruits.
Tool Technique: That soft-bristle brush isn’t just a suggestion—it’s critical. I learned this the hard way after using a stiff makeup brush that tore delicate anthers. The goal is to release pollen without damaging the flower’s reproductive parts. For stubborn pollen, gently tap the brush against the anthers rather than scraping. And here’s a pro move: if you don’t have a brush, a clean cotton swab works perfectly—just avoid the paper part, which can snag pollen.
Environmental Factors: Those 55°F minimum temperatures in the instructions are your baseline, but don’t stop there. Tomatoes need consistent warmth above 60°F for optimal fruit development. I’ve seen plants struggle when nighttime temps dip below 50°F—even with row fabric, the stress shows in smaller fruits. If you’re in a cooler climate, consider using black plastic mulch around plants to raise soil temperatures by 5-10°F. This small change can dramatically improve fruit set and size.
Monitoring System: The 3-5 day check-ins are your early warning system. Here’s how to read the signs: healthy pollinated flowers will show petal drop within 3 days, followed by a tiny fruit bump within 5 days. If you see flowers wilting without setting fruit after 7 days, the plant might be stressed—check for pests, underwatering, or nutrient deficiencies. I keep a small notebook by my plants to track which flowers I’ve pollinated and their progress; it’s become my secret weapon for maximizing yields.
Pro Tips for Hand Pollinate Tomato Plants
- Here’s what nobody tells you about getting the most out of your hand-pollination efforts—these details make all the difference between decent fruit set and a bumper crop.
- Timing Secret: The 24-48 hour window for pollination is non-negotiable, but here’s the real trick: morning is always best.
- Tool Technique: That soft-bristle brush isn’t just a suggestion—it’s critical.
Frequently asked questions
Got questions about hand-pollinating tomatoes? You’re not alone! Here are answers to the most common queries to help you master the technique like a pro.
Do I need to hand-pollinate tomatoes?
Not always! Tomatoes can self-pollinate via wind or insects, but hand-pollination ensures better fruit set, especially in greenhouses, high humidity, or during rainy seasons. It’s a game-changer for determinate varieties or when flowers aren’t getting enough natural help.
When’s the best time to hand-pollinate?
Pollinate in the morning when flowers are fully open and dew is present—this mimics natural conditions. Avoid midday heat or evening dampness, as these can stress flowers. Pro tip: If flowers drop without setting fruit, they may need a second pollination attempt 24–48 hours later!
What if I don’t have a paintbrush or cotton swab?
No worries! Use a toothpick, bobby pin, or even a clean finger (wash hands first!). The key is gently transferring pollen from the anther (yellow dust) to the stigma (sticky center). Just avoid damaging delicate flower parts—gentle = better fruit!
Why aren’t my tomatoes setting fruit after pollination?
Several factors could be at play: temperature extremes (below 55°F or above 90°F), poor nutrition (lack of phosphorus/potassium), or overwatering. Check for blossom end rot (black spots) or blossom drop (flowers falling off). Adjust care and repollinate if needed!
Can I pollinate tomatoes too much?
Over-pollination isn’t harmful, but it’s inefficient. Focus on healthy, open flowers—each tomato needs energy to grow! If you’re seeing too many small fruits, the plant may be overburdened. Prune excess flowers/fruit to redirect resources to larger, juicier tomatoes.
Wrapping up and next steps
Hand pollinating your tomato plants is a rewarding way to boost fruit production and ensure plump, flavorful harvests—especially in less-than-ideal weather. With the right tools (like a soft brush or gentle breath) and a little patience, you’re well on your way to a bountiful garden. 🌱✨
Now that you’re armed with the know-how, give it a try this season and watch your tomatoes thrive! For even better results, experiment with companion planting (like basil or marigolds) to deter pests and enhance growth. Happy gardening!