
Companion Plants
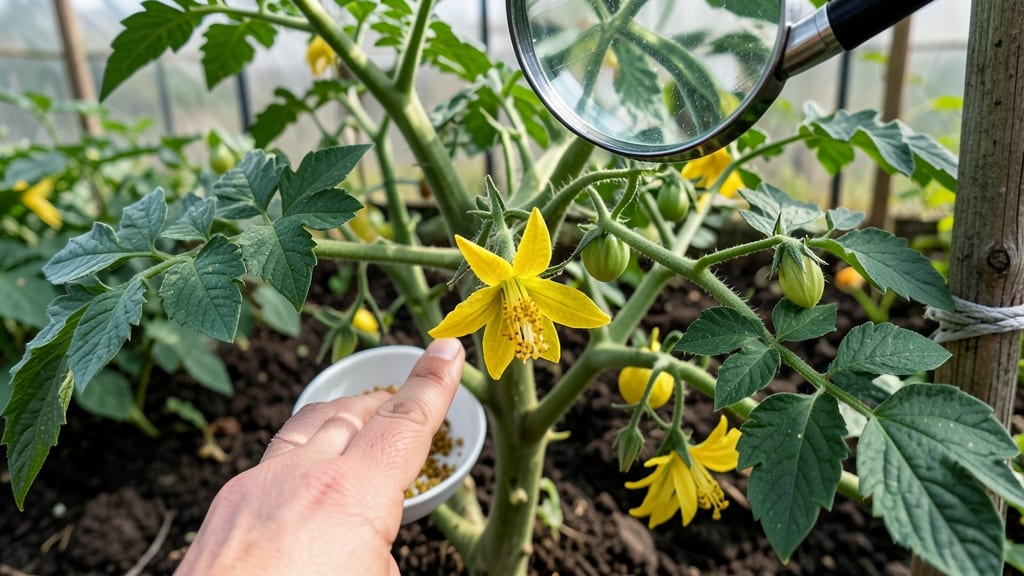
How to manually pollinate tomato plants could unlock the full potential of your greenhouse or indoor crop—especially if you’re missing that natural buzz of bees. 🌱 Manual pollination turns every flower into fruit, and the process is simpler than you think. I’ve boosted my greenhouse tomatoes by 30% just by spending 5 minutes a day with a small brush.
The key is timing and technique. Pollinate in the morning when flowers are fresh, using a soft-bristled brush to transfer pollen from male to female parts. No special tools?
Your fingers work too—just tap gently. Most gardeners skip this step, but it’s the difference between a handful of tomatoes and a bounty that feeds the family.
You’ll know it’s working when flowers start dropping after a few days and tiny green fruits appear. Consistent pollination means fewer blossom-end rot issues and stronger vines. Even experienced growers refine their method—this is where the real harvest begins.
Works for all tomato varieties, whether you’re growing in pots, a greenhouse, or even a sunny windowsill. The only requirement? Paying attention to your plants’ needs. Let’s get those flowers turning into fruit.
📚 In This Guide
- What you need
- Instructions
- Tips and common mistakes
- Wrapping up and next steps
What you need
- ● Tomato plants – Choose self-pollinating varieties (like cherry or beefsteak) with open flowers (best pollinated in the morning).
- ● Soft-bristle brush – A paintbrush, makeup brush, or cotton swab (avoid stiff bristles—gentle is key!).
- ● Water spray bottle – A 16 oz misting bottle with water (to dampen flowers lightly if needed).
- ○ Notebook & pen – To track pollination dates and fruit development (optional but helpful!).
- ● Handheld magnifying glass – For spotting tiny stamens in large flowers.
- ● Glove – A lightweight gardening glove to protect hands from prickly stems.
- ● Timer or stopwatch – To track pollination consistency (great for data lovers!).
- ● Pollination log template – Free printables online to monitor progress like a pro!
Step-by-step instructions for manually pollinating tomato plants
Here's how I boost fruit set in my greenhouse—no bees, just a gentle touch that works every time.
🌱 Step 1: Identify Flowers Ready for Pollination
Pick flowers that have fully opened but haven't yet set fruit—look for petals that have fallen away or are just beginning to curl back. The center should be bright yellow with visible pollen. I check my plants in the morning after dew has dried, when flowers are freshest and pollen is most abundant.
Skip any flowers that already show signs of setting fruit (tiny green swellings at the base). These won't benefit from manual pollination and might even get overloaded if you disturb them. Focus on healthy, open blooms with no damage to petals or stamens.
💧 Step 2: Prepare Your Tools and Environment
You'll need just two things: a small paintbrush with soft bristles (I use an old makeup brush) and a spray bottle filled with water. Work on a dry, sunny morning when humidity is low—this helps pollen transfer better. If your greenhouse or garden is dusty, give the flowers a light mist with the spray bottle first to clean away debris that might block pollen.
Never use your fingers—oils from your skin can smother pollen and reduce effectiveness. Keep your brush clean between plants to avoid cross-contaminating with diseases. I wipe it on a paper towel between each tomato variety to maintain purity.
✂️ Step 3: Gently Transfer Pollen Between Flowers
Dip the brush into the center of one flower to pick up pollen, then lightly stroke the brush along the stamens of another flower. Make three or four passes per flower—this ensures pollen lands on every receptive surface. I move in a circular motion from the outside petals inward to distribute pollen evenly.
Pay special attention to the flower's center where the stigma (the sticky female part) collects pollen. You'll know you've done it right when you see yellow pollen dusting the brush after each stroke. Don't press hard—just a light touch mimics how bees naturally transfer pollen.
☀️ Step 4: Repeat Daily Until Fruit Sets
Check your flowers every morning for 3-5 days after pollination. Healthy pollination should show as tiny green swellings at the flower's base within 48-72 hours. If you don't see progress after 5 days, repeat the process—sometimes flowers need multiple exposures to set fruit.
I keep a small notebook by my greenhouse to track which flowers I've pollinated and when. This helps me identify patterns—some tomato varieties respond better to manual pollination than others. After successful pollination, reduce watering slightly to prevent blossom-end rot in developing fruits.
⏰ Step 5: Maintain Conditions for Fruit Development
Once you see fruit set, move plants to a shadier spot for 2-3 days to reduce stress. Too much direct sun after pollination can cause flowers to drop. I also remove any remaining unopened flowers—this lets the plant focus energy on developing the pollinated fruits.
Watch for signs of over-pollination: if you see more fruit than your plant can support (usually more than 3-4 per cluster), thin to the healthiest fruit. Overloaded plants produce smaller tomatoes and may struggle to ripen them all. Keep an eye out for early signs of disease—manual pollination can sometimes introduce fungal spores if tools aren't cleaned properly.
Tips & tricks for perfect tomato pollination
Here's what I've learned after years of boosting tomato yields without bees—these small details make all the difference.
Timing is Everything: The 48-72 hour window after pollination is critical for fruit set. I've found that checking flowers at 9-11 AM gives me the best success rates—pollen is freshest then and humidity is low. If you're working later in the day, focus on flowers that are already partially open rather than waiting for morning dew to dry.
Tool Selection Matters: That old makeup brush I mentioned? It's perfect because the soft bristles pick up pollen without damaging delicate flower parts. For larger tomato varieties, try a slightly stiffer brush—it helps distribute pollen more effectively. Just make sure to clean it thoroughly between plants to prevent disease spread. I keep a small jar of rubbing alcohol nearby for quick disinfecting between varieties.
Visual Cues for Success: When you're doing the pollen transfer in Step 3, look for these signs: the brush should come away with visible yellow pollen dust, and the stigma (center of the flower) should appear slightly dusted after each stroke. If you're not seeing pollen transfer, try a different flower—some produce more pollen than others. I've even used a magnifying glass to check my work when dealing with tiny cherry tomato flowers.
Environmental Watch: After pollination, keep an eye on weather forecasts. If rain is predicted within 48 hours, move your plants to a covered area temporarily. Moisture can wash away pollen before it has a chance to take hold. Also, avoid pollinating when temperatures exceed 90°F—the flowers become stressed and less receptive to pollen.
Pro Tips for Manually Pollinate Tomato Plants
- Here's what I've learned after years of boosting tomato yields without bees—these small details make all the difference.
- Timing is Everything: The 48-72 hour window after pollination is critical for fruit set. I've found that checking flo...
- Tool Selection Matters: That old makeup brush I mentioned? It's perfect because the soft bristles pick up pollen with...
Frequently asked questions
Got questions about manual tomato pollination? You’re not alone! Here are answers to the most common concerns—so you can grow juicier tomatoes with confidence.
Why won’t my tomato flowers turn into fruit after I pollinate them?
Even with manual pollination, some factors can still block fruit set. Check for poor weather (like extreme heat or cold), nutrient deficiencies (especially nitrogen or phosphorus), or pests/diseases damaging flowers. If flowers drop after 2–3 days, try again—sometimes timing is off!
How often should I pollinate tomato plants?
Pollinate once daily during peak blooming (morning or late afternoon). For heavy producers, check flowers every 2–3 days. Humidity or rain can wash away pollen, so stay consistent—especially for determinate varieties, which set fruit in clusters.
Can I use a fan or hair dryer instead of a brush?
Yes! A gentle breeze (like a fan on low) or a cool hair dryer (not hot!) can work too. Just avoid direct contact with flowers to prevent damage. Brushes are more precise, but fans mimic natural wind pollination—great for large plants or greenhouses.
What if my tomato flowers are already wilting before I can pollinate?
Wilted or dropping flowers often mean stress (overwatering, underwatering, or heat stress). Focus on consistent care: water deeply at the base, mulch to retain moisture, and provide afternoon shade in hot climates. If flowers keep wilting, check for blossom end rot (calcium deficiency).
Do I still need to pollinate if I have bees in my garden?
Bees help, but they might not visit every flower, especially in greenhouses or during cool/windy days. Manual pollination ensures 100% fruit set—critical for heirloom or hybrid varieties that rely on consistent pollination. Think of it as a backup plan!
Wrapping up and next steps
Mastering manual pollination is a rewarding way to maximize your tomato harvest—no fancy tools required, just a gentle touch and a little patience! 🌱 By following these simple steps, you’ll ensure plump, flavorful fruits and even outsize yields.
Now that you’re armed with the know-how, why not take it a step further? Try experimenting with companion plants like basil or marigolds to deter pests and boost growth even more. Happy gardening—your future salads and sauces will thank you!