
Watering
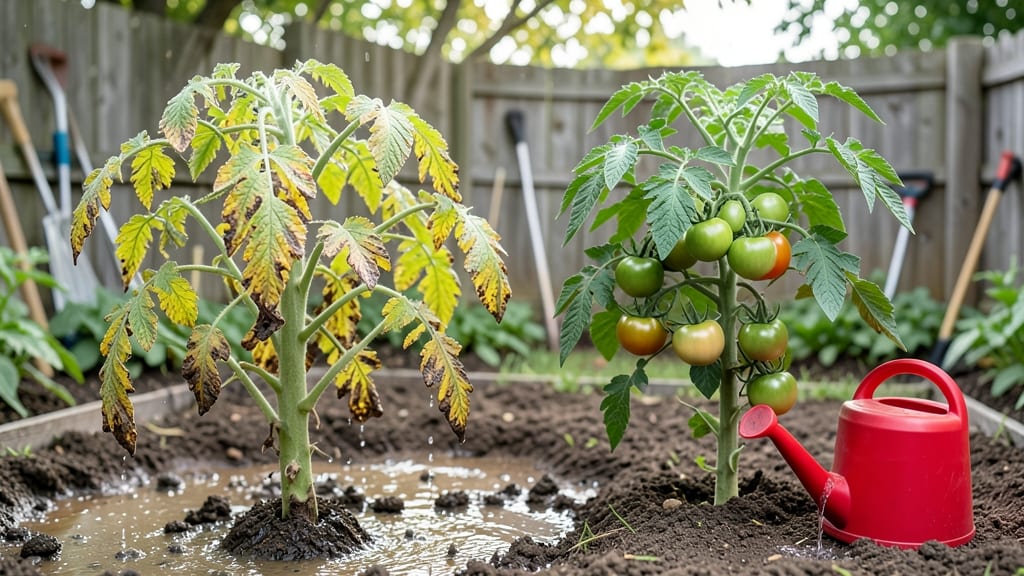
Your tomato plants’ yellow leaves aren’t a death sentence—they’re just screaming for a watering timeout. 🌱 Overwatering drowns roots, starves plants of oxygen, and turns lush vines into sad, wilted sticks. The good news?
Fixing it takes less than an hour and three targeted steps that actually work (no wishful thinking). First, stop watering immediately and let the soil dry out completely—this prevents root rot from spreading. Then, improve drainage by mixing in compost or perlite to break up heavy soil.
Within a week, you’ll see new green growth as roots recover and regain their appetite for water. By adjusting your schedule (deep watering every 2-3 days instead of daily light sprinkles), you’ll avoid this mess next season.
The key is checking soil moisture with your finger—if the top inch is damp, wait. Healthy tomatoes thrive on consistency, not chaos. This fix works for container plants, raised beds, or in-ground gardens. No fancy tools, just smarter habits. Let’s get those vines back to their vibrant best!
Root Causes Of Excess Moisture
Overwatering tomato plants may seem like a harmless gardening mistake, but it can quickly turn into a recipe for disaster—especially if you’re not aware of the underlying reasons why it happens.
Understanding these causes is the first step to preventing soggy soil and unhealthy plants. Let’s break down the most common culprits and why they lead to waterlogged roots.
One of the biggest reasons tomato plants suffer from overwatering is compacted or poorly draining soil. If your garden bed or containers don’t allow excess water to escape, roots sit in a perpetually wet environment, cutting off oxygen and leading to root rot. Here’s why this happens:
- Clay-heavy soil holds water like a sponge, preventing it from draining naturally. Without amendments like compost or sand, water pools around roots instead of seeping away.
- Lack of organic matter reduces soil porosity. Healthy soil needs a mix of sand, silt, and organic material (like peat moss or coconut coir) to create air pockets for drainage.
- Improper container choices (e.g., small pots without drainage holes) trap water, mimicking the effects of clay soil. Even "self-watering" pots can over-saturate if not monitored.
Pro Tip: 💡 Before planting, perform a simple drainage test—fill a container with water and time how long it takes to drain. If it takes more than 10–15 minutes, amend your soil or upgrade your pots.
Skipping a watering day and then drowning your plants the next can create a yo-yo moisture cycle, which is just as harmful as steady overwatering. Here’s how inconsistent habits lead to trouble:
- Surface evaporation tricks gardeners into thinking plants need more water than they do. A quick topsoil check can be misleading—stick your finger 2 inches deep; if it’s dry, water lightly. If it’s damp, wait.
- Overcompensating after drought leads to sudden, heavy watering. Tomato roots are shallow and spread widely; a deep but infrequent watering (1–2 times per week) is better than daily shallow soaks.
- Ignoring weather changes—like sudden rain or humidity spikes—can cause overwatering if you don’t adjust your schedule. Use a rain gauge or weather app to track natural moisture.
Pro Tip: ✨ Set a timer or use a moisture meter to create a consistent routine. Early morning (6–10 AM) is the best time to water, as it reduces evaporation and fungal risks.
Tomatoes in pots are far more vulnerable to overwatering than in-ground plants because containers dry out unevenly and lack natural drainage pathways. Here’s what trips up container gardeners:
- Small or shallow pots dry out quickly but can’t recover if overwatered. A 5-gallon pot is the minimum for one tomato plant; larger pots (10+ gallons) reduce frequency but require deeper watering.
- Lack of drainage holes turns pots into water traps. Even "drip-proof" pots need occasional checking—water should flow out within 10 minutes of soaking.
- Grouped containers create microclimates where humidity rises, slowing evaporation. Space pots at least 12 inches apart to improve airflow.
Pro Tip: 🌡️ Weigh your pots! Lift them before watering—if they feel light, it’s time to water. If they’re heavy, wait. This trick works better than guessing.
Too much fertilizer—especially high-nitrogen or synthetic blends—can make tomato plants thirstier and more prone to overwatering. Here’s the connection:
- Nitrogen boosts leafy growth, increasing water demand. Plants with lush foliage but weak roots can’t handle excess moisture, leading to yellowing or wilting.
- Salt buildup from fertilizers disrupts soil structure, making it harder for water to drain. Always flush soil with water after fertilizing to prevent accumulation.
- Over-fertilized seedlings develop weak root systems, making them susceptible to rot when overwatered later in the season.
Pro Tip: 🎯 Use a balanced fertilizer (like 10-10-10) and follow the label’s dilution instructions. For organic gardeners, compost tea or worm castings provide nutrients without the risk of salt buildup.
Now that you know the why behind overwatering, the next step is fixing it—without losing your prized tomato harvest. Stay tuned for actionable solutions in the following sections!
Fixing overwatered tomato plants
Overwatering your tomato plants can feel like a disaster—wilting leaves, yellowing foliage, and even root rot—but the good news is that with the right fixes, your plants can bounce back stronger than ever. The key is identifying the root cause (literally and figuratively) and taking action fast.
Below are practical, step-by-step solutions tailored to the most common overwatering issues, plus prevention tips to keep your tomatoes thriving.
---
Cause: Soggy soil deprives roots of oxygen, leading to yellowing leaves. Fix: 1. Stop watering immediately—let the top 1–2 inches of soil dry out before watering again. 2. Check your soil—stick your finger in the soil; if it’s damp past 2 inches, hold off on watering. 3. Improve drainage—amend heavy or compacted soil with perlite, sand, or compost to help water flow away from roots. 4. Repot if needed—if your container lacks drainage holes, transfer the plant to a pot with them.
Prevention Tip: 💡 Use a moisture meter or the "squeeze test" (gently press soil; if it’s like a damp sponge, wait to water).
---
Cause: Overwatering weakens roots, causing them to struggle to absorb nutrients. Fix: 1. Trim damaged foliage—snip yellow or mushy leaves with clean scissors to redirect energy to healthy growth. 2. Fertilize lightly—add a balanced, water-soluble fertilizer (like 10-10-10) to replenish lost nutrients. 3. Water deeply but less often—give your plant a long, slow drink once the soil is dry, then let it dry between waterings. 4. Mulch to retain moisture—apply 2–3 inches of straw or shredded leaves to keep roots consistently moist without drowning them.
Pro Tip: ✨ If your plant is severely wilted, submerge the pot in 1 inch of water for 10–15 minutes to rehydrate roots gently.
---
Cause: Excess moisture creates the perfect breeding ground for fungus and rot. Fix: 1. Remove infected soil—if roots look black, mushy, or smell foul, trim away diseased roots with sterilized pruners. 2. Disinfect the pot—scrub with a 10% bleach solution (1 part bleach to 9 parts water) or hydrogen peroxide (3%). 3. Repot in fresh, sterile soil—use a lightweight potting mix with added sand or vermiculite to prevent compaction. 4. Apply fungicide—spray with copper fungicide or neem oil to stop fungal spread.
Prevention Tip: 🌡️ Water in the morning so foliage dries quickly, reducing humidity that fuels fungus.
--- To keep your tomatoes healthy, adopt these watering best practices: - Water at the base—avoid wetting leaves to prevent disease. - Use drip irrigation or soaker hoses—delivers water directly to roots without oversaturating. - Monitor weather—adjust watering during rain or high humidity. - Choose the right pot—ensure containers have drainage holes and are the appropriate size (not too large).
Quick Checklist: ✅ Soil test – Should feel like a damp sponge, not a swamp. ✅ Container check – Drainage holes? Yes! ✅ Watering schedule – Less often, but deeply.
--- By addressing the specific symptoms your tomato plants show and adjusting your watering routine, you’ll see a full recovery in 1–2 weeks. And once your plants are back in tip-top shape, you’ll be rewarded with juicy, flavorful tomatoes all season long! 🍅🔥
Frequently asked questions about overwatering tomato plants
How can I tell if my tomato plant is overwatered vs. underwatered?
Check the soil first: if the top 2 inches are damp but the roots feel soggy or smell foul, you're overwatering. Look for yellowing lower leaves, wilting despite wet soil, or black/mushy roots. Underwatered plants have dry soil, crispy edges, and droopy leaves that perk up after watering.
Will my tomato plant recover from overwatering?
Yes, if you act fast! Stop watering immediately and let the soil dry completely. Trim any yellow/mushy leaves, improve drainage with perlite, and repot if needed. With proper care, plants often bounce back in 1-2 weeks, though severe root rot may require replacing the plant.
What's the best way to water tomato plants to avoid overwatering?
Water deeply every 2-3 days (or when top 1-2 inches of soil are dry) using a soaker hose or drip irrigation. Water at the base in the morning, and avoid wetting leaves. For containers, ensure they have drainage holes and never let them sit in saucers of water.
Can I use coffee grounds to help with overwatered tomato plants?
Yes, but use them carefully! Mix 1 cup of used coffee grounds into the soil to improve drainage and provide nutrients. Too much can compact soil—stick to 10% coffee grounds mixed with compost. They also help repel pests and add organic matter to prevent future overwatering issues.
Why do my tomato plants get overwatered in pots but not in the ground?
Containers dry out unevenly and lack natural drainage. Small pots hold moisture longer, while in-ground plants benefit from soil's natural absorption. Use pots with drainage holes and upgrade to 5+ gallons per plant. Weigh your pots—if they feel heavy, they're too wet!