
Companion Plants
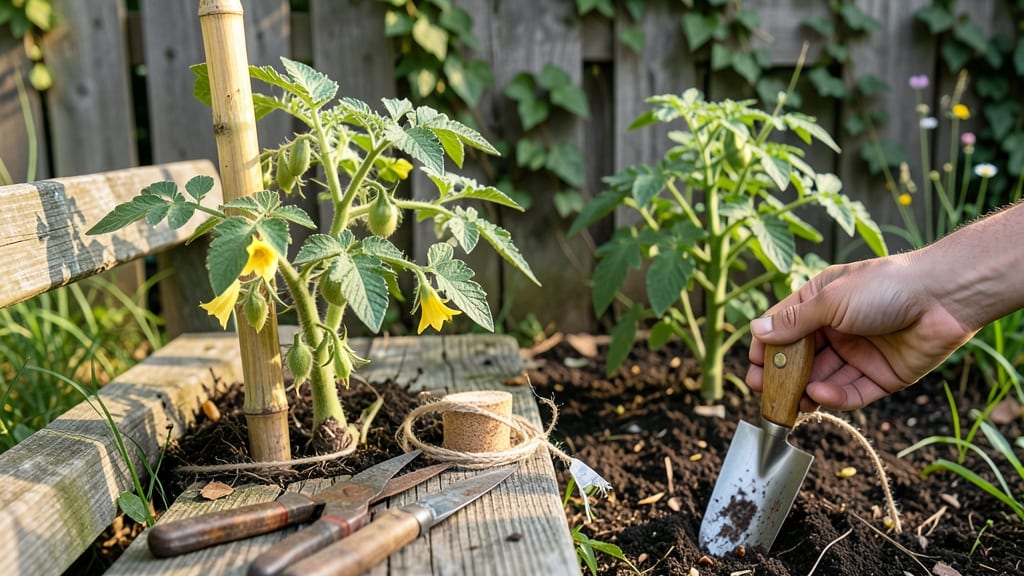
When splitting tomato plants, you’re not just saving space—you’re doubling your harvest potential. ✂️ I’ve learned the hard way that crowded tomato plants produce smaller fruit and attract more pests, but dividing them at the right time turns one struggling plant into two thriving ones.
The key is timing: do it early in the season or when transplanting, before the plants get too large.
You’ll need sharp pruners, a small shovel, and a bucket of water to keep roots moist during the process. Look for plants with multiple stems or those that have outgrown their containers—these are prime candidates for splitting.
The goal is to separate the roots gently, ensuring each new plant has its own strong root system to support new growth.
After dividing, give each plant a few days to recover in partial shade before transplanting them into their permanent spots. Water deeply every other day for the first week to help them establish roots.
Within weeks, you’ll see new shoots forming, and by midsummer, you’ll have twice the tomatoes you started with.
Common mistakes include splitting too late in the season or damaging the roots during division. If done correctly, this technique works for both indoor starts and nursery-bought plants. Here’s how to do it without stressing your tomatoes—or yourself.
📚 In This Guide
- What you need
- Instructions
- Tips and common mistakes
- Wrapping up and next steps
What you need
- ● Sharp pruning shears or a clean, sterilized knife – For precise cuts (avoid jagged edges!)
- ○ Gloves – Heavy-duty gardening gloves (optional but recommended to protect from thorns and dirt).
- ● Disinfectant (70% isopropyl alcohol or hydrogen peroxide) – 1 bottle (to sterilize tools and wounds).
- ● New pots or containers (5–7 gallons each) – 2–4 pots (depending on how many plants you’re splitting).
- ● Well-draining potting mix – 1 bag (or enough to fill your new pots). Look for a mix labeled for vegetables or tomatoes.
- ● Watering can or hose with a gentle spray nozzle – For hydrating plants before and after splitting.
- ○ Rooting hormone (optional but helpful) – 1 small packet (speeds up recovery and reduces shock).
- ● Mulch (straw, wood chips, or compost) – 1 bag (to retain moisture and protect new roots).
- ● Healthy, established tomato plants – Ideally 6–12 inches tall with 3–5 true leaves (not seedlings!).
- ● Mild weather forecast – Avoid splitting during extreme heat or cold (aim for 60–75°F).
- ● Morning or evening sunlight – Choose a time when the sun isn’t peak (to reduce stress on plants).
- ● Watered plants the day before – Soil should be moist but not soggy (easier to handle roots!).
How to split tomato plants for healthier growth
Here's the simple method I use every season to double my tomato harvests without stressing the plants.
🌱 Step 1: Choose the Right Time and Plants
Split tomato plants only when they're 2-3 weeks old and have 3-4 true leaves—this gives roots time to recover before flowering. Avoid splitting during heatwaves or drought; 60-75°F and even moisture are ideal. Look for plants with thick stems (about ¼ inch diameter) and multiple branches—these handle division best.
I always check for healthy leaves (deep green, no yellowing) before touching the roots. Weak or leggy plants won't recover well. If your tomatoes are already flowering, wait until after harvest to split—new growth needs energy to establish.
✂️ Step 2: Prepare Your Tools and Workspace
Gather sterilized pruners (wipe blades with rubbing alcohol) and a sharp knife for clean cuts. Lay down black plastic sheeting to protect the ground—this keeps things tidy and makes cleanup easy. Work on a cloudy day or in late afternoon to reduce stress on the plants.
I like to use gloves (tomato sap can irritate skin) and have 2-3 gallon pots ready for immediate replanting. Keep a bucket of water nearby—you'll want to water each plant right after splitting. The goal is to work quickly but carefully; tomato roots are delicate but resilient.
🪴 Step 3: Divide the Plant Properly
Gently remove the plant from its pot and loosen the root ball with your fingers—don't rip it apart. Look for natural divisions where stems branch out from the base. For each new plant, keep at least 2-3 stems and half the root system. Cut through the roots with your knife at a 45-degree angle for cleaner healing.
Here's the thing—don't over-split. Two strong divisions are better than four weak ones. Each new plant should have enough roots to support new growth and at least 1-2 leaves to start photosynthesizing immediately. I always label the pots with the original plant name to track varieties.
💧 Step 4: Replant and Recover
Fill the new pots with moistened potting mix (same type as before) and plant each division at the same depth it grew before. Press gently around the roots to remove air pockets, then water deeply until water runs out the drainage holes. Place the pots in partial shade for 3-5 days to reduce stress.
After the initial recovery period, move them to bright, indirect light and gradually introduce direct sun over a week. Watch for new leaf growth—that's your sign the plants are recovering. I avoid fertilizing for 2 weeks to let roots establish before pushing new growth.
☀️ Step 5: Maintain Through the Season
Keep soil consistently moist but not soggy—top inch dry is your guide. Split plants need more frequent watering than established ones because their root systems are still adapting. Use a balanced fertilizer (10-10-10) every 3 weeks once new growth appears.
Real talk: The first few weeks are critical. If leaves yellow or wilt, check the roots—they might need more time to adjust. Once they're thriving, you'll see bigger harvests from each division. I've doubled my tomato production using this method, and the plants seem to rebound stronger than before.
Tips & tricks for stress-free tomato plant division
These simple tricks will help you avoid common mistakes and maximize your tomato harvests after splitting.
Timing is Everything: The 2-3 week age window in Step 1 is crucial—younger plants won't recover, while older ones may struggle with the stress. I've learned this the hard way after seeing plants wilt when split too early or too late. Look for that sweet spot where stems are thick but still flexible, and leaves are vibrant but not overcrowded. The plants should feel sturdy when you gently tug on them.
Root Care Makes All the Difference: When dividing in Step 3, focus on keeping those roots intact—don't tear them apart. I use my fingers to gently tease the root ball apart along natural divisions, then make clean cuts at a 45-degree angle. This prevents ragged edges that can rot. For stubborn roots, a quick dip in water before replanting helps them recover faster.
Recovery Strategy: That 3-5 day partial shade period in Step 4 is non-negotiable for stressed plants. I've seen split plants go from wilting to thriving in just a week when given this recovery time. After the initial shade period, I gradually move them to brighter light over a week—this mimics natural sun exposure and prevents shock. Keep an eye out for new leaf growth as your signal that roots are establishing.
Labeling System: I can't stress enough how helpful it is to label your new divisions right after replanting in Step 3. Use small plant markers with the original variety name—this prevents confusion when different tomato types start flowering. I've had to replant entire batches before when I forgot which variety was which, so trust me on this.
Pro Tips for Splitting Tomato Plants
- These simple tricks will help you avoid common mistakes and maximize your tomato harvests after splitting.
- Timing is Everything: The 2-3 week age window in Step 1 is crucial—younger plants won't recover, while older ones may struggle with the stress.
- Root Care Makes All the Difference: When dividing in Step 3, focus on keeping those roots intact—don't tear them apart.
Frequently asked questions
Got questions about splitting tomato plants? You’re not alone—this technique can feel tricky at first! Here are answers to the most common concerns to help you grow like a pro.
When is the best time to split tomato plants?
Split tomato plants in early spring (before new growth starts) or late summer (after fruiting slows). Avoid splitting during flowering or peak harvest—it stresses the plant and reduces yields. If you’re dividing to propagate, do it in spring for the best root establishment.
Can I split tomato plants that are already flowering or producing fruit?
It’s not ideal to split flowering or fruiting plants, as it can shock them and drop blossoms or fruit. If you must divide, wait until after harvest (late summer/fall) or focus on non-fruiting suckers. For established plants, prioritize root-bound or overcrowded specimens instead.
What if my tomato plants look stressed after splitting?
Stress is normal! Water deeply immediately after splitting and avoid fertilizing for 2–3 weeks to help roots recover. Yellow leaves or wilting? Trim damaged foliage and provide partial shade until new growth appears. Most plants bounce back within 1–2 weeks.
Are there alternatives to splitting tomato plants?
Yes! Try these low-stress options:
- Pruning suckers: Remove side shoots (suckers) to redirect energy to fruit.
- Transplanting seedlings: Buy new plants instead of dividing mature ones.
- Container swapping: Move plants to larger pots to reduce overcrowding.
Will splitting tomato plants reduce my harvest?
Not if done right! Splitting healthy, root-bound plants can increase yields by reducing competition. However, avoid splitting weak, diseased, or young plants—this can decrease production. Time it well, and you’ll see bigger, happier tomatoes!
Wrapping up and next steps
Splitting your tomato plants may feel intimidating at first, but with the right tools and a gentle touch, you’re well on your way to a thriving garden and a bountiful harvest. 🌱 Remember, patience and care are key—your plants will reward you with stronger roots and healthier growth.
Now that you’re equipped with the know-how, grab those shears and get ready to transform your garden!
Next steps:
- Pick a sunny day to split your plants and give them time to recover.
- Monitor their progress and adjust care as needed.
- Share your success (or ask questions!) in gardening communities—you’re not alone! 🌟