Vegetables
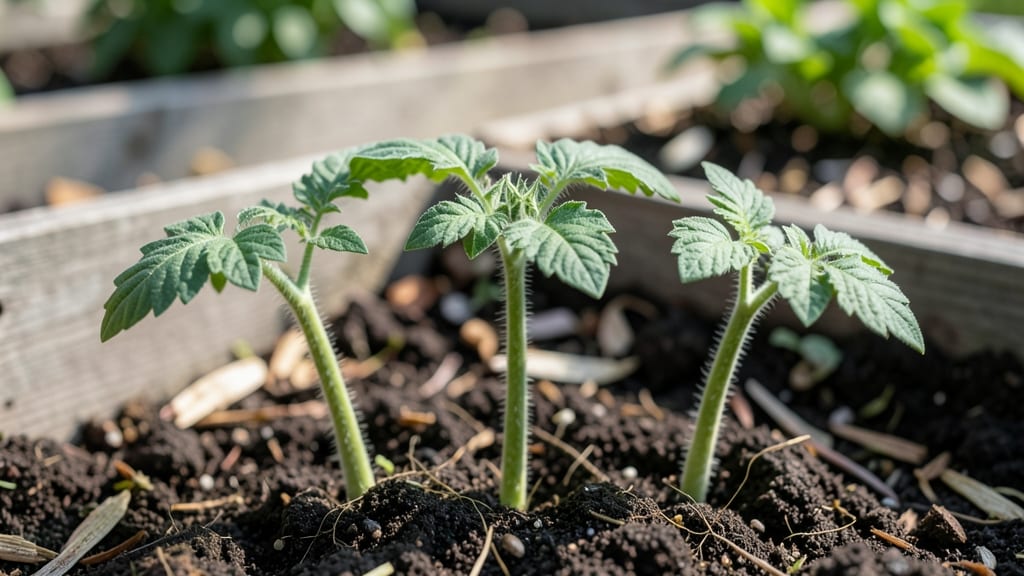
Caring for tomato seedlings means the difference between stocky, thriving plants and leggy, weak transplants that struggle to recover. 🌱 I’ve nursed seedlings from sad little sprouts to robust, flower-ready plants—here’s how to skip the trial and error and get it right the first time.
The secret isn’t complicated: consistent light, gentle watering, and the right temperature keep seedlings strong. Too much water? Damping off strikes. Not enough light? They stretch toward the sun like they’re auditioning for a horror movie.
Master these three things, and your seedlings will be ready for transplanting in 6-8 weeks with no stress. You’ll end up with plants that burst into growth the moment they hit the garden, producing heavier fruit earlier than anything you’d buy at a nursery.
The key is watching for those first true leaves—then you know you’re on the right track. This works for all tomato varieties, from cherry to heirloom slicers, and even saves you money compared to buying transplants. Let’s get those seedlings growing right.
📚 In This Guide
- What you need
- Instructions
- Tips and common mistakes
- Wrapping up and next steps
What you need
- ● Seedling trays or pots: 2–4 inch deep containers (6–12 cells per tray) or 4–6 inch pots for individual seedlings. Biodegradable pots are a great eco-friendly option!
- ● Seed-starting mix: Lightweight, sterile potting mix (avoid garden soil—it’s too dense!). Look for a mix labeled for seedlings or vegetable starts.
- ● Tomato seeds: Choose heirloom or hybrid varieties suited to your climate (e.g., Early Girl, Cherry Roma, or Beefsteak). Start seeds 6–8 weeks before your last frost date.
- ● Grow lights or sunny windowsill: Seedlings need 12–16 hours of light daily. A full-spectrum LED grow light (12–24 inches above seedlings) works best.
- ● Watering can or spray bottle: A gentle spray nozzle prevents disturbing delicate seedlings.
- ● Fertilizer: A balanced, water-soluble fertilizer (e.g., 5-5-5 or 10-10-10) or a seedling-specific formula like fish emulsion (diluted to half-strength).
- ● Humidity dome or plastic wrap: Helps retain moisture while seeds germinate (remove once sprouts appear).
- ○ Thermometer (optional but helpful): Ideal soil temp for germination: 70–85°F.
- ● Heating mat: Speeds up germination for slow starters (keep soil at 75–85°F).
- ● pH testing kit: Tomato seedlings thrive in soil with a pH of 6.0–6.8.
- ● Plant labels: Mark trays with seed variety and date for easy tracking.
- ● Insecticidal soap or neem oil: Preemptive strike against fungus gnats or aphids.
- ● Tweezers or small spoon: For delicate seedling transplants later on.
Step-by-step guide to nurturing healthy tomato seedlings
Here’s how to transform fragile sprouts into sturdy, disease-resistant plants ready for the garden.
🌱 Step 1: Provide Consistent Warmth and Light
Tomato seedlings thrive at 70-75°F during the day and 60-65°F at night. If your home runs cooler, use a seedling heat mat beneath trays to maintain warmth—this prevents leggy growth and speeds germination. Place seedlings under grow lights (14-16 hours daily) 2-3 inches above the tallest plant. You’ll know the light is working when seedlings grow compact and dark green, not stretched and pale.
Rotate trays quarter-turn daily so seedlings don’t lean toward the light. Watch for first true leaves (the second set after cotyledons) to appear—this signals it’s time to adjust light height. If leaves touch the fixture, raise it immediately to avoid scorching.
💧 Step 2: Water Gently and Monitor Soil Moisture
Water seedlings bottom-up by placing trays in ½-inch of water for 10-15 minutes. This encourages deep root growth and prevents fungal diseases like damping-off. You’ll see even moisture without soggy soil—never let the surface dry out completely, but avoid puddles. Overwatering suffocates roots, while underwatering causes stunted growth.
Use a spray bottle for occasional misting on hot days, but avoid wetting leaves—this invites fungal spores. Check soil moisture by pressing a finger ½-inch deep; if it feels dry, water again. Seedlings with yellow lower leaves often need less water, not more.
☀️ Step 3: Fertilize Lightly and Strengthen Stems
Wait until first true leaves appear before fertilizing. Use a balanced liquid fertilizer (5-5-5 or 10-10-10) diluted to ¼ strength—too much salt burns tender roots. Apply to soil (not leaves) and water immediately to distribute nutrients evenly. You’ll notice darker green leaves and thicker stems within a week.
To prevent weak stems, pinch off the lower leaves touching the soil. This improves airflow and reduces disease risk. If seedlings flop over, gently tuck them into the soil at the base—this encourages stronger anchoring. Avoid disturbing roots unless necessary.
⏰ Step 4: Harden Off Before Transplanting
Start 2 weeks before your last frost date by moving seedlings outside for 1-2 hours daily in a shaded, sheltered spot. Gradually increase exposure, ending with full sun by day 10. You’ll see seedlings adjust color from pale to vibrant green—this confirms they’re ready for the garden.
Transplant on an overcast afternoon to reduce stress. Bury seedlings deeper than the original soil line—this promotes root growth along buried stems. Water deeply at the base, and avoid wetting foliage to prevent disease. Mulch with 1-2 inches of organic matter to retain moisture and suppress weeds.
Tips & tricks for thriving tomato seedlings
Real talk: Growing tomato seedlings from scratch is one of the most rewarding gardening experiences—but it takes attention to detail. Here's what nobody tells you about keeping those fragile sprouts strong and healthy.
Lighting Strategy: The 14-16 hours of daily light is non-negotiable for compact growth, but here's the secret: position your lights so they're just 2-3 inches above the tallest seedling. As they grow, you'll need to raise them every 5-7 days—this prevents that classic "leggy" look that signals weak stems. I use a simple ruler taped to my light fixture to track height adjustments.
Temperature Matters: Those 70-75°F daytime temps are critical, but nighttime can make or break your seedlings. If your home dips below 65°F at night, a simple seedling heat mat (even a cheap one from the garden center) works wonders. Pro tip: Place a thermometer near your seedlings to monitor temps—fluctuations wider than 10°F can stress the plants, leading to slower growth.
Watering Wisdom: The bottom-up watering method is genius, but timing is everything. Those 10-15 minutes in ½-inch of water should leave the soil evenly moist—not soggy, not dry. I test this by lifting a tray: if it feels heavy but not waterlogged, you've nailed it. And here's what nobody tells you—yellow lower leaves usually mean you're overwatering, not underwatering. The roots need oxygen too!
Transplanting Technique: Burying seedlings deeper than their original soil line might seem counterintuitive, but it's a game-changer. This buried stem becomes a powerhouse of new root growth, creating a stronger plant. Just make sure to remove any lower leaves that would end up below soil level—they'll rot and invite disease.
Pro Tips for Tomato Seedlings Care
- Real talk: Growing tomato seedlings from scratch is one of the most rewarding gardening experiences—but it takes attention to detail.
- Lighting Strategy: The 14-16 hours of daily light is non-negotiable for compact growth, but here's the secret: position your lights so they're just 2-3 inches above the tallest seedling.
- Temperature Matters: Those 70-75°F daytime temps are critical, but nighttime can make or break your seedlings.
Frequently asked questions
Got questions about nurturing your tomato seedlings into strong, thriving plants? You’re not alone! Here are some of the most common concerns—and their straightforward solutions—to keep your little green friends on track for a bountiful harvest.
How do I know when my tomato seedlings are ready to transplant?
Seedlings are ready when they’ve developed 2-3 sets of true leaves (not the first seed leaves) and are about 3-4 inches tall. Harden them off for 5-7 days by gradually exposing them to outdoor conditions (sun, wind, and cooler temps) to avoid shock.
Why are my tomato seedlings leggy or stretching toward the light?
Leggy seedlings happen when they don’t get enough light or are crowded. To fix it, move them closer to a sunny window or grow light (12-16 hours/day) and thin them if needed. Bury 1/3 of the stem when transplanting to encourage root growth.
Can I transplant tomato seedlings too early in the season?
Yes! If frost is still a risk, wait until after the last frost date (check your local USDA zone). Use row covers or cold frames to protect young plants if needed. Tomatoes thrive in warm soil (60°F+), so rush only if you’re prepared to shield them from chilly nights.
What should I do if pests like aphids or cutworms attack my seedlings?
Act fast! For aphids, spray with soapy water or introduce ladybugs. For cutworms, wrap stems with cardboard collars or use diatomaceous earth as a barrier. Inspect seedlings daily and remove pests by hand if possible.
How often should I water tomato seedlings, and how do I avoid overwatering?
Keep soil consistently moist but not soggy—water when the top inch feels dry. Use a spray bottle or drip irrigation to avoid wetting leaves (which can cause disease). Seedlings need less water than mature plants, so err on the side of caution.
Can I use homemade fertilizers for tomato seedlings, or should I stick to store-bought?
Both work! For a gentle boost, try compost tea, banana peels (for potassium), or diluted fish emulsion. Avoid over-fertilizing—seedlings need low nitrogen (use a 5-10-10 or 10-10-10 ratio) to prevent leggy growth. Test soil first if unsure!
Wrapping up and next steps
Caring for tomato seedlings is all about patience, consistency, and a little green thumb love! 🌱 With the right balance of sunlight, water, and nutrients, your seedlings will grow into robust plants ready for transplanting—and eventually, a bountiful harvest. Don’t let setbacks discourage you: even the most experienced gardeners face challenges, but each lesson brings you closer to success.
Now that you’re armed with the know-how, it’s time to roll up your sleeves and get growing! Start by transplanting your seedlings outdoors (or under grow lights) once they’ve developed their second set of true leaves.
Keep an eye on their progress, and soon, you’ll be savoring the fruits of your labor—literally! Happy gardening! 🍅✨