
Lawn
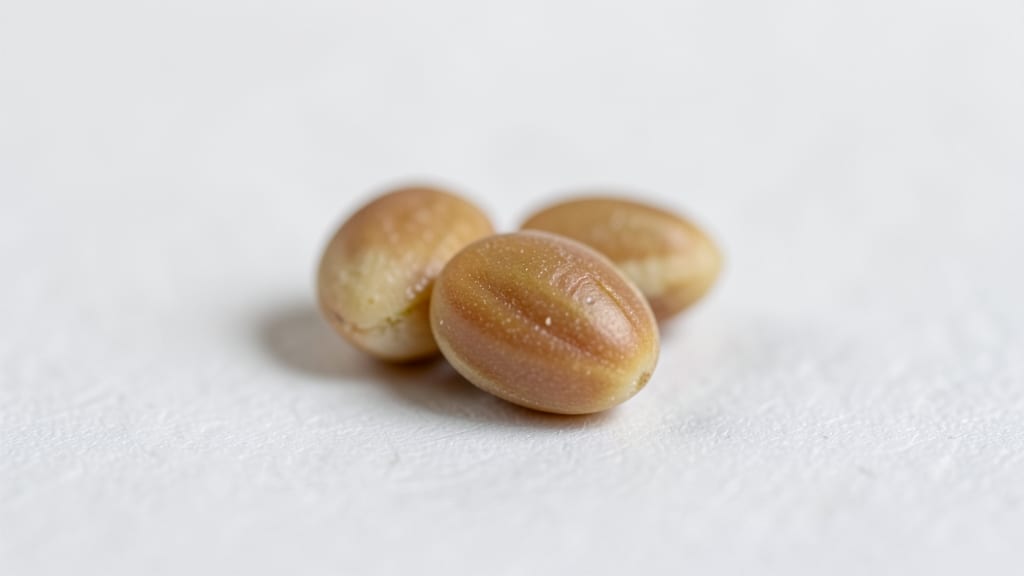
A tomato seed looks like a tiny, oval, cream-colored bean with a smooth, slightly gelatinous coating — the secret to unlocking your next homegrown 🍅 harvest.
Ever wondered how those tiny specks in your grocery-store tomato can grow into a sprawling vine loaded with juicy fruit? Tomato seeds are far from ordinary — they’re packed with potential, and knowing what to look for is your first step to success.
These seeds start off encased in a slimy, translucent layer that protects them while still inside the fruit. When you extract them, you’ll notice their small size — roughly 1/8 inch long — and their smooth, almost glossy texture.
In this guide, I’ll show you how to spot tomato seeds, compare them to pepper seeds, and even learn how to save and plant them for your own garden. Ready to turn those little beans into big tomatoes?

Identifying tomato seeds: size, shape, and texture guide
If you’ve ever cracked open a ripe tomato, you’ve seen those tiny specks floating in the pulp—those are tomato seeds. But what do they really look like up close?
Unlike the smooth, round seeds of other plants, tomato seeds have a distinctive bean-like shape and a gelatinous coating that’s easy to miss if you’re not looking closely. Knowing their appearance helps you identify them quickly, whether you’re saving seeds from your garden or troubleshooting a seed packet.
The first thing you’ll notice about fresh tomato seeds is their tiny size—they’re barely 1/8-inch long (about 3 millimeters). Their shape is oval or slightly curved, resembling a tiny kidney bean or almond slice.
The surface is smooth but slightly textured, with a faint ridge running down one side. This shape isn’t just for show; it helps the seed float and disperse in water, which is how wild tomatoes naturally spread.
Fresh seeds are encased in a gelatinous coating that’s translucent and slimy when wet. This coating is nature’s way of protecting the seed during its journey through digestive systems or water currents. When you first extract seeds from a tomato, they’ll look like tiny, cream-colored beans suspended in a cloudy, jelly-like substance. This slimy layer is a dead giveaway—it’s what sets tomato seeds apart from pepper seeds, which are flat and paper-thin.
Here’s how to spot the differences at a glance:
The gelatinous coating is a key identifier, especially when seeds are fresh. If you’ve ever tried to rinse tomato seeds, you’ve seen this slimy layer cling to your fingers—it’s made of mucilage, a natural substance that helps seeds stick together and float.
This coating also protects the seed during fermentation, a process that removes the gel before planting. Without it, seeds would dry out or be damaged during storage.
When you’re saving seeds from heirloom tomatoes, you’ll notice their seeds are often larger and more uniform than those from hybrid varieties. Heirloom seeds tend to have a slightly thicker gel layer and a more pronounced bean shape.
Hybrids, on the other hand, might have seeds that are slightly smaller or irregularly shaped, though the differences are subtle.
The best way to tell them apart is by comparing them side by side under good light—hybrid seeds may also show faint color variations, like pale green or yellowish hues.
Once you’ve extracted the seeds and let them ferment for a day or two (a process I’ll cover in the next section), the gel disappears, and the seeds take on a dry, papery texture.
At this stage, they’ll look like tiny tan or light brown beans, almost like miniature coffee beans. This dried state is ideal for long-term storage, as the removed gel prevents mold and rot.
If you’ve ever seen seeds in a packet, these are what they look like—small, lightweight, and ready to sprout.
One common mistake gardeners make is confusing tomato seeds with debris or other tiny seeds. For example, <
How to extract and prepare tomato seeds for planting
Extracting tomato seeds is simpler than you think, but proper preparation ensures high germination rates and healthy seedlings. Start by selecting ripe, organic tomatoes—their seeds will be cleaner and more viable.
The process involves removing the slimy coating that clings to fresh seeds, which we’ll tackle step-by-step to avoid common pitfalls like over-fermenting or mold.
Your goal is to transform those tiny, gelatinous specks into dry, ready-to-plant seeds. This method works for both heirloom and hybrid varieties, though heirlooms often yield more consistent results. Grab a bowl, some water, and a fine-mesh strainer—you’re just minutes away from seed-saving success.
Step-by-Step Tomato Seed Extraction
- Step 1: Slice open ripe tomatoes and scoop out the seeds (including jelly-like pulp) into a bowl.
- Step 2: Add 1 cup of water and stir gently. Let the mixture ferment for 2-3 days—this removes the slimy coating.
- Step 3: Stir daily to prevent mold. Good seeds will sink; discard any floating debris.
- Step 4: Pour the mixture through a fine-mesh strainer to separate seeds from water.
- Step 5: Rinse seeds with clean water to remove residual pulp, then spread them on a paper towel.
- Step 6: Let seeds dry for 3-5 days in a warm, dry place (like a sunny windowsill).
- Step 7: Store dried seeds in a paper envelope or airtight container in a cool, dark place for up to 4 years.
Avoid the temptation to rush fermentation—over-fermenting for more than 3 days can damage seeds or encourage mold growth. If you notice foul odors or black spots, discard the batch immediately. For best results, work with fresh, disease-free tomatoes to ensure your seeds stay healthy and viable.
Once dry, your seeds should look like tiny, cream-colored beans with a smooth texture—nothing like their slimy, freshly extracted state. These are now ready to plant directly in soil or store for future seasons. Label your seed envelopes with the tomato variety and date to track their freshness.
Pro tip: Test a few seeds on a damp paper towel before planting to check germination rates. Place them in a warm spot and observe sprouts in 5-10 days. This simple test gives you confidence that your seeds are ready for the garden bed.
With your seeds prepped and stored, you’re one step closer to a thriving tomato harvest. Next time you enjoy a homegrown tomato, remember—those tiny seeds hold the promise of your next bountiful crop! 🌱