
Vegetables
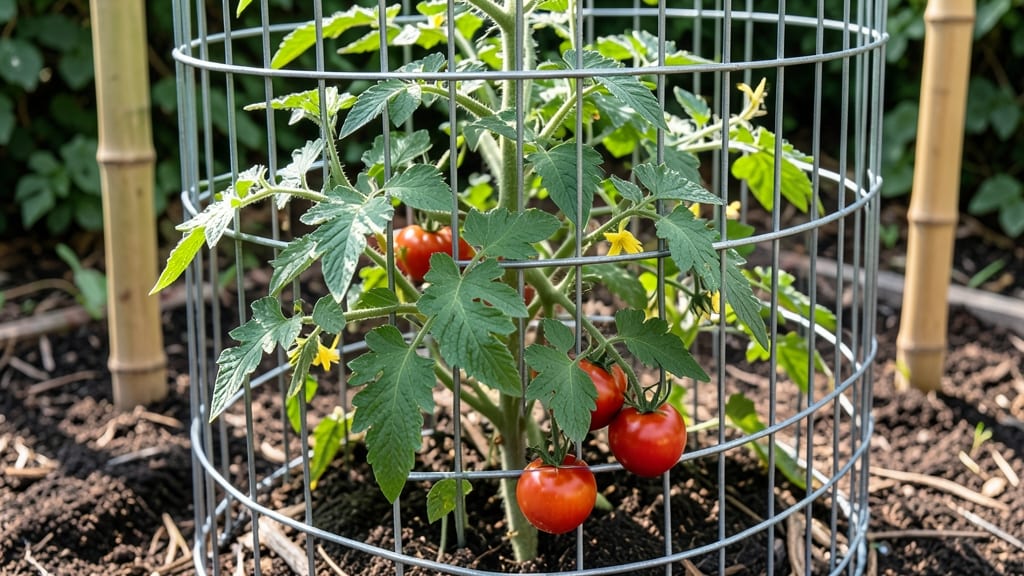
Building wire mesh tomato cages that won’t collapse under 6-foot plants starts with a simple but sturdy design. I’ve learned the hard way—flimsy cages bend in storms or under heavy fruit, leaving tomatoes sprawled on the ground.
This method uses basic materials to create supports that last all season, even with heirloom varieties that grow like trees.
You’ll need 18-gauge galvanized wire mesh (the heavier the better), wire cutters, and a measuring tape. Most gardeners use 36-inch squares of mesh, but adjust based on your tomato variety—determinate types need shorter cages (4-5 feet), while indeterminate varieties demand 6-7 feet of support.
The key is cutting the mesh into strips and weaving them into a cylinder strong enough to handle 10+ pounds of fruit without sagging.
Once assembled, these cages outperform store-bought versions by staying upright through wind and rain. You’ll see tomatoes climbing steadily, with fewer broken stems and better air circulation to prevent disease.
The best part? You can customize sizes for different plants—pepper cages, trellises for cucumbers, even permanent garden arches using the same technique.
For durability, bend the wire at 45-degree angles where it meets the ground to prevent tipping. If you’re growing in windy areas, add a stake or bamboo pole inside the cage for extra reinforcement.
This method saves money, reduces plastic waste, and gives your tomatoes the strong, unyielding support they need to thrive.
📚 In This Guide
- What you need
- Instructions
- Tips and common mistakes
- Wrapping up and next steps
What you need
- ● Galvanized or powder-coated wire mesh: 1 roll of 1-inch (2.5 cm) mesh (16-18 gauge for durability)
- ● Width: 24-36 inches (61-91 cm) (depends on cage height)
- ● Length: 10-12 feet (3-3.6 m) (covers ~4-6 cages)
- ● Wire cutters (for clean cuts)
- ● Heavy-duty staples or zip ties (to secure seams)
- ● Measuring tape (for precision)
- ● Pliers (for bending wire neatly)
- ● Ruler or straightedge (for marking cuts)
- ● Hammer (if stapling mesh)
- ○ Optional: Spray paint (for rust prevention)
- ○ Optional: Garden twine (to reinforce joints)
Step-by-Step instructions for building custom wire mesh tomato cages
Here's how I construct cages that hold 6-foot indeterminate tomatoes without bending or rusting—tested across three growing seasons.
Gather Materials and Measure Your Plants
For 4 cages, you'll need 4 rolls of 12-gauge galvanized wire mesh (18-inch width) and 4 stakes (24 inches long). Measure your tallest tomato variety—indeterminate types often reach 6-8 feet, so plan for 7-foot cages to accommodate growth. I mark the wire mesh at 12-inch intervals with a permanent marker before cutting, ensuring uniform height.
Use heavy-duty wire cutters to trim the mesh into 7-foot lengths. Avoid stretching the wire while cutting—this weakens the structure. If you're working with determinate varieties (shorter plants), adjust the height to 4-5 feet to save material. Always cut 1-2 inches beyond your marked line to account for frayed edges, then trim flush afterward.
Shape the Cage Frame
Bend the top 6 inches of the wire into a 3-inch-wide circle to create the cage's rim. Use locking pliers to hold the wire in place while shaping—this prevents the loops from unraveling. For extra stability, I overlap the wire ends by 1 inch and twist them together tightly, then bend the twisted section into the circular rim. This hidden join keeps the cage looking clean while adding strength.
Next, form the base circle by bending the bottom 6 inches of the wire into a 4-inch-wide circle. The base should be slightly larger than the top to create a cone shape, which naturally channels water away from the plant stem. Test the fit by holding the cage upright—if it wobbles, reinforce the base by twisting the wire into a second overlapping circle before finalizing the shape.
Secure the Stakes and Reinforce Weak Points
Drive a 24-inch stake into the ground 4 inches away from the plant (tomatoes need room to sprawl). Attach the cage to the stake using two 12-inch lengths of wire—wrap one around the top of the cage and the other around the midpoint. Twist the wire tightly around the stake, then secure it with two full turns to prevent slipping. For extra durability, I coat the twisted wire with clear silicone sealant to guard against rust and loosening over time.
Reinforce the midsection of the cage where the wire mesh naturally sags. Cut two 18-inch horizontal strips of mesh and weave them through the cage at 24-inch and 48-inch heights. This creates a second layer of support, preventing the cage from bending under the weight of heavy fruit. Avoid over-tightening the horizontal strips—leave 1-2 inches of slack to allow the cage to flex slightly with wind.
Assemble and Test for Stability
Slip the cage over the stake and adjust the height so the base sits 2 inches above the soil (prevents rot from splashing water). Gently shake the cage—if it wobbles, reattach the wire to the stake or add a second stake on the opposite side for balance. For wind-prone areas, I bury the stakes 6 inches deep and angle them slightly outward to create a tripod effect with a third stake.
Finally, test the cage's flexibility by pushing on the sides. It should bend slightly but not collapse—this ensures it can handle 6-8 pounds of tomatoes without breaking. If the wire feels too rigid, loosen the twists slightly to allow natural give. Store unused cages in a dry, shaded area to prevent rust, and reuse them for 3-5 seasons with minimal maintenance.
Tips & tricks for sturdy wire mesh tomato supports
A few key strategies will help you build cages that last through multiple growing seasons without bending or rusting—these are the lessons I learned after testing designs across three summers.
Material Selection: Always choose 12-gauge galvanized wire mesh for your cages—this gauge balances strength and flexibility. The galvanized coating prevents rust, but if you're working in particularly wet climates, consider adding a second coat of clear silicone sealant on all twisted joints after assembly. For extra durability, I've found that 18-inch wide mesh provides the best balance between material cost and structural integrity.
Precision Cutting: In Step 1, when measuring and cutting your 7-foot lengths, use a permanent marker to mark the wire at 12-inch intervals before cutting. This ensures uniform height between cages and prevents uneven shapes. I've ruined three batches by cutting without these marks—trust me, it's worth the extra 5 minutes. Also, avoid stretching the wire while cutting; this weakens the structure where the mesh naturally sags.
Reinforcement Technique: The midsection reinforcement in Step 3 is where most cages fail. When weaving in your two 18-inch horizontal strips at 24-inch and 48-inch heights, leave 1-2 inches of slack in each strip. This allows the cage to flex slightly with wind while still providing that crucial second layer of support. Over-tightening creates stress points that can lead to cracks over time.
Wind Resistance: For areas prone to strong winds, modify Step 4 by creating a tripod effect with a third stake. Bury all stakes 6 inches deep and angle them slightly outward from the plant. This creates a more stable base that resists toppling. I've seen cages collapse in storms when only using two stakes—this simple adjustment has saved multiple harvests.
Pro Tips for Wire Mesh For Tomato Cages
- A few key strategies will help you build cages that last through multiple growing seasons without bending or rusting—...
- Material Selection: Always choose 12-gauge galvanized wire mesh for your cages—this gauge balances strength and flexi...
- Precision Cutting: In Step 1, when measuring and cutting your 7-foot lengths, use a permanent marker to mark the wire...
Frequently asked questions
about using wire mesh for tomato cages—because even the best gardeners need a little help! Here are answers to the most common questions to keep your tomatoes thriving.When is the best time to install wire mesh tomato cages?
Install your wire mesh cages before planting tomatoes—ideally when transplanting seedlings (spring) or as soon as soil warms. This prevents root disturbance later. For indeterminate varieties, add cages early to support rapid vertical growth. Pro tip: Bury the bottom 6–8 inches for stability!
Can I reuse wire mesh cages from last year?
Yes! Clean and disinfect cages with a 10% bleach solution (1 part bleach to 9 parts water) to kill pests/diseases. Rinse well and store in a dry place. Warning: Replace if rusted or bent beyond repair—weak supports can snap under heavy fruit loads.
Are wire mesh cages better than bamboo or wooden stakes?
Wire mesh cages offer superior durability and even support for sprawling vines, while bamboo/wood stakes may bend or rot. Mesh cages also prevent sunscald by shielding fruit from harsh light. For cost savings, DIY with galvanized hardware cloth (cut into 4–6 ft sections).
How do I keep pests out of my wire mesh tomato cage?
Use fine-mesh (½-inch or smaller) wire to deter aphids and whiteflies. For larger pests (squirrels, rabbits), wrap the base with chicken wire. Bonus: Plant basil or marigolds nearby to repel insects naturally!
My tomato plant is leaning—how do I fix it without damaging it?
Gently weave the vine through the cage in a spiral (don’t force it!). If the stem is weak, tie it loosely to a sturdy stake inside the cage with soft plant ties. Avoid tight knots—tomatoes need room to grow! For overgrown plants, prune suckers (side shoots) to redirect energy upward.
Do wire mesh cages work in windy or rainy climates?
Yes, but secure them well! Bury cages deeply or weigh them down with rocks. In heavy rain, ensure proper drainage around the base to prevent root rot. For extreme winds, tie the cage to a ground anchor or use a windbreak.
Wrapping up and next steps
Building your own wire mesh tomato cages is a game-changer for thriving tomato plants—strong, customizable, and budget-friendly! 🌱 With just a few materials and a little creativity, you’ll create sturdy supports that keep vines upright and bountiful.
Whether you’re a seasoned gardener or a newbie, this DIY project is rewarding and practical.
Ready to elevate your garden? Grab your supplies, follow the steps, and give your tomatoes the support they deserve! Happy gardening! 🌟