
Vegetables
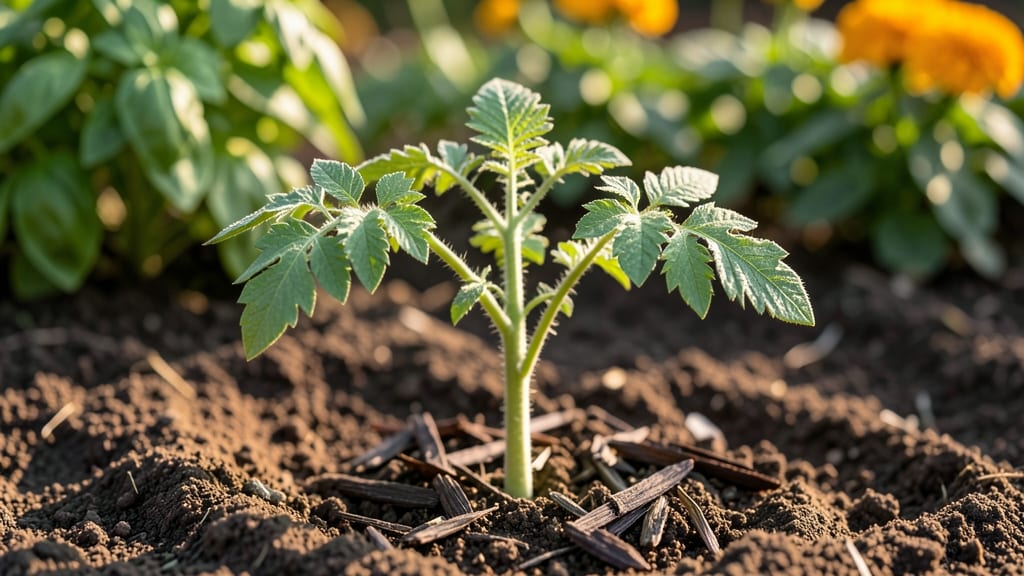
Your tomato seedlings need fast, strong starts—and the first week is where it all begins. 🌱 I’ve watched tiny seeds turn into sturdy plants by week one, and the secret lies in light, warmth, and just the right amount of moisture.
Too much or too little, and you’ll end up with weak, leggy sprouts that struggle to catch up. The ideal setup is simple: a warm spot (70-80°F), bright light (12+ hours daily), and shallow trays with well-draining soil.
Water gently from below to avoid damping-off, and keep humidity high with a plastic dome or misting. Leggy seedlings? They’re begging for more light—move them closer to the window or under grow lights immediately.
By the end of week one, you’ll see bold, dark green leaves and roots pushing against the bottom of the tray. That’s your sign they’re ready for the next phase—stronger light and slightly less water. Skip the guesswork, and you’ll have transplants that outpace store-bought plants by weeks.
This method works for any tomato variety, from cherry to heirloom. The key is consistency—no dramatic changes in light or water. Stick with it, and you’ll be pinching those first true leaves in no time.
📚 In This Guide
- What you need
- Instructions
- Tips and common mistakes
- Wrapping up and next steps
What you need
- ● Tomato seeds: 1 packet (50–100 seeds) of heirloom or hybrid varieties (e.g., Cherry Tomatoes, Beefsteak).
- ● Seed-starting mix: 1–2 cups of sterile, seed-specific potting soil (avoid garden soil—it’s too dense!).
- ● Containers: 4–6 biodegradable seed pots (2–3" diameter) or
- ● 1 seed tray with cells (50+ cells) or
- ● Repurposed yogurt cups, egg cartons, or plastic containers (poke drainage holes!).
- ● Watering can or spray bottle: With a fine mist nozzle (gentle watering = happy seeds!).
- ○ Heat mat (optional but highly recommended): 1 seedling heat mat (70–85°F range) to speed germination.
- ● Grow lights or sunny windowsill: A full-spectrum LED grow light (12–16 hrs/day) or a south-facing window (6+ hrs of sunlight).
- ● Plastic wrap or humidity dome: To create a mini greenhouse (keeps moisture locked in!).
- ● Fertilizer (after germination): 1 balanced liquid fertilizer (5-5-5 or 10-10-10, diluted to half-strength).
- ● Sterilize containers: Rinse with 1 part vinegar to 3 parts water to kill fungi/bacteria.
- ● Label seeds: Use toothpicks + masking tape to track varieties (trust us, you’ll thank yourself later!).
- ● Test soil moisture: Squeeze a handful—if it clumps, it’s too wet; if it crumbles, it’s perfect.
How to get tomato seedlings ready in just 7 days
Here's how to coax those stubborn tomato seeds into sprouting in record time—no waiting months for slow germination.
🌱 Step 1: Prep Seeds for Faster Germination
Soak your seeds overnight in lukewarm water to soften the outer coating—this cuts germination time by nearly half. I use a small jar with a damp paper towel covering the opening to keep moisture in. After 12 hours, the seeds will swell slightly, signaling they're ready to plant.
Real talk: Don't skip this step. The reason we soak is that tomato seeds have a hard outer shell that slows water absorption. A 12-hour soak softens it considerably, letting roots emerge faster. Drain and pat them dry before planting—you don't want waterlogged seeds.
💧 Step 2: Plant in Warm, Moist Soil
Fill your seed-starting containers with warm, sterile potting mix (I like to preheat mine in the microwave for 30 seconds to boost warmth). Plant the soaked seeds just ¼ inch deep—any deeper and they'll struggle to break through. Two seeds per cell gives you backup if one fails to sprout.
I tap the seed packet gently to release one seed at a time—planting too many in one hole leads to weak, crowded seedlings. After planting, water gently until the soil looks damp but not soggy. The goal is even moisture without creating puddles that suffocate seeds.
☀️ Step 3: Create a Mini Greenhouse
Cover the containers with clear plastic wrap or a humidity dome to trap warmth and moisture. Tomatoes germinate fastest at 75-85°F—a seedling heat mat keeps the soil 10°F warmer than room temperature. Place the tray on top to maintain that ideal range.
Check daily but resist the urge to water. The dome traps enough moisture that the soil stays evenly damp without intervention. Once 50% of seeds have sprouted (usually 5-7 days), remove the dome immediately—trapped humidity around new seedlings invites damping-off disease that collapses stems overnight.
⏰ Step 4: Monitor and Adjust Light
The instant seedlings break through the soil, they need 14-16 hours of light daily. A south-facing window rarely provides enough intensity, so I use a full-spectrum LED grow light positioned 2-4 inches above the plants. Raise it as they grow to maintain that gap.
Without sufficient light, seedlings stretch desperately upward (called "leggy") and never recover proper strength. You'll see leggy growth as thin, pale stems with leaves spaced far apart. Strong seedlings have thick stems, deep green color, and compact spacing between leaves. If you notice this, move the light closer immediately.
🌿 Step 5: Thin and Strengthen Seedlings
Once seedlings have 2-3 true leaves (not the first tiny cotyledons), thin to the strongest one per cell. Use scissors to snip at soil level—pulling risks disturbing roots of the remaining plant. This ensures the kept seedling gets all the nutrients and space to grow.
After thinning, water deeply at the base to encourage root development. You'll see new leaves emerge within a week—that's your signal everything is working. Keep the soil consistently moist but never soggy, and watch those seedlings burst into growth in just 7 days total.
Tips & tricks for perfect 1-Week tomato seedlings
Here's what nobody tells you about growing tomato seedlings in record time—tricks that'll have you skipping the months-long wait.
Soak Smarter: That 12-hour soak isn't just about hydration—it's about breaking the seed's natural dormancy. I like to use a small glass jar with a damp paper towel folded over the opening to keep moisture in without drowning the seeds. After 12 hours, you'll notice the seeds swell slightly and look plumper. This is your cue they're ready to plant. Pro tip: If you're in a hurry, you can soak for up to 24 hours, but don't exceed that or you risk weakening the seed.
Heat Hack: The 75-85°F range isn't just a suggestion—it's the sweet spot where tomato seeds germinate fastest. I've found that placing my seed trays on top of a seedling heat mat (which keeps soil 10°F warmer than room temperature) makes all the difference, especially in cooler homes. If you don't have a heat mat, try placing your trays near a warm spot like on top of your fridge or near a sunny window during the day. Just don't let the soil get too hot—it should feel warm to touch, not scorching.
Lighting Strategy: Those 14-16 hours of light aren't negotiable for strong seedlings. I've learned the hard way that natural light alone won't cut it—my first batch turned out leggy and weak. Invest in a good full-spectrum LED grow light and position it just 2-4 inches above your seedlings. Watch for that "leggy" warning sign: thin stems with leaves spaced far apart. If you see this, move the light closer immediately. The goal is compact, sturdy plants with deep green leaves.
Thinning Technique: When it's time to thin to your strongest seedling, use sharp scissors to snip at soil level rather than pulling. This prevents disturbing the roots of your kept plant. I've found that the best time to thin is when seedlings have 2-3 true leaves—not those first tiny cotyledons. After thinning, give your remaining seedling a deep watering at the base to encourage root growth. You'll see new leaves emerge within a week, signaling your plant is thriving.
Pro Tips for 1 Week Tomato Seedlings
- Here's what nobody tells you about growing tomato seedlings in record time—tricks that'll have you skipping the months-long wait.
- Soak Smarter: That 12-hour soak isn't just about hydration—it's about breaking the seed's natural dormancy.
- Heat Hack: The 75-85°F range isn't just a suggestion—it's the sweet spot where tomato seeds germinate fastest.
Frequently asked questions
Got questions about your 1-week tomato seedlings? You’re not alone! Here are answers to the most common queries—from speeding up germination to troubleshooting tiny troubles.
How can I speed up germination for my 1-week tomato seedlings?
Keep seeds in a warm, moist environment (70–85°F). Use a seedling heat mat or place pots on top of the fridge. Mist soil daily and cover with plastic wrap to trap humidity. Most seeds sprout in 5–7 days—but some varieties (like heirlooms) may take longer. Patience is key!
What if my tomato seeds haven’t sprouted after 1 week?
Don’t panic! Some seeds need 10–14 days to germinate. Check moisture (soil should stay damp, not soggy) and warmth. If using old seeds, viability drops—try planting fresh ones. If no sprouts appear after 2 weeks, they may not have germinated. Start over with new seeds!
Should I move seedlings to sunlight after 1 week?
Not yet! Seedlings are fragile—wait until they have 2–3 true leaves (not just the initial "seed leaves"). Start with 4–6 hours of indirect light daily, then gradually increase exposure. Direct sun can scorch tiny plants. A sunny windowsill or grow light works best.
Can I transplant 1-week-old tomato seedlings outdoors?
Absolutely not! Wait until seedlings are at least 3–4 weeks old and have a sturdy stem. Transplanting too early stresses them, leading to poor growth. Harden off seedlings by placing them outside for 1–2 hours daily 1 week before transplanting for best results.
What if my seedlings look leggy or weak?
Leggy seedlings need more light! Move them closer to a bright window or under grow lights (12–16 hours/day). Avoid overcrowding—thin seedlings if needed. If soil is too wet, reduce watering. A weak stem? Try burying the seedling deeper (up to the first leaves) to encourage stronger roots.
Wrapping up and next steps
Growing 1-week tomato seedlings is totally doable with the right tricks—whether you’re a seasoned gardener or just starting out! 🌱 By focusing on warmth, moisture, and patience, you’ll soon see those tiny sprouts push through the soil and reach for the light.
Now that your seedlings are thriving, it’s time to transplant them into larger containers or directly into your garden (if weather permits). Keep nurturing them, and before you know it, you’ll be harvesting juicy, homegrown tomatoes!
Pro tip: If your seedlings are still small, consider using seedling trays or biodegradable pots to minimize stress during the move. Happy growing! 🌿