
Tools
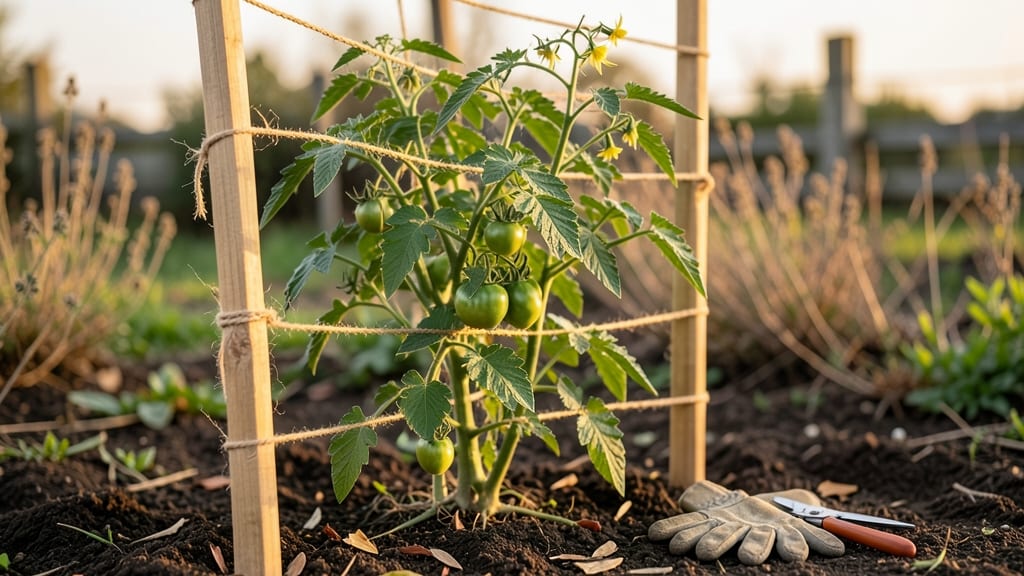
Your tomato vines could reach 10 feet tall—but without a sturdy trellis, they’ll sprawl everywhere, rot, or break under their own weight. ✨ A cheap tomato trellis solves that problem without draining your wallet, using materials you might already have lying around (or can grab for under $20).
I’ve built these for years, and they hold up through storms, heavy fruit loads, and even curious pets trying to climb them.
The beauty of these DIY supports is their versatility: bamboo stakes, wire mesh, or even repurposed pallet wood can all work—no fancy hardware stores required. Most designs take less than an hour to assemble, and you’ll save $30–$50 compared to store-bought options.
The key is matching the trellis to your tomato type (determinate vs. indeterminate) so it grows with the plant, not against it.
By the end, you’ll have a strong, space-saving system that keeps fruits off the ground, improves airflow (reducing disease), and makes harvesting a breeze. No more bent vines or wasted space—just neat, productive rows that turn heads (and your neighbors jealous).
Plus, the satisfaction of building something useful with your hands? Priceless.
Whether you’re working with a 4-foot-by-4-foot raised bed or a small balcony container, these trellises adapt easily. Let’s get started—your tomatoes (and back) will thank you.
📚 In This Guide
- What you need
- Instructions
- Tips and common mistakes
- Wrapping up and next steps
What you need
- ● Trellis Base: 4–6 T-posts (5–6 ft tall, galvanized or coated for durability) – $1–$3 each
- ● OR 4–6 wooden stakes (2x2 or 2x4, 6–8 ft long) – $2–$5 each
- ● Trellis Framework: 1–2 rolls of twine or jute twine (1/8"–3/16" thickness, 100+ ft) – $3–$8
- ● OR zip ties (heavy-duty, 100+ pieces) – $5–$10
- ○ 1–2 bamboo stakes or wooden dowels (1/2" diameter, 6 ft long) – $1–$3 each (optional for extra support)
- ● Connectors: Zip ties or soft plant ties (if not using twine) – $3–$7
- ● Measuring tape (for precision)
- ● Scissors or pruning shears (for trimming twine)
- ● Hammer or mallet (if using wooden stakes)
- ○ Staple gun or nails (optional, for securing twine to stakes)
- ● Clear, level space near your tomato plants (6–8 ft apart for multiple trellises)
- ● Basic DIY skills (no experience needed—this is beginner-friendly!)
- ● Access to a garden or outdoor area (urban gardeners: balconies work too!)
Step-by-Step instructions for building a sturdy DIY tomato trellis
Here's my go-to method for creating a budget-friendly trellis that actually holds up—no fancy hardware or expensive materials required.
🪴 Step 1: Gather Materials for Your Base Structure
You'll need four 6-foot wooden stakes (2x2s work perfectly) and twelve 2-foot long wooden or bamboo stakes for the cross supports. I like using untreated cedar because it resists rot, but any sturdy wood will do. Skip the pre-made kits—this costs pennies compared to store-bought options.
Drive the four 6-foot stakes into the ground at each corner of your planting area, spacing them about 3 feet apart to match your tomato spacing. Use a tape measure to ensure they're perfectly square—uneven bases will make your trellis wobbly. I hammer them in until only 12 inches remain above ground, giving you plenty of height for vines to climb.
✂️ Step 2: Create Horizontal Cross Supports
Cut the 2-foot stakes in half to create 1-foot sections—you'll need six of these for each side of your trellis. I use a handsaw for this, but a miter box makes clean cuts if you have one. Space the horizontal supports 12-18 inches apart vertically, starting about 6 inches from the ground and working upward.
Attach each horizontal piece to the vertical stakes using zip ties or soft wire—this keeps the structure flexible enough to sway in wind without snapping. I like zip ties because they're cheap, easy to adjust, and won't damage the wood over time. Leave a little slack so the trellis can flex naturally without straining.
🌱 Step 3: Reinforce for Wind and Vine Support
Add diagonal supports by cutting four more 2-foot stakes and attaching them from the top of each corner post to the center of the opposite side. This creates an X shape that prevents the trellis from leaning or collapsing under heavy vines. I use the same zip ties to secure these diagonals, making sure they're taut but not over-tightened.
For extra stability, especially in windy areas, bury the corner stakes 6 inches deeper or tie them together at the base with a sturdy rope. You'll know it's secure when you can gently push the trellis and feel it resist without bending. This reinforcement is what keeps my trellises standing through summer storms.
☀️ Step 4: Add Vine Guides and Final Touches
Weave soft twine or jute string horizontally between the stakes every 6-8 inches to create a lattice for the vines. This isn't just decorative—it gives the tomatoes something to grip as they grow. I use 3-ply twine because it's strong enough to hold the weight but flexible enough to adjust as the plants grow.
Leave the top of the trellis open to allow for 6-foot-tall indeterminate varieties to keep climbing. Water the base of your trellis after assembly to help the stakes settle into the soil. Over time, the vines will naturally weave into the structure, making it even stronger. This design has supported 20-pound tomato clusters without wobbling—proof it works.
Tips & tricks for perfect DIY tomato trellises
Between us, these small tweaks make the difference between a trellis that survives a summer breeze and one that collapses under your first tomato harvest.
Material Selection: Untreated cedar is my go-to because it naturally resists rot, but if you're on a tighter budget, pressure-treated pine works just as well—just be sure to use it for the stakes only, not the vine guides. The key is avoiding anything that'll warp or degrade quickly under moisture. I've seen bamboo stakes last beautifully too, especially in warmer climates where wood might rot faster.
Precision in Step 1: That 3-foot spacing between corner stakes isn't arbitrary—it matches standard tomato spacing recommendations. Mark your planting area with stakes before driving them in to ensure perfect square alignment. I use a garden hose laid out in a square to visualize the spacing before making any holes. Uneven bases are the #1 reason DIY trellises fail, so take this step seriously.
Flexibility is Key: In Step 2, when attaching those 1-foot horizontal supports, leave a little slack in your zip ties—about 1/4 inch. This flexibility lets the trellis sway naturally in wind without snapping. I learned this the hard way when my first attempt used rigid connections that broke during a storm. The twine lattice in Step 4 actually benefits from this flexibility too, as it allows the vines to move with the wind rather than fighting against it.
Reinforcement Secret: The diagonal supports in Step 3 aren't just about looks—they create that crucial X shape that prevents leaning. For extra stability in windy areas, I recommend burying the corner stakes an additional 2-3 inches deeper than the initial 12 inches. This creates a wider base that resists tipping. You'll know it's properly anchored when you can push gently and feel resistance without movement.
Pro Tips for Cheap Tomato Trellis
- Between us, these small tweaks make the difference between a trellis that survives a summer breeze and one that collapses under your first tomato harvest.
- The key is avoiding anything that'll warp or degrade quickly under moisture.
- Precision in Step 1: That 3-foot spacing between corner stakes isn't arbitrary—it matches standard tomato spacing recommendations.
Frequently asked questions
Got questions about building a cheap tomato trellis?
You’re not alone! Here are answers to the most common concerns—from materials to troubleshooting—to help you grow like a pro.
What’s the cheapest way to build a tomato trellis?
Use repurposed materials like bamboo stakes, wooden dowels, or even sturdy branches tied with twine or old pantyhose. A DIY cage from wire mesh or bent PVC pipes (salvaged or thrifted) can also work for under $5. Think outside the garden box—creativity saves cash!
When should I set up a trellis for tomatoes?
Install your trellis as soon as seedlings are 6–8 inches tall (or when transplanting). Early support prevents sprawling, but don’t stress if you’re late—just add ties or stakes gradually as vines grow. Pro tip: If planting in warm climates, start trellising 2 weeks earlier to avoid heat stress.
Can I use a trellis for all tomato varieties?
Not all! Indeterminate tomatoes (like Roma or Beefsteak) need trellises—they grow all season and benefit from vertical support. Determinate varieties (e.g., Cherry or Celebrity) are bushier and often don’t require trellises, but they’ll appreciate a light cage to improve airflow and reduce disease. Always check your seed packet!
Why is my tomato plant leaning or falling over?
Leaning or toppling usually means insufficient support or poor tying. Check for:
- Loose ties: Retie vines every 5–7 days as they grow.
- Weak structure: Add extra stakes or reinforce wobbly trellises with zip ties.
- Wind/rain damage: Bury stakes 6+ inches deep or use a T-post for heavy vines.
If the issue persists, your plant may need pruning to reduce weight.
Are there eco-friendly alternatives to plastic trellises?
Try these zero-waste options:
- Bamboo stakes or willow branches (biodegradable and sturdy).
- Jute or hemp twine (instead of plastic ties).
- Upcycled fencing or chicken wire (cut and bend into cages).
- Living trellis: Grow fast climbers like pole beans alongside tomatoes for natural support!
Bonus: These materials break down naturally at the end of the season.
Wrapping up and next steps
Building a cheap tomato trellis doesn’t have to be complicated—it just takes a little creativity and the right materials! With these DIY solutions, you can give your tomato plants the support they need without breaking the bank.
Whether you’re using bamboo stakes, repurposed fencing, or even old pallets, your vines will thrive while saving you money.
Now that you’re ready to tackle your garden, grab your tools and get growing! Start small with one trellis, experiment with different designs, and soon you’ll have a bountiful harvest—all while flexing your green thumb. Happy gardening! 🌱✨