
Container Gardens
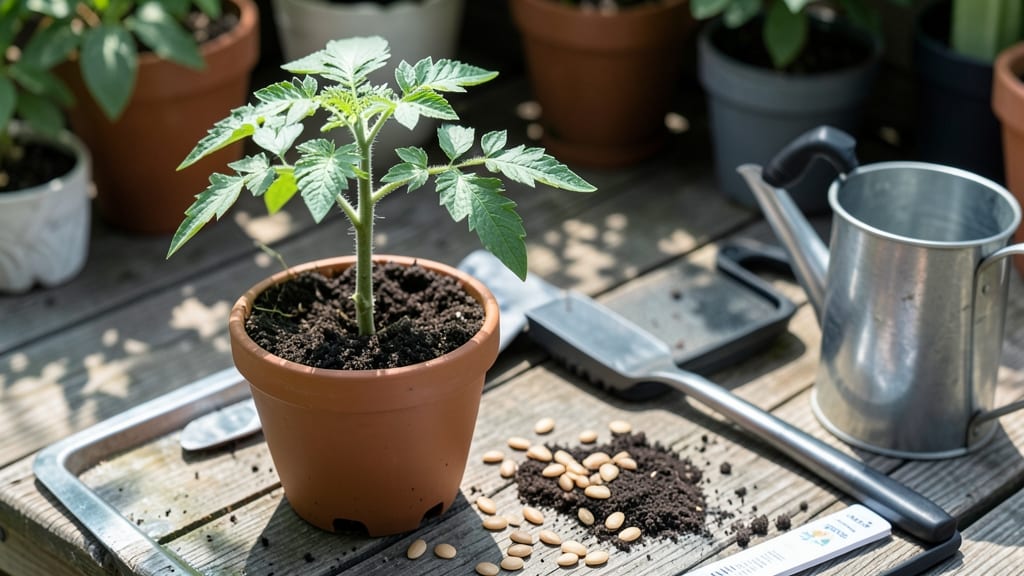
Planting tomato seeds in a pot lets you grow heirloom varieties year-round, even on a tiny windowsill. 🌱 The secret to success starts with the right pot, soil, and a sunny spot—no fancy equipment needed.
I’ve turned my kitchen into a mini tomato factory by following these simple steps, and you can too. You’ll need a 4-inch pot (or larger), seed-starting mix, and a spray bottle for gentle watering.
Fill the pot halfway with moistened soil, plant seeds ¼-inch deep, and keep them warm until sprouts appear in 7-14 days. A clear plastic bag creates a humidity dome that speeds up germination.
Once seedlings emerge, move them to bright light (a south-facing window or grow light) and keep soil consistently moist. Thin to the strongest seedling, and watch those first true leaves burst with energy. By 6-8 weeks, they’ll be ready to transplant into larger containers or the garden.
This method works for any tomato variety, from cherry to beefsteak, and gives you a head start on the growing season. Troubleshoot damping-off with better airflow, and soon you’ll be harvesting sun-ripened tomatoes from your own pots!
📚 In This Guide
- What you need
- Instructions
- Tips and common mistakes
- Wrapping up and next steps
What you need
- ● Tomato seeds: 3–5 seeds per pot (choose heirloom or hybrid varieties like 'Cherry Tom,' 'Beefsteak,' or 'Roma').
- ● Container: 1–2 pots (5–10 inches deep, with drainage holes). Pro tip: Use biodegradable pots for easy transplanting!
- ● Potting mix: 1 bag of high-quality seed-starting mix (sterile, lightweight, and well-draining). Skip garden soil—it’s too dense!
- ● Drainage tray or saucer: 1 (to catch excess water).
- ● Spray bottle: 1 (for gentle watering).
- ● Grow lights or sunny windowsill: Access to 6–8 hours of sunlight daily (or a 12–16 hour light setup if using grow lights).
- ● Toothpick or pencil: 1 (for marking seedling trays if needed).
- ● Plant labels: 3–5 (to track varieties).
- ● Heating mat: 1 (speeds up germination for cold climates).
- ● Fertilizer: 1 small bag of balanced starter fertilizer (5-5-5 or similar).
- ● Humidity dome or plastic wrap: 1 (to retain moisture until seeds sprout).
- ● Tweezers: 1 (for delicate seed handling).
- ● Support system: 1 small cage or stakes (for indeterminate tomato varieties).
Step-by-step instructions for planting tomato seeds in pots
Here's how I get strong, healthy tomato starts every season—no greenhouse needed.
🌱 Step 1: Select the Right Containers and Prepare Seed-Starting Mix
Choose 4-inch diameter pots with drainage holes for each seed you plan to plant. I like biodegradable peat pots because they eliminate transplant shock when it's time to move seedlings outside. Fill each pot with a sterile seed-starting mix—never garden soil, as it compacts and harbors disease.
Moisten the mix until it's damp like a wrung-out sponge, but not dripping. Tap the pot gently on the table to settle the soil without compacting it. The goal is a fine, airy texture that allows roots to push through easily. Press down lightly with your fingers until the surface is firm but not hard—this prevents seeds from floating to the top when you water.
🌱 Step 2: Sow Seeds at the Correct Depth and Spacing
Plant 1-2 tomato seeds per pot at a depth of about ¼ inch. Sowing too deep delays germination because the seedling exhausts its energy before reaching light. Use your finger to make a small hole, drop in the seeds, then cover lightly with additional mix. I tap the seed packet gently to release one seed at a time—planting too many in one hole leads to weak, crowded seedlings.
Mist the surface with a spray bottle until the soil is evenly moist. Avoid heavy watering, which can dislodge seeds or bury them too deep. Label each pot with the variety and date—after a week of identical green sprouts, you’ll forget which is which. Place the pots in a shallow tray to catch any excess water that drains through.
💧 Step 3: Provide Warmth and Consistent Moisture for Germination
Cover the pots with a clear plastic dome or plastic wrap to retain warmth and humidity. Tomatoes germinate best at 75-85°F, so place the tray on a seedling heat mat if your home runs cooler. Expect sprouts in 5-10 days, though cooler rooms may take up to 14 days. Check daily but resist the urge to water—condensation inside the dome keeps the soil moist.
Once 50% of seeds have sprouted, remove the dome immediately. Trapped humidity around new seedlings invites damping-off disease, which collapses stems overnight. Keep the soil surface slightly damp but never soggy—you’ll know moisture is right when the top inch feels cool to the touch but not wet.
☀️ Step 4: Move to Bright Light Immediately After Germination
The instant seedlings break through the soil, they need 14-16 hours of light daily. A south-facing window rarely provides enough intensity, so I use a full-spectrum LED grow light positioned 2-4 inches above the plants. Raise it as they grow to maintain that gap. Without sufficient light, seedlings stretch desperately upward (called "leggy") and never recover proper strength.
Strong seedlings have thick stems, deep green color, and compact spacing between leaves. You’ll see leggy growth as thin, pale stems with leaves spaced far apart. Rotate the pots a quarter turn daily so plants grow upright instead of leaning toward the light. Once seedlings show their first true leaves (not the initial seed leaves), they’re ready for slightly less frequent watering.
⏰ Step 5: Harden Off and Transplant Outdoors
Two weeks before your last frost date, start hardening off the seedlings by placing them outside in a sheltered, shaded spot for 1-2 hours the first day. Gradually increase outdoor time by 1 hour daily over 10-14 days, slowly introducing more sun and wind. This prepares them for the garden without shock.
Skipping this step burns leaves, breaks stems, and stresses plants severely. Once seedlings tolerate a full day outside without wilting, they’re ready for the garden. Transplant on an overcast afternoon to reduce transplant shock and water deeply at the base. Choose pots at least 12 inches deep for mature plants, as tomatoes need room for strong root systems.
Tips & tricks for perfect sunny window tomato starts
A few simple tricks will turn your kitchen windowsill into a thriving tomato nursery—without the guesswork.
Container Selection: While 4-inch pots work perfectly, consider using 6-inch pots if you're growing larger tomato varieties like beefsteak. The extra space gives roots room to establish before transplanting, which translates to stronger plants later. I've found that peat pots with built-in drainage holes eliminate the need for bottom watering trays, but if using regular pots, always place them in saucers to catch excess water.
Germination Temperature: The ideal 75-85°F range is critical—if your home runs cooler, place pots on a seedling heat mat or even a warm spot above your fridge. I've had seeds sprout in just 5 days when using a heat mat, but in cooler conditions, they can take up to 14 days. Pro tip: Place a thermometer near your seed tray to monitor temperature consistently.
Light Strategy: For those 14-16 hours of daily light, position your grow light on a timer to automate the process. I use a simple $20 outlet timer to handle this while I'm at work. If using natural light, rotate your pots daily to prevent seedlings from leaning toward one side—this creates sturdy stems that won't flop when transplanted. Watch for leggy growth (thin, pale stems with widely spaced leaves) as your first sign that light is insufficient.
Harden Off Gradually: The 1-2 hour outdoor introduction on day one might seem short, but this gradual approach prevents transplant shock. I've seen seedlings that were hardened off properly thrive immediately in the garden, while those rushed outdoors often wilt dramatically. On cloudy days, you can safely extend the first outdoor session to 3-4 hours without risking sunburn. Always choose a sheltered spot to protect seedlings from wind.
Pro Tips for Plant Tomato Seeds In A Pot
- A few simple tricks will turn your kitchen windowsill into a thriving tomato nursery—without the guesswork.
- Container Selection: While 4-inch pots work perfectly, consider using 6-inch pots if you're growing larger tomato var...
- Germination Temperature: The ideal 75-85°F range is critical—if your home runs cooler, place pots on a seedling heat ...
Frequently asked questions
Got questions about growing tomatoes in pots? You’re not alone! Here are answers to the most common concerns to help you grow thriving plants from seed.
How deep should I plant tomato seeds in a pot?
Plant seeds half an inch deep—just enough to cover them lightly with soil. Press gently to ensure good contact with the soil, but avoid compacting it too much. Tomato seeds need warmth and moisture to sprout, so keep the soil consistently damp (not soggy) until germination, which usually takes 5–14 days.
When is the best time to start tomato seeds indoors?
For most climates, start seeds 6–8 weeks before your last frost date. If you’re in a warm region (like Zone 9+), you can direct-sow seeds in pots anytime after the frost risk passes. Use a seed-starting kit or a sunny windowsill to give seedlings enough light—12–16 hours daily—to prevent leggy growth.
What’s the best pot size for tomato seeds?
Start with small pots (2–3 inches wide) for seedlings, then transplant into 5-gallon containers or larger once they’re 3–4 inches tall. Tomatoes need room to grow—avoid crowded pots, as they’ll compete for nutrients and stunt growth. If space is tight, choose determinate varieties (bush types) that stay compact.
Why aren’t my tomato seeds sprouting?
Check these common issues:
- Cold soil: Seeds need warmth (70–85°F) to germinate. Use a heat mat or place pots on a sunny windowsill.
- Too dry/wet: Keep soil moist but not waterlogged. Mist lightly or use a spray bottle.
- Old seeds: Store seeds properly (cool, dry place) and replace if older than 2–3 years.
- Low light: Seedlings may not sprout if they’re too dark. Supplement with a grow light if natural light is weak.
Can I grow tomatoes in pots without sunlight?
Tomatoes are sun-lovers and need at least 6–8 hours of direct sunlight daily. If your windowsill is dim, use a grow light (LED or fluorescent) 12–16 inches above seedlings for 12+ hours/day. South-facing windows are ideal, but east or west works too. Without enough light, plants will grow tall and weak (called “leggy”).
Wrapping up and next steps
Growing tomatoes from seeds in a pot is a rewarding journey that brings fresh, homegrown flavor right to your kitchen! With the right containers, soil, and care, you’ll watch tiny seeds transform into thriving plants—even in small spaces. 🌱
Now that you’re armed with the know-how, your next step is to grab those seeds and get planting! Start small, stay patient, and soon you’ll be harvesting juicy tomatoes that taste like summer. Happy gardening! 🍅✨