
Vegetables
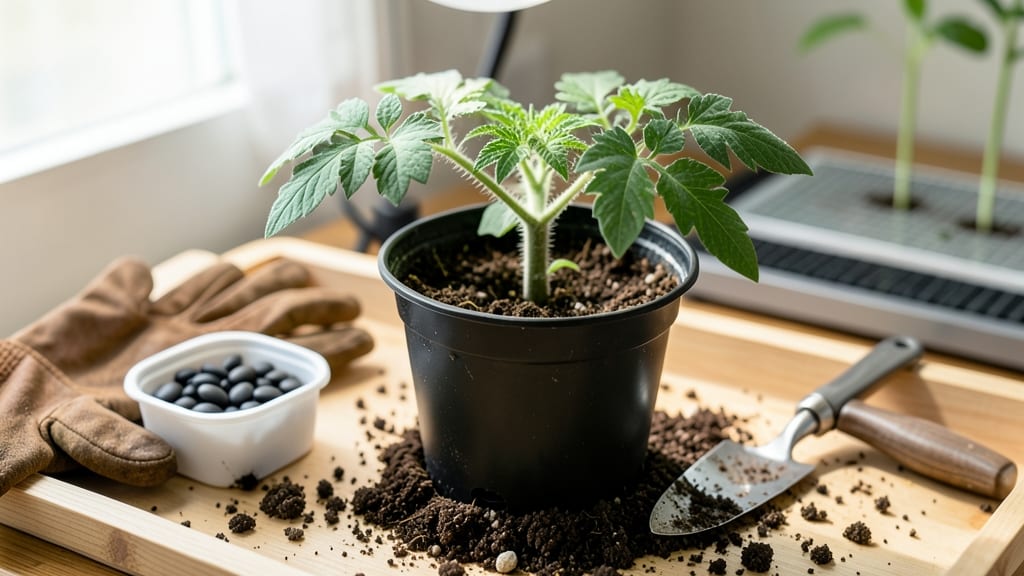
Planting tomato seeds inside lets you beat the season by 4-6 weeks, but most beginners lose patience when germination takes too long. I’ve tested every trick—from heat mats to humidity domes—and these are the three that actually work without fancy equipment.
The secret isn’t just patience; it’s creating the right conditions from day one.
You’ll need just four things: seed-starting mix (not garden soil), small pots or a tray, a spray bottle, and a warm spot. The soil should feel like a damp sponge—not soggy, not dry—and planting depth matters: push seeds in just ¼-inch deep, or they’ll rot before sprouting.
Most people overwater here, drowning their seeds before they even wake up.
Within 5-7 days, you’ll see those first tiny leaves poking through, and with the right light (grow bulbs or a sunny window), your seedlings will stay stocky instead of stretching like twigs.
The key is keeping them cozy—warmth speeds germination, and a clear plastic bag creates a mini greenhouse effect until sprouts appear.
Even with perfect conditions, problems pop up: damping off (mushy stems) or leggy seedlings. The fix is simple—better airflow and light—but I’ll walk you through exactly how to spot and stop them before they ruin your batch. Ready to turn those tiny seeds into a summer’s worth of tomatoes?
📚 In This Guide
- What you need
- Instructions
- Tips and common mistakes
- Wrapping up and next steps
What you need
- ● Tomato seeds: 5–10 seeds per variety (choose disease-resistant types like Early Girl or Cherry Roma for beginners).
- ● Seed-starting trays or pots: 2–4" deep with drainage holes (biodegradable peat pots or 6-pack cell trays work great).
- ● High-quality seed-starting mix: Lightweight, sterile potting mix (avoid garden soil—it’s too dense!).
- ● Grow lights or sunny windowsill: A full-spectrum LED grow light (12–16 hours/day) or a south-facing window (6+ hours of sunlight).
- ● Spray bottle: For gentle watering (avoid over-saturating seeds!).
- ● Plastic wrap or humidity dome: To retain moisture and warmth during germination.
- ○ Heat mat (optional but recommended): A seedling heat mat (70–80°F range) speeds up germination by 30–50%.
- ● Seedling fertilizer: A diluted fish emulsion or 5-10-5 formula (once true leaves appear).
- ● Grow tent or clear plastic container: Creates a mini greenhouse for extra humidity.
- ● pH testing kit: Keep soil pH between 6.0–6.8 for optimal nutrient uptake.
- ● Label markers: To track varieties and planting dates (trust us, you’ll forget!).
- ● Fans (small oscillating): Encourages stronger stems by simulating wind.
Step-by-step instructions for planting tomato seeds indoors
Here’s how I get tomato seeds to sprout in just days—not weeks—so you’re ready for transplanting well before spring.
🌱 Step 1: Prepare Containers and Seed Starting Mix
Fill clean, 2-3 inch deep containers with a sterile seed-starting mix—never garden soil, which can harbor diseases. I use biodegradable pots to avoid root disturbance later. Moisten the mix until it’s damp enough to hold together when squeezed but doesn’t drip. Press it down lightly so the surface is firm; this helps seeds make solid contact with the soil.
Don’t skip sterilizing your containers. I run them through a quick dishwasher cycle or wipe them with rubbing alcohol before filling. This prevents damping-off, which can kill seedlings overnight. If you’re reusing pots, a 10-minute soak in hot, soapy water works too.
🌱 Step 2: Sow Seeds at the Right Depth and Warmth
Plant 1-2 seeds per cell at a depth of ¼ inch—about the width of the seed itself. Sowing too deep delays germination because the seedling exhausts its energy pushing through the soil. Cover lightly with a sprinkle of additional mix, then mist the surface until evenly damp. A heavy watering can will bury seeds too deep.
Tomato seeds germinate fastest at 75-85°F. I place the trays on a seedling heat mat, which keeps the soil 10°F warmer than room temperature. Without one, germination could take twice as long. Cover the trays with a clear humidity dome or plastic wrap to trap warmth and moisture—you’ll see sprouts in 5-10 days.
💧 Step 3: Maintain Moisture and Light for Strong Growth
Check daily but resist watering until the soil surface looks slightly dry. Overwatering now can cause damping-off, where seedlings collapse at the base. Once 50% of seeds have sprouted, remove the dome immediately—trapped humidity invites fungal diseases. You’ll know moisture is right when the soil surface looks damp but not glistening.
The instant seedlings break through the soil, move them to 14-16 hours of light daily. A south-facing window rarely provides enough intensity, so I use a full-spectrum LED grow light 2-4 inches above the plants. Raise it as they grow to maintain that gap. Without enough light, seedlings stretch leggy and never recover.
✂️ Step 4: Thin Seedlings and Harden Off Before Transplanting
When seedlings show 2-3 true leaves (the first set are cotyledons), thin to the strongest plant per cell by snipping the weaker one at the base with scissors. This avoids disturbing roots. Water gently afterward to settle the soil. Strong seedlings have thick stems and deep green leaves—anything pale or stretched needs more light.
Two weeks before your last frost date, start hardening off seedlings by placing them outside in a sheltered spot for 1-2 hours the first day. Gradually increase outdoor time by 1 hour daily over 10-14 days. This prepares them for real-world conditions. Skip this, and you’ll end up with shocked plants that wilt or bolt in the garden.
Tips & tricks for perfect indoor tomato seedlings
These little tricks will help you skip the common pitfalls and get your tomato seedlings off to the fastest, strongest start possible.
Seed Starting Mix Secret: The secret to speedy germination lies in your seed starting mix. I like to add a pinch of perlite or vermiculite to the mix—about 10% by volume—to improve drainage and aeration. This prevents waterlogging, which can suffocate seeds before they even sprout. The right mix should feel like a damp sponge when squeezed, not a dripping wet rag. Confession: I skipped this step for years and wondered why some seeds took forever to sprout.
Heat Mat Hack: If you don’t have a seedling heat mat, try placing your trays on top of your refrigerator or in a sunny windowsill during the day. Just be careful not to let the soil dry out completely. The key is maintaining that 75-85°F range consistently. I’ve seen germination times cut in half just by adding a simple heat source—it’s like giving your seeds a warm blanket to snuggle under.
Lighting Upgrade: For those without grow lights, a simple fluorescent shop light with a full-spectrum bulb can work in a pinch. Position it just a few inches above your seedlings and leave it on for the full 14-16 hours per day. The light should be bright enough that you can’t see your hand when it’s directly underneath. I’ve had great success with this setup, though it won’t give you quite the same intensity as a dedicated grow light.
Thinning Technique: When it’s time to thin your seedlings in Step 4, use a pair of clean, sharp scissors rather than pulling the weaker plants by hand. This prevents disturbing the roots of your keepers. I like to thin on a cloudy day when the seedlings are less stressed. The stronger plants will have thick stems and vibrant green leaves—anything leggy or pale is begging for more light.
Pro Tips for Planting Tomato Seeds Inside
- These little tricks will help you skip the common pitfalls and get your tomato seedlings off to the fastest, strongest start possible.
- Seed Starting Mix Secret: The secret to speedy germination lies in your seed starting mix.
- Heat Mat Hack: If you don’t have a seedling heat mat, try placing your trays on top of your refrigerator or in a sunny windowsill during the day.
Frequently asked questions
Got questions about growing tomatoes indoors? Here are some of the most common queries—and quick answers—to help you get started on your speedy, homegrown harvest!
How long does it take for tomato seeds to germinate indoors?
Most tomato seeds sprout in 5–14 days indoors, depending on warmth and moisture. Keep soil at 70–85°F (21–29°C) with consistent dampness for fastest results. If they’re taking longer, check humidity—try a plastic dome or misting to help them along!
Do I need special lights for indoor tomato seed germination?
Not for germination! Seeds only need warmth and moisture to sprout. Once they’ve sprouted (1–2 inches tall), switch to 12–16 hours of grow lights (LED or fluorescent) to prevent leggy seedlings. Skip the lights until then—it’s a waste of energy!
Why are my tomato seeds rotting instead of sprouting?
Overwatering or poor drainage are the top culprits. Use a well-draining seed-starting mix and water only when the top inch feels dry. If moisture sits too long, seeds suffocate. Try planting in small pots with drainage holes or on a tray of pebbles to improve airflow.
Can I plant tomato seeds directly in pots instead of starting them in soil?
Yes! Skip the soil entirely by using paper towels or damp coffee filters to germinate seeds first. Once sprouted (with roots ~¼-inch long), transplant into pots with soil. This method speeds up germination and gives you a head start on the growing season.
How early can I start planting tomato seeds indoors for a summer harvest?
Start seeds 6–8 weeks before your last frost date for transplanting outdoors. For indoor container growing, you can plant anytime—just ensure they get enough light (10+ hours/day) and move them outside gradually to harden off. Early starts mean earlier tomatoes, even in small spaces!
Wrapping up and next steps
Growing tomato seeds inside isn’t just a clever hack—it’s your ticket to an early, bountiful harvest! 🌱 With the right setup and a little patience, you’ll watch those tiny seeds transform into thriving seedlings, ready to conquer your garden.
Now that you’re armed with speed-germination tricks and pro tips, there’s no better time to start.
Your next step? Grab those seeds, prep your indoor space, and get planting! Keep an eye on your seedlings, and before you know it, you’ll be enjoying homegrown tomatoes straight from your own windowsill to table. Happy growing! 🍅✨