Companion Plants
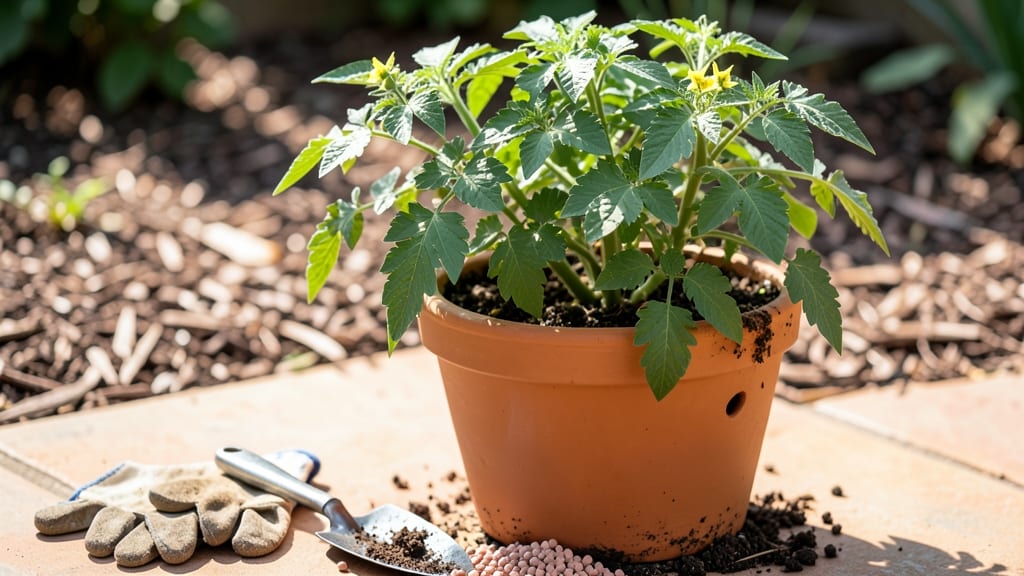
Repotting tomato plants at the right moment can double your harvest—when roots outgrow their current container, it’s time to upgrade. 🌱 I’ve learned the hard way that waiting too long means stunted growth, while moving too early stresses plants.
The key is timing: repot seedlings when they hit 2–3 inches tall, and mature plants when roots circle the pot’s bottom. You’ll need containers 10–12 inches in diameter for determinate varieties (bush types) and 15–20 gallons for indeterminate (vining) tomatoes.
Use well-draining potting mix with added compost—avoid garden soil, which compacts and suffocates roots. A handful of perlite or vermiculite keeps moisture balanced without waterlogging. After repotting, water thoroughly and place in full sun for 3–5 days to reduce shock.
Hold off on fertilizing for a week, then switch to a balanced, organic feed like fish emulsion. You’ll see new root growth within 7–10 days, and plants will rebound faster than you’d expect. For mature plants, gently loosen roots before transferring to avoid breakage.
If repotting in late season, prune suckers aggressively to redirect energy into fruit rather than foliage. The payoff? Heavier, earlier harvests and plants that thrive through summer’s heat.
📚 In This Guide
- What you need
- Instructions
- Tips and common mistakes
- Wrapping up and next steps
What you need
- ● New container: A pot 2–4 inches larger in diameter than the current one (e.g., 12–18 inches for mature plants). Use fabric grow bags or terra cotta/plastic pots with drainage holes.
- ● High-quality potting mix: 1–2 bags (5–10 gallons) of well-draining, organic mix (e.g., 60% compost, 30% perlite/pumice, 10% worm castings). Avoid garden soil—it compacts!
- ○ Drainage layer: 1–2 inches of gravel, perlite, or ceramic shards (optional but recommended for heavy clay soils).
- ● Pruning shears or clean knife: For trimming root-bound roots or damaged stems.
- ● Watering can or hose with gentle nozzle: For thorough but controlled watering post-repotting.
- ○ Gloves (optional): To protect hands from soil-borne pathogens or thorns.
- ● Compost tea or mycorrhizal fungi: Mix into soil to boost root health (1 tbsp per gallon of soil).
- ● Slow-release fertilizer: A balanced 10-10-10 or tomato-specific pellet (sprinkle lightly on top of soil).
- ● Plant support: Cages, stakes, or trellis if your tomato variety needs vertical space (e.g., indeterminate types).
- ● Mulch: Straw or shredded leaves to retain moisture and regulate soil temp.
Step-by-step instructions for repotting tomato plants
Here's how to give your tomato plants the root space they crave for explosive growth.
🪴 Step 1: Choose the Right Container and Timing
Select a container that's at least 2 inches larger in diameter than the current pot—tomatoes need room to spread their roots aggressively. I prefer fabric grow bags because they allow roots to breathe and prevent soil compaction, which is critical for heavy feeders like tomatoes. Avoid plastic pots that trap excess moisture and encourage root rot.
Time your repotting when plants are in their vegetative growth phase, not during flowering or fruiting. You'll know it's the right moment when you see new leaves emerging rapidly and the plant has outgrown its current container by at least half. This typically happens 4-6 weeks after transplanting or when roots start circling the pot's bottom.
🌱 Step 2: Prepare the New Pot and Soil Mix
Fill the new container about 1/3 full with a well-draining potting mix designed for vegetables. I blend my own using 60% compost, 30% coco coir, and 10% perlite to ensure excellent aeration and moisture retention. Add a handful of worm castings to the bottom layer for immediate nutrient boost—this is where the magic happens for root development.
Moisten the soil mix until it's damp but not soggy. You want it to hold together when squeezed but not drip water. The reason for this careful moisture balance is to prevent air pockets that could stress the roots during transplant. Tap the pot gently on the table to settle the soil before adding the plant.
🌿 Step 3: Transplant with Minimal Root Disturbance
Gently remove the plant from its current container by grasping the base of the stem and tipping it sideways. If roots are circling tightly, use a clean knife to make 2-3 vertical cuts along the root ball to encourage outward growth. This pruning technique prevents girdling and helps roots establish more efficiently in the new space.
Place the plant in the center of the new pot, maintaining the same depth it was growing at previously. Fill around the root ball with additional soil mix, pressing lightly to remove air pockets. Leave about 1 inch of space between the soil surface and the pot's rim—this prevents soil from spilling out when you water. Water thoroughly after repotting to help settle the soil and eliminate air gaps.
☀️ Step 4: Provide Ideal Conditions for Recovery
Keep the repotted tomato in a location with full sun exposure (6-8 hours daily) and maintain soil moisture by watering when the top 1-2 inches feel dry. The first week after repotting is critical—roots need time to establish in their new environment. You'll notice new root hairs forming within 7-10 days, visible through the fabric of grow bags or by gently probing the soil surface.
Hold off on fertilizing for 2 weeks to allow roots to recover from the transplant shock. Instead, provide support with a sturdy cage or stakes immediately after repotting—this prevents stem damage as the plant adjusts. Watch for signs of stress like yellowing leaves, which usually indicates overwatering or insufficient light during this sensitive period.
Tips & tricks for repotting tomato plants
These game-changing insights will help your tomato plants thrive after repotting—no guesswork involved.
Container Selection: Fabric grow bags are my top recommendation because they promote root aeration and prevent the soil compaction that can strangle tomato roots. If you must use plastic, opt for containers with drainage holes and avoid black pots—they absorb heat and can cook the roots. The 2-inch size increase in diameter is non-negotiable for aggressive root spreaders like tomatoes.
Root Pruning Technique: When you notice roots circling the bottom of the pot (usually around those 4-6 weeks after transplanting), make 2-3 vertical cuts along the root ball with a sterilized knife. This isn't just about aesthetics—it forces roots to grow outward rather than continuing their girdling pattern. Think of it as giving your tomato plant a fresh start with outward growth potential.
Soil Mix Science: The 60-30-10 ratio of compost, coco coir, and perlite creates the perfect balance: compost provides nutrients, coco coir holds moisture without suffocating roots, and perlite ensures aeration. Pro tip: Add worm castings to the bottom layer—they release nutrients slowly and contain beneficial microbes that jumpstart root development. This mix prevents both waterlogging and drought stress during the critical 7-10 day recovery period.
Post-Repotting Care: That 2-week fertilizer hiatus is crucial for root establishment. Instead of feeding, focus on maintaining consistent moisture—water when the top 1-2 inches feel dry—and providing full sun (6-8 hours daily). You'll know roots are adapting when you see new root hairs forming along the container edges within that first week. Yellowing leaves? That's your cue to check for overwatering or insufficient light during this sensitive period.
Pro Tips for Repotting Tomato Plants
- These game-changing insights will help your tomato plants thrive after repotting—no guesswork involved.
- Container Selection: Fabric grow bags are my top recommendation because they promote root aeration and prevent the soil compaction that can strangle tomato roots.
- Root Pruning Technique: When you notice roots circling the bottom of the pot (usually around those 4-6 weeks after transplanting), make 2-3 vertical cuts along the root ball with a sterilized knife.
Frequently asked questions
Got questions about repotting your tomato plants? You’re not alone! Here are some of the most common concerns—and their straightforward answers—to help you grow like a pro.
When is the best time to repot tomato plants?
Repot seedlings when they outgrow their starter pots (usually 2–3 weeks after germination). For mature plants, aim for early spring or late winter, before the growing season kicks off. Avoid repotting during extreme heat or cold—roots need time to settle!
How often should I repot tomato plants?
Tomatoes typically need repotting once every 1–2 years (or when roots circle the pot). If growing in containers, upgrade to a larger pot (5+ gallons) as they mature. For garden beds, transplanting may suffice if soil is rich. Watch for root-bound signs—like roots growing out of drainage holes—as your cue!
Can I repot tomatoes during flowering or fruiting?
Repotting during flowering or fruiting can stress plants and drop blossoms/fruit. If you must repot, do it early in the morning and keep the plant in partial shade for a few days. For established plants, wait until after harvest or next season’s start. Patience pays off!
What if my tomato plant looks sad after repotting?
Wilting or yellowing leaves? Don’t panic! It’s normal for plants to recover in 1–2 weeks. Keep soil moist (but not soggy), avoid direct sun, and hold off on fertilizing for 7–10 days. If leaves don’t bounce back after 2 weeks, check for root rot or pests.
Are there alternatives to repotting for container-grown tomatoes?
Yes! If repotting feels like too much work, try top-dressing with fresh compost or side-dressing with nutrient-rich soil. For root-bound plants, prune roots before repotting to encourage healthier growth. Or, swap pots entirely—tomatoes thrive in fabric grow bags or self-watering containers!
Wrapping up and next steps
Repotting your tomato plants is a simple yet powerful way to unlock their full potential—fueling stronger roots, healthier growth, and juicier harvests! 🌱 With the right container, soil, and timing, you’re not just giving your plants a fresh home; you’re setting them up for a thriving season.
Now that you’re armed with the know-how, there’s only one next step: grab those shears, pick your pots, and get repotting! Your future tomato feast starts with this small but mighty move.