
Watering
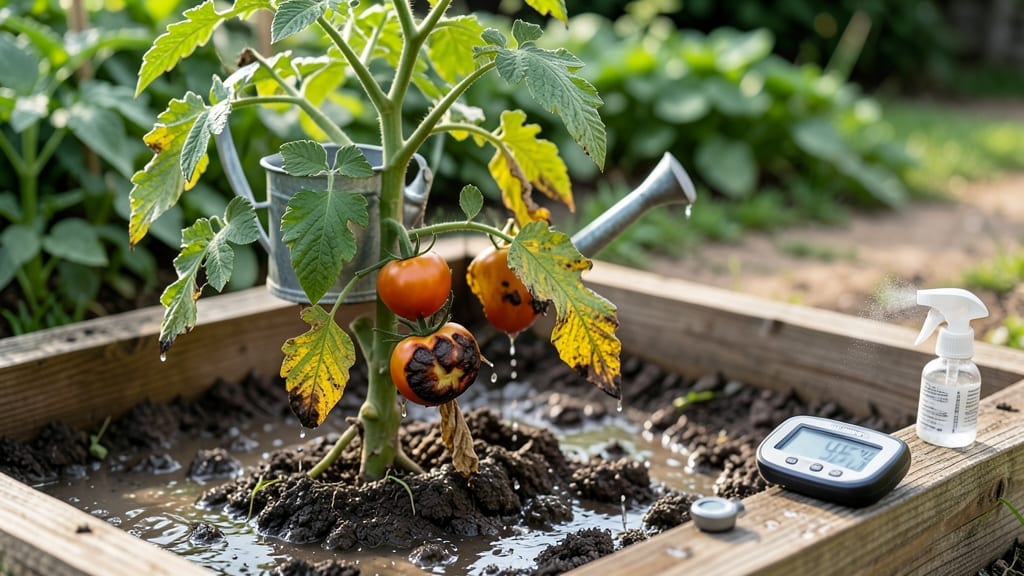
Your tomato plants might be drowning instead of thriving—overwatering signs like yellowing leaves and mushy roots are silent killers most gardeners miss until it's too late. 🌱 I've seen healthy plants turn into sad, droopy messes in just days from too much love (water, that is), and the damage starts before you notice.
The first clue is usually yellowing leaves that start at the bottom, paired with a weird, sour smell from the soil. Roots rot when they sit in soggy conditions, cutting off nutrients and causing wilting even when the soil looks wet.
Fungal growth like mold or powdery mildew on stems is another red flag—your plants are literally suffocating. Here's the fix: let the top 2 inches of soil dry out between waterings, and always check drainage.
If your pots or beds stay soggy for more than a day, it's time to adjust. For existing rot, trim affected roots and repot in fresh, well-draining mix—your plants can bounce back if you catch it early. Prevention is easier than cleanup.
Stick your finger in the soil before watering—if it's damp below the surface, wait. And for potted tomatoes, 10-15 gallon containers with drainage holes are non-negotiable. Trust me, your plants will thank you with juicy, disease-free fruit all season.
Why it happens
Overwatering tomato plants might seem like a harmless mistake—after all, who doesn’t want their plants to drink up? But when roots drown in soggy soil, a cascade of problems begins.
Understanding the why behind overwatering is the first step to fixing it. Let’s break down the key culprits and the science that turns your garden into a waterlogged swamp.
🌱 Poor Soil Drainage: The Silent Saboteur
Tomatoes thrive in well-draining soil, but if your garden bed or containers lack proper aeration, water pools around the roots instead of seeping away. Heavy clay soils, compacted dirt, or pots without drainage holes create a suffocating environment.
When roots sit in waterlogged conditions, they struggle to absorb oxygen—a process called hypoxia. Without oxygen, roots suffocate, cells break down, and nutrients can’t reach the plant. This leads to stunted growth, yellowing leaves, and even root rot.
Actionable fix: Amend your soil with organic matter like compost or perlite to improve drainage. For container gardens, ensure pots have drainage holes and use a mix of potting soil with added sand or coconut coir.
💧 Inconsistent Watering Habits: More Harm Than Good
Tomatoes don’t like their roots to dry out completely, but they hate being watered on a whim. Frequent light watering—especially if done daily—keeps the topsoil wet while the lower roots remain soggy. This creates an uneven moisture balance, where the plant can’t regulate water uptake efficiently.
Over time, the roots become waterlogged, and beneficial microbes that help break down nutrients are flushed away, leaving the plant nutrient-starved.
Actionable fix: Water deeply but infrequently—aim for 1–2 inches of water per week (adjust for climate). Use a moisture meter or the "finger test" (stick your finger 2 inches into the soil; if it’s dry, water). Early morning is best to reduce evaporation and fungal risks.
🌦️ Weather and Climate Mismatches: Nature’s Overachievers
Rainy seasons, humid climates, or even a sudden downpour can turn your careful watering schedule into a disaster. If you’re on a strict watering routine but Mother Nature adds extra moisture, the soil can become oversaturated.
Tomatoes in humid areas are especially vulnerable because excess moisture in the air slows evaporation, keeping the soil damp longer. This double whammy of high soil moisture + high humidity creates the perfect storm for fungal diseases like Phytophthora and Pythium, which attack weakened roots.
Actionable fix: Adjust your watering based on weather forecasts. If rain is in the forecast, skip your scheduled watering. Use mulch (straw or wood chips) to regulate soil temperature and reduce evaporation. For container plants, move them to a covered area during heavy rain.
🏺 Container Constraints: Roots Running Out of Space
Tomatoes in pots or small garden beds hit a wall when their roots outgrow their container. Without room to expand, roots become root-bound, circling the edges of the pot and struggling to access oxygen and water efficiently.
When you water, the excess has nowhere to go, leading to waterlogging at the bottom of the container. Over time, this causes anaerobic conditions (lack of oxygen), where harmful bacteria thrive and roots rot.
Actionable fix: Choose large containers (at least 5 gallons for determinate varieties, 10+ for indeterminate). Repot every 1–2 years or prune roots gently if they’re circling. Ensure pots have drainage holes and elevate them slightly to prevent water from pooling underneath.
How to Fix Overwatered Tomatoes
Now that you’ve spotted the warning signs—yellowing leaves, mushy roots, or wilting despite damp soil—it’s time to take action. The good news? Tomatoes are resilient, and with the right steps, you can nurse them back to health (or even save a struggling plant).
Here’s your step-by-step recovery plan, tailored to the root cause of the problem.
Cause: Soggy soil suffocates roots, cutting off oxygen and inviting rot. Fix:
- Stop watering for 24–48 hours to let excess moisture evaporate. This is critical—don’t skip it!
- If the soil is severely waterlogged (like a swamp), extend the pause to 72 hours and monitor closely.
- Pro Tip: 💡 Use your finger to check soil moisture 1–2 inches deep. If it’s still damp, wait longer.
Cause: Compacted or poorly draining soil traps water, stranding roots. Fix:
- For container-grown tomatoes:
- Lift the pot and poke drainage holes if none exist (use a nail or drill).
- Repot into a larger container with fresh, well-draining potting mix (avoid garden soil—it compacts).
- For in-ground plants:
- Dig around the base of the plant to loosen soil 6–8 inches deep. Mix in perlite, coarse sand, or compost to aerate.
- Create a small trench 1–2 feet from the stem to redirect excess water away from roots.
- Quick Fix: 🌡️ If you’re in a rush, top-dress with dry mulch (straw or shredded leaves) to absorb moisture and prevent surface evaporation.
Cause: Yellow or blackened leaves waste energy and attract pests. Fix:
- Sterilize your pruners with rubbing alcohol to avoid spreading disease.
- Snip off:
- All yellow or brown leaves (even if just a few spots are affected).
- Mushy or blackened stems at the base (cut ½ inch above the healthy tissue).
- Leave the green leaves—they’re photosynthesizing to power recovery!
- Pro Tip: ✨ If >50% of the plant is damaged, consider pruning back to the first set of healthy leaves to redirect energy to new growth.
Cause: Inconsistent watering (too much or too little) stresses plants. Fix:
- Water deeply but infrequently:
- Morning is best (8–10 AM) to allow foliage to dry before evening.
- Aim for 1–1.5 inches per week (including rain), delivered in one long session (e.g., 20–30 minutes with a drip system or soaker hose).
- Avoid wetting leaves (use drip irrigation or water at the base) to prevent fungal diseases like blight.
- Check for signs of recovery:
- New growth in 5–7 days? You’re on the right track.
- Still wilting? Repeat Step 1 and extend the drainage fixes.
Cause: Weak roots can’t recover without support. Fix:
- Fertilize lightly with a balanced, water-soluble fertilizer (10-10-10 or 5-5-5) 10 days after pruning. Over-fertilizing now can burn stressed roots!
- Add organic matter:
- Mix compost or worm castings into the top 6 inches of soil to improve structure and microbial activity.
- Avoid fresh manure—it can “burn” roots with excess nitrogen.
- For containers: 💡 Flush the soil with water every 2–3 months to prevent salt buildup from fertilizers.
Cause: Habits die hard—here’s how to break the cycle. Prevention Checklist:
| Problem | Solution |
|---|---|
| No drainage holes | Repot or add holes to containers. |
| Watering by schedule | Water when the top 1–2 inches of soil are dry (stick your finger in!). |
| Using garden soil | Switch to potting mix + perlite (50/50 ratio) for containers. |
| Ignoring weather | Reduce watering if rain is forecasted. |
| Overcrowded plants | Thin seedlings to 18–24 inches apart for better airflow. |
If your tomato’s roots are soft, black, or smelly (advanced rot):
- Dig carefully and rinse roots under cool, running water to remove excess soil.
- Trim away all mushy sections with sterilized scissors.
- Soak roots in a fungicide solution (1 tbsp hydrogen peroxide per gallon of water) for 10 minutes.
- Repot in fresh, sterile potting mix and keep dry for 3–5 days before resuming light watering.
Remember: 🌱 Recovery takes 1–2 weeks, but with these fixes, your tomatoes should bounce back—often stronger than before! If a plant is beyond saving, pull it and redirect your energy to healthier ones. Happy growing!
Frequently asked questions
How can I tell if my tomato plant is overwatered vs. underwatered?
Overwatered plants show yellowing leaves starting at the bottom, mushy stems, and a foul smell from the soil. Underwatered plants have crispy, brown edges on leaves and dry soil that pulls away from the pot. Stick your finger 2 inches deep—if it's damp, you're likely overwatering.
Can overwatered tomato plants recover if I stop watering immediately?
Yes, but act fast! Stop watering for 24-48 hours to let soil dry, then prune any mushy roots and repot in fresh, well-draining mix. For advanced rot (black, smelly roots), trim affected areas and treat with hydrogen peroxide solution before repotting. Recovery takes 1-2 weeks if caught early.
Why do my tomato leaves turn yellow after watering, even when the soil looks dry?
This often means root rot from poor drainage. Yellow leaves with soggy stems indicate roots suffocating in compacted or waterlogged soil. Check for drainage holes in pots and test soil moisture deeper than the surface—it may feel dry on top but wet below.
What's the best way to fix soggy soil in my tomato containers?
For containers, poke drainage holes if missing, then repot using a 50/50 mix of potting soil and perlite. Elevate pots on saucers to prevent water pooling. For in-ground plants, dig around roots to loosen soil and create a trench 1-2 feet away to redirect excess water.
How often should I water tomato plants to prevent overwatering?
Water when the top 1-2 inches of soil are dry—usually 2-3 times per week in summer, less in cooler weather. Use the "finger test" and water deeply in the morning to reduce evaporation. Avoid daily light watering, which keeps roots soggy and invites disease.