
Container Gardens
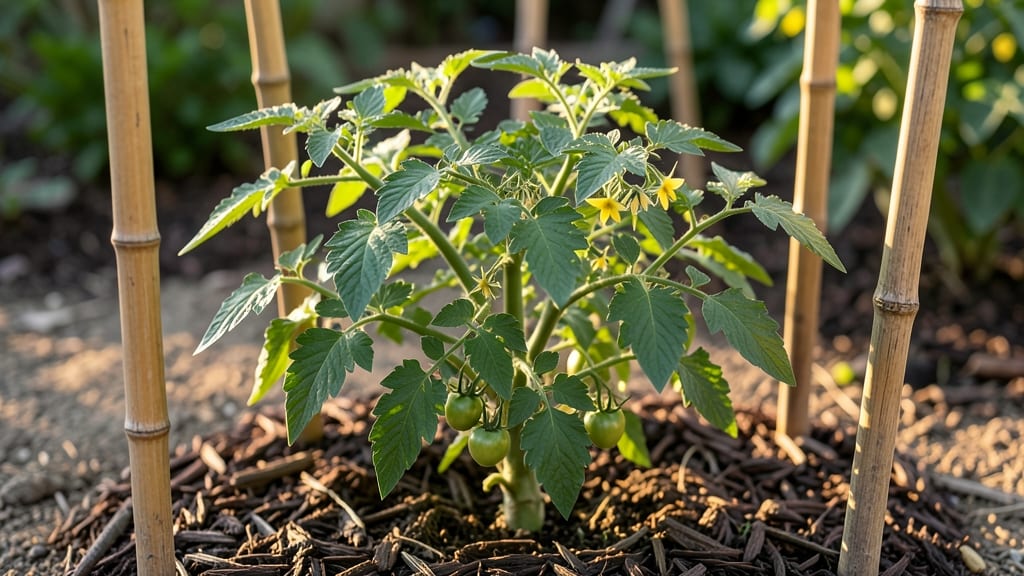
Growing tomatoes from seed to harvest is where gardening magic happens—the tomato growing process transforms a tiny seed into a vine heavy with sun-ripened fruit. 🌱 I’ve watched my first blight-resistant cherry tomatoes go from flimsy seedlings to bursting vines, and the secret isn’t luck—it’s timing, soil, and a few simple habits that keep plants thriving (even when I forget to water for a week).
Start with the right seeds—heirloom or hybrid—and give them warmth (70°F soil) before transplanting after your last frost. My biggest mistake? Skipping soil tests—now I mix in compost and a slow-release fertilizer to avoid leggy seedlings.
You’ll need 5-6 hours of sunlight daily, sturdy cages or stakes, and a watering routine that keeps soil moist but not soggy.
By mid-summer, your vines will be bursting with fruit—if you prune suckers early and tie stems to supports. The real payoff? Homegrown tomatoes taste nothing like store-bought, with flavors that peak in late August when the vines finally slow down.
Even my black thumb can’t kill these if you follow the basics.
Works for containers, raised beds, or in-ground gardens—just adjust spacing and support. Here’s how to avoid common pitfalls like blight and cracked fruit, so you end up with a harvest that makes your neighbors jealous. Let’s get those seeds started!
📚 In This Guide
- What you need
- Instructions
- Tips and common mistakes
- Wrapping up and next steps
What you need
- ● Container: A pot or grow bag with a minimum 5-gallon capacity (bigger is better for indeterminate varieties—aim for 7-10 gallons). Ensure it has drainage holes to prevent root rot.
- ● Potting Mix: A high-quality, well-draining mix designed for vegetables or tomatoes (avoid garden soil—it compacts and retains too much moisture). 5-10 pounds per container, depending on size.
- ● Tomato Seeds or Seedlings: Seeds: Start indoors 6-8 weeks before the last frost date. Choose determinate (bush) or indeterminate (vining) varieties based on your space and goals.
- ● Seedlings: Purchase healthy, disease-free transplants from a nursery. Look for sturdy stems and dark green leaves.
- ● Fertilizer: Balanced fertilizer (e.g., 10-10-10 or 5-5-5): Use at planting time (follow package instructions for dosage).
- ● Tomato-specific fertilizer (high in phosphorus and potassium): Apply every 2-3 weeks during the growing season.
- ● Support System: Cage or stake: Choose a 5-6 foot tall cage for indeterminate varieties or stakes + twine for DIY support.
- ○ Trellis: Optional for vertical gardening in small spaces.
- ● Mulch: 2-3 inches of organic mulch (e.g., straw or shredded leaves) to retain moisture and suppress weeds.
- ● Watering Can or Hose with Soaker Nozzle: Containers dry out fast—aim for 1-1.5 inches of water per week (adjust for heat/drought).
- ● Pruning Shears: Sharp, clean shears to prune suckers and remove diseased leaves.
- ● Grow Lights: If starting seeds indoors, a full-spectrum LED grow light (12-16 hours/day) speeds up germination.
- ● Drip Irrigation Kit: Automates watering and reduces disease risk from overhead moisture.
- ● Epsom Salt: A tablespoon dissolved in water every 2 weeks boosts magnesium for healthier foliage.
- ● Compost or Worm Castings: Mix into soil at planting for extra nutrients and microbial activity.
- ● Row Covers or Shade Cloth: Protects seedlings from pests or harsh sun in hot climates.
Step-by-step guide to growing tomatoes with confidence
Here’s my foolproof method for growing tomatoes from seed to harvest—no green thumb required.
🌱 Step 1: Start Seeds Indoors 6-8 Weeks Before Last Frost
Fill small seedling trays with sterile seed-starting mix (not garden soil) and moisten it until damp but not soggy. Press the mix down lightly so it’s firm enough to hold seeds in place. I like to use biodegradable pots—they eliminate transplant shock later.
Plant 2-3 seeds per cell at a depth of about ¼ inch. Cover them lightly with more mix, then mist the surface with water until evenly damp. Place the tray in a warm spot—75-85°F speeds up germination. Expect sprouts in 5-10 days.
Once seedlings emerge, move them to a sunny windowsill or under grow lights. Keep the soil consistently moist but never waterlogged—you’ll know it’s right when the top inch feels dry to the touch. Thin to the strongest seedling per cell after 2 weeks.
☀️ Step 2: Harden Off Seedlings Before Transplanting
Two weeks before your last frost date, start hardening off seedlings by placing them outside in a sheltered spot for 1-2 hours the first day. Gradually increase their outdoor time by 1 hour daily until they can handle a full day.
Watch for leggy seedlings (thin, stretched stems) or wilting—these are signs they’re not ready. If leaves yellow or curl, they’re getting too much sun too soon. A shady spot with indirect light works best during this phase.
On transplant day, choose an overcast afternoon to reduce stress. Dig holes slightly deeper than the seedling pots and bury stems up to the first set of true leaves. This encourages stronger root growth later.
🪴 Step 3: Plant in Full Sun and Provide Support Early
Tomatoes need 6-8 hours of direct sun daily. If your garden gets less, opt for smaller varieties like ‘Patio’ or ‘Tiny Tim’—they handle partial shade better. Space plants 18-24 inches apart in rows 3 feet apart for airflow.
Install cages or stakes at planting time—waiting until vines get heavy makes the job harder. I use 5-foot bamboo stakes tied with soft plant ties. Avoid wire or anything that can cut into stems as they thicken.
Water deeply at planting to settle the soil, then keep the root zone consistently moist. Mulch with 2-3 inches of straw or grass clippings to retain moisture and suppress weeds. Avoid wetting leaves to prevent disease.
💧 Step 4: Feed and Prune for Maximum Yield
After the first flowers appear, switch to a balanced fertilizer (like 10-10-10) every 2-3 weeks. Too much nitrogen makes plants leafy but fruitless—look for dark green leaves with fewer flowers. Yellow leaves mean it’s time to fertilize again.
Prune suckers (the small shoots in the leaf axils) regularly to focus energy on fruit production. Pinch off the first few suckers when they’re 2 inches long. Leave 3-4 main stems on indeterminate varieties for better airflow and fewer disease issues.
When fruit sets, reduce watering slightly to prevent cracking. Tomatoes need steady moisture, but soggy soil stresses plants. A soaker hose keeps roots hydrated without wetting foliage.
✂️ Step 5: Harvest at Peak Ripeness for Best Flavor
Pick tomatoes when they’re fully colored and slightly soft to the touch. Ripe ones pull away from the vine with gentle tugging. Indeterminate varieties produce all season—harvest regularly to encourage more fruit.
If frost threatens before all tomatoes ripen, pick green ones and store them in a paper bag with a banana at room temperature. The ethylene gas from the banana speeds up ripening.
Save seeds from heirloom varieties by scooping out the jelly-like center, fermenting it in a jar for 3-5 days, then rinsing and drying the seeds. Plant them next season for free tomatoes!
Tips & tricks for perfect tomato vine growth
Here's what nobody tells you about growing tomatoes that actually works—no gardening degree required.
Timing Secret: Those 6-8 weeks before last frost for starting seeds indoors are non-negotiable. Check your local frost dates and work backward—rushing this step leads to weak seedlings that struggle outdoors. I always mark my calendar with colored stickers to track progress visually.
Heat Control: Maintaining that 75-85°F range for germination is easier than you think. Place your seed trays on top of your fridge or near a sunny window with a clear plastic cover to trap heat. Avoid direct sunlight at this stage—it overheats the mix and can kill sprouts before they start.
Hardening Off Strategy: The 1-2 hours to full day progression during hardening off is crucial, but don't skip the gradual increase. I've seen beginners try to rush this and end up with crispy seedlings. Start with morning sun when temperatures are cooler, then move to afternoon spots as they adapt.
Pruning Technique: When pinching those 2-inch suckers, use your thumb and forefinger to gently twist them off rather than pulling. This prevents damaging the main stem. I do this every 2-3 weeks throughout the season—it might seem tedious, but it dramatically increases fruit production by directing energy to the main stems.
Pro Tips for Tomato Growing Process
- Here's what nobody tells you about growing tomatoes that actually works—no gardening degree required.
- Timing Secret: Those 6-8 weeks before last frost for starting seeds indoors are non-negotiable. Check your local fros...
- Heat Control: Maintaining that 75-85°F range for germination is easier than you think. Place your seed trays on top o...
Frequently asked questions
Got questions about growing tomatoes in containers?
You’re not alone! Here are some of the most common queries—and their straightforward answers—to help you grow like a pro.
How long does it take for tomato plants to produce fruit after planting?
Indeterminate varieties (like cherry tomatoes) can take 60–85 days from transplanting to first harvest, while determinate types (like Roma) may fruit in 50–70 days. Early blooms? Prune suckers to redirect energy to fruit production. Patience pays off—think of it as nature’s slow-cooked reward!
What’s the best temperature range for growing tomatoes in containers?
Tomatoes thrive in 70–85°F (21–29°C) daytime temps and 55–65°F (13–18°C) at night. Below 50°F (10°C), growth stalls; above 90°F (32°C), fruit may crack. Use black plastic mulch or shade cloth to regulate heat in hot climates. Pro tip: Move containers to partial shade during heatwaves!
Why are my tomato leaves turning yellow, and how do I fix it?
Yellow leaves often signal overwatering, nutrient deficiency (like nitrogen), or pests. Check soil moisture—containers dry faster! Test pH (aim for 6.0–6.8) and fertilize with balanced tomato food every 2–3 weeks. Spot aphids or whiteflies? Blast them off with water or use neem oil.
Can I grow tomatoes in containers year-round, or do they need a break?
Tomatoes are warm-season plants and need dormancy in winter. In cold climates, harvest before frost and store seeds or replant next spring. In mild zones, overwinter indoors (8+ hours of light) or grow winter varieties like ‘Solar Fire’. Think of it like a tomato vacation—rest ensures a bigger, better comeback!
What’s the easiest tomato variety for beginners in containers?
Start with compact or bush varieties like:
- ‘Tiny Tim’ (cherry, 18" tall)
- ‘Patio Princess’ (determinate, 3' tall)
- ‘Balcony Red’ (dwarf, 2' tall)
How often should I water container-grown tomatoes?
Water when the top inch of soil is dry—usually every 1–2 days in summer (more in heat/wind). Use self-watering containers or drip irrigation to avoid soggy roots. Morning watering prevents fungal diseases like blight. Let the soil dry slightly between waterings!
Wrapping up and next steps
Growing your own tomatoes is a rewarding journey that combines patience, care, and a sprinkle of green thumbs! 🌱 From selecting the perfect container to harvesting sun-ripened fruits, every step brings you closer to a bountiful harvest.
Whether you're a beginner or a seasoned gardener, the key is to stay consistent, observe your plants, and adapt as needed.
Now that you’re armed with knowledge, it’s time to roll up your sleeves and plant those seeds! Start small, track your progress, and soon you’ll be enjoying homegrown tomatoes straight from your container garden. Happy growing—your future meals (and bragging rights) will thank you! 🍅✨