
Planting
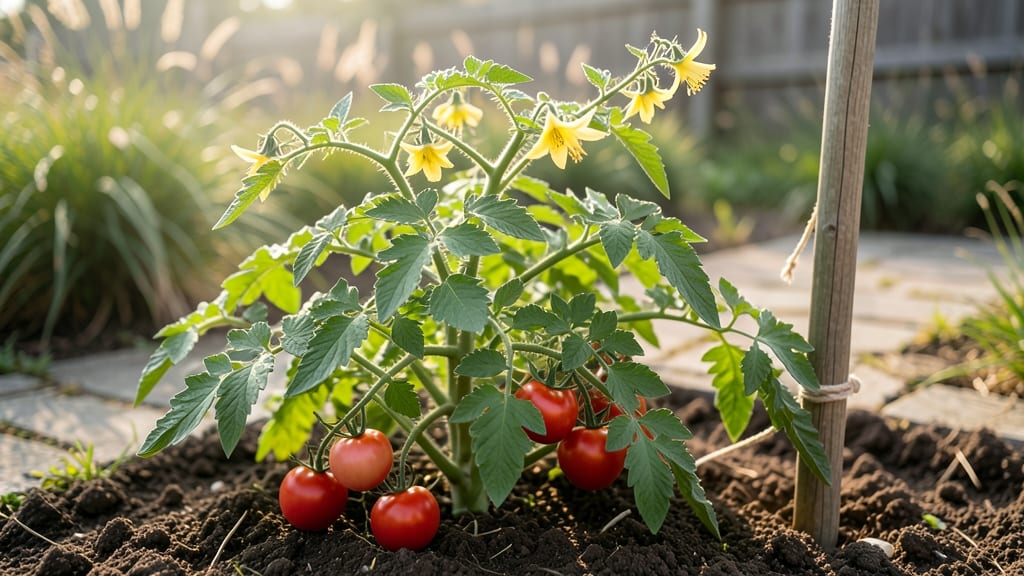
Tomato plant dirt isn't just dirt—it's the foundation for juicy, productive harvests that taste like summer. 🌱 I learned the hard way that my backyard's heavy clay soil would smother tomato roots no matter how much I watered. The secret?
A loose, airy mix that mimics the crumbly texture of well-aged compost, packed with organic matter to feed hungry plants all season. Start with 50% high-quality compost (homemade or store-bought) mixed into your native soil—this improves drainage and adds essential nutrients.
For containers, blend 60% potting mix with 30% compost and 10% perlite to prevent compaction. Tomatoes thrive in slightly acidic soil (pH 6.2-6.8), so test your mix and amend with sulfur or lime if needed.
You'll notice the difference immediately: roots spread freely, leaves stay vibrant green, and plants support heavier fruit loads without toppling. The key is keeping it fluffy—never packed down like construction fill. Add a handful of worm castings at planting for an extra nutrient boost.
This same mix works for raised beds, in-ground plots, or even large containers. The only rule? Never reuse last year's soil without refreshing it—tomatoes are heavy feeders and exhaust nutrients quickly. Your plants will thank you with sun-ripened tomatoes that burst with flavor.
📚 In This Guide
- What you need
- Instructions
- Tips and common mistakes
- Wrapping up and next steps
What you need
- ● Garden soil (topsoil): 50% by volume (ensure it’s well-draining and free of weeds).
- ● Compost: 25% by volume (homemade or store-bought, rich in organic matter).
- ● Peat moss or coconut coir: 10% by volume (improves moisture retention and aeration).
- ● Perlite or vermiculite: 5% by volume (adds lightness and prevents compaction).
- ● Balanced fertilizer (10-10-10 or 5-5-5): 1 cup per 5 gallons of mix (boosts nutrient content).
- ○ Lime (optional, if soil is acidic): 1–2 tablespoons per 5 gallons (adjust pH to 6.0–6.8).
- ● Garden gloves (to protect your hands from dirt and thorns).
- ● Garden trowel or shovel (for mixing and planting).
- ● Wheelbarrow or large bucket (to blend ingredients easily).
- ○ pH testing kit (optional but helpful for fine-tuning soil acidity).
- ● Tomato seedlings or seeds (start with healthy, disease-free plants!).
- ● Mulch (straw or wood chips): 2–3 inches (retains moisture and suppresses weeds).
How to create the perfect tomato plant dirt mix
This nutrient-packed blend gives tomatoes the loose, well-draining foundation they crave.
🌱 Step 1: Combine Base Materials for Optimal Structure
Start with 60% high-quality potting soil as your base—this provides essential organic matter while staying lightweight. I like to use a mix specifically formulated for vegetables, as it contains balanced nutrients without being too dense. Add 20% perlite to create air pockets; this prevents compaction and helps roots breathe, which is critical for tomato plants that hate soggy feet.
Next, incorporate 10% compost—well-aged, dark, and crumbly—into the mix. This introduces beneficial microbes and slow-release nutrients. I sift it through a fine mesh screen first to remove any large chunks that could disrupt the soil's even texture. The goal is a blend that holds moisture but drains freely, with a crumbly consistency that falls apart easily between your fingers.
💧 Step 2: Add Nutrient Boosters for Vigorous Growth
Work in 5% worm castings for a gentle but potent nutrient boost. These contain natural plant hormones that encourage root development and disease resistance. I sprinkle them evenly over the mix and gently fold them in with my hands—this prevents clumping while ensuring even distribution. For extra phosphorous—critical for flowering and fruiting—add 1 tablespoon of bone meal per gallon of mix.
If your tomatoes are destined for containers, include 5% coconut coir to improve water retention without compacting the soil. This is especially helpful in hot climates where soil dries out quickly. Mix everything thoroughly until the blend looks uniform, with no streaks of perlite or compost. The final texture should resemble a soft, airy sponge—light enough to crumble but with enough structure to support strong stems.
☀️ Step 3: Adjust pH and Moisture for Tomato Success
Tomatoes thrive in slightly acidic soil with a pH between 6.2 and 6.8. Test your mix with a simple pH meter or kit—if it reads higher than 7.0, add a small amount of sulfur and remix. I like to keep a jar of the finished mix handy to test periodically, as pH can shift over time. Once balanced, moisten the blend until it reaches a consistency where a handful forms a loose clump that holds together but crumbles when gently squeezed.
Let the mix sit for 24 hours before use. This allows any chemical adjustments to stabilize and gives the organic components time to begin breaking down. The next day, give it one final stir to redistribute any settled materials. Your finished tomato dirt should smell earthy and fresh, with no sharp chemical odors. This blend will keep its structure for 4-6 weeks if stored in a sealed container, but for best results, use it fresh in your planting beds or containers.
✂️ Step 4: Apply and Maintain for Continuous Productivity
Fill your planting containers or garden beds with the mix, leaving 1 inch of space at the top to accommodate watering. For containers, I always add a 1-inch layer of coarse sand or gravel at the bottom first to improve drainage. Plant your tomato seedlings gently, ensuring the soil covers the stems up to the first set of true leaves—this encourages strong root development without burying the plant too deeply.
After planting, water thoroughly until moisture runs freely from the drainage holes, then let the soil dry slightly between waterings. I check moisture by sticking my finger 1 inch into the soil—if it feels dry, it's time to water. Over time, you can maintain this mix by top-dressing with a thin layer of compost every 4-6 weeks to replenish nutrients. This approach keeps your tomato plants thriving all season long, with strong stems, abundant foliage, and heavy fruit production.
Tips & tricks for perfect tomato plant dirt
Here's what nobody tells you about creating the ideal foundation for your tomato plants.
Texture is Everything: After combining your 60% potting soil with 20% perlite and 10% compost in Step 1, test the consistency by squeezing a handful—it should crumble easily between your fingers but hold together when lightly pressed. This "sponge-like" texture is non-negotiable for tomato roots. If it feels too dense, add another 5% perlite; if too loose, mix in 5% more compost. The goal is that perfect balance between aeration and moisture retention.
Worm Castings Technique: When incorporating the 5% worm castings in Step 2, don't just sprinkle them on top—work them in gently with your hands to avoid creating pockets of concentrated nutrients. I like to think of it like folding in flour to dough: distribute evenly while maintaining the airy structure. These castings contain beneficial microbes that need to be evenly dispersed throughout the mix to colonize the entire root zone.
pH Testing Shortcut: For the pH adjustment in Step 3, I keep a small jar of the finished mix handy to test periodically. If you don't have a pH meter, use red cabbage juice as a natural indicator—blue/purple means acidic (good for tomatoes), while green/yellow indicates neutral or alkaline soil. This DIY method works surprisingly well and costs nothing. Remember, tomatoes thrive in that 6.2-6.8 range, so aim for that vibrant purple hue.
Storage Wisdom: After your 24-hour curing period, store any unused mix in a sealed container with a small handful of dry perlite sprinkled on top. This prevents compaction and maintains the airy structure for up to 6 weeks. I like to label containers with the date and store them in a cool, dark place. The perlite layer acts like a breathable lid, keeping the mix fresh while preventing moisture buildup that could lead to mold.
Pro Tips for Tomato Plant Dirt
- Here's what nobody tells you about creating the ideal foundation for your tomato plants.
- This "sponge-like" texture is non-negotiable for tomato roots.
- Worm Castings Technique: When incorporating the 5% worm castings in Step 2, don't just sprinkle them on top—work them in gently with your hands to avoid creating pockets of concentrated nutrients.
Frequently asked questions
What’s the ideal soil pH for tomato plants?
Tomatoes thrive in slightly acidic to neutral soil with a pH between 6.0 and 6.8. Test your soil with a kit—if it’s too alkaline (high pH), amend with sulfur or peat moss. Pro tip: Avoid over-fertilizing with lime, which can throw off the balance!
How long does it take for tomato dirt to break down?
If you’re using fresh compost or organic matter, it may take 2–4 weeks to fully integrate into the soil. For potting mixes, blend ingredients 1–2 days before planting to ensure even moisture and nutrient distribution. Patience pays off for healthier roots!
Can I reuse last year’s tomato dirt?
Reusing soil can work, but sterilize it first to kill pests/diseases (bake at 200°F for 30 mins or solarize for 4–6 weeks). Remove old plant debris and replenish nutrients with compost or fertilizer. Warning: Avoid reusing soil from blight-affected tomatoes—it’s a fast track to reinfection!
What’s a budget-friendly alternative to store-bought tomato soil?
Mix 1 part coconut coir or peat moss (for moisture), 1 part compost, and 1 part perlite/vermiculite (for drainage). Add a handful of worm castings or a slow-release fertilizer for nutrients. Bonus: Save money by using yard waste (shredded leaves, grass clippings) as “green” compost!
Why are my tomato plants wilting even with “perfect” dirt?
Wilting can signal overwatering, underwatering, or root issues. Check soil moisture (top 1–2 inches should be dry), ensure pots have drainage holes, and inspect for pests (aphids, blight). If roots look mushy, it’s root rot—repot with fresh, dry mix immediately!
Does tomato dirt need to be warm for seedlings?
Seedlings prefer soil temps between 70–85°F. Use a seedling heat mat if your climate is cool, or plant in black plastic mulch to absorb sunlight. Cold soil slows germination and weakens young roots—keep it cozy!
Wrapping up and next steps
Growing tomatoes is a rewarding journey, and the right tomato plant dirt is your secret weapon for a thriving garden! 🌱 Whether you’re a seasoned gardener or just starting, a loose, nutrient-rich mix sets the stage for lush plants and juicy, flavorful harvests.
Now that you know the essentials—from soil composition to troubleshooting—it’s time to roll up your sleeves and get planting!
Ready to take the next step? Start by prepping your garden beds or containers, then mix up your soil blend with confidence. Watch your tomato plants flourish, and soon, you’ll be enjoying homegrown tomatoes that taste like summer in every bite. Happy gardening! 🍅✨