
Companion Plants
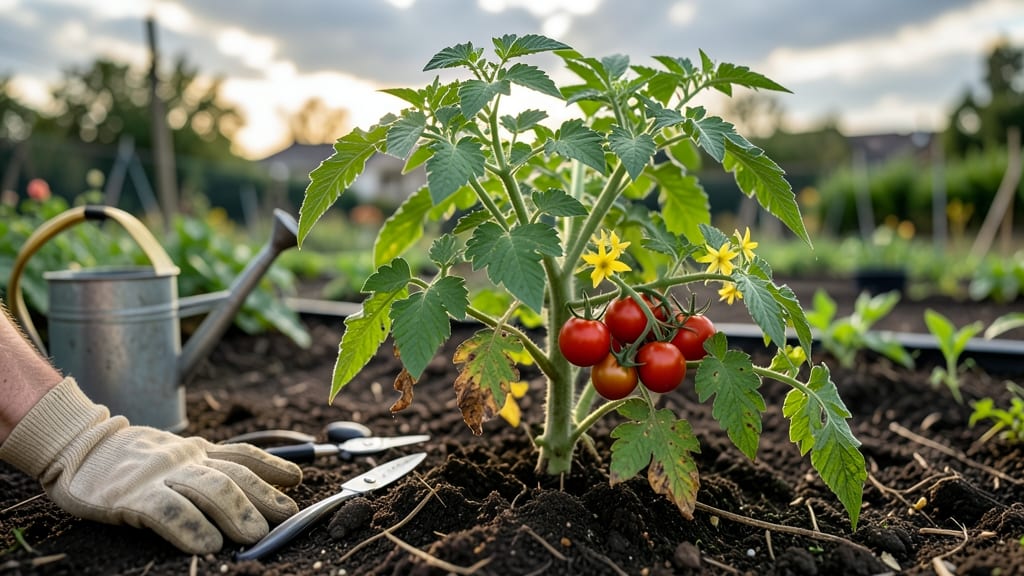
Tomato plants turning brown on the bottom? That’s your plant screaming for help—root rot or early blight is likely the culprit, and the good news is you can still save it with 3 simple steps.
I’ve nursed back more tomato plants than I’d like to admit, and the key is acting fast before the damage spreads upward. Start by checking the soil: if it’s soggy or smells like wet socks, you’ve got root rot from overwatering.
Early blight shows up as dark spots on the bottom leaves, often with concentric rings. Both problems thrive in damp, crowded conditions, so your first move is to trim away affected leaves and improve airflow around the plant.
Next, adjust your watering game—deep but infrequent watering at the base (not overhead) keeps roots healthy. Add a 2-inch layer of mulch to protect soil moisture levels and prevent splashing water onto leaves.
For extra defense, a copper fungicide spray (organic option) or baking soda mix (1 tsp per quart of water) can stop blight in its tracks. With these fixes, your tomato plants bounce back surprisingly fast.
The browned bottom leaves will drop off naturally, and new growth will emerge green and strong—just like my plants did after last summer’s downpours. Let’s get those tomatoes thriving again!
Root Rot Rescue: Hidden Causes
When your tomato plants develop brown, mushy bottoms, it’s often a sign of stress from unseen forces lurking in the soil. Understanding the root causes is the first step to saving your plants—and your harvest.
Let’s break down the science behind why this happens, so you can tackle the problem head-on.
Tomatoes are thirsty plants, but too much water can drown their roots, cutting off oxygen and inviting fungal infections like Phytophthora or Pythium. These pathogens thrive in waterlogged soil, causing roots to rot and stems to weaken.
Why it happens:
- Compacted or clay-heavy soil holds excess moisture, suffocating roots.
- Lack of drainage in containers or raised beds traps water, accelerating rot.
- Frequent watering without drying periods keeps soil soggy, creating the perfect breeding ground for pathogens.
💡 Pro Tip: Test your soil’s drainage by digging a hole, filling it with water, and timing how long it takes to drain. If it takes more than 30 minutes, amend the soil with perlite, sand, or compost to improve aeration.
Fungal diseases like Fusarium wilt or Verticillium wilt attack tomato roots, blocking nutrient uptake and causing wilting, yellowing, and brown discoloration at the base. These fungi often lurk in contaminated soil or old plant debris.
Why it happens:
- Infected soil or tools spread spores from previous infected plants.
- High humidity and warm temperatures (70–85°F) create ideal conditions for fungal growth.
- Weakened plants (from stress, poor nutrition, or overcrowding) are easier targets.
🔍 Watch For:
Symptom
Likely Cause
Brown, mushy stems at soil level
Phytophthora root rot
Yellowing leaves with brown streaks in stems
Fusarium or Verticillium wilt
Blackened, foul-smelling roots
Bacterial soft rot (Erwinia)
🌡️ Prevention Tip: Avoid overhead watering (use drip irrigation instead) and rotate crops yearly to break fungal cycles. If you suspect wilt, remove infected plants immediately and disinfect tools with 70% rubbing alcohol.
While you’re focused on above-ground pests, root-feeding insects like nematodes, grubs, or cutworms are silently devouring your tomato roots. Their feeding disrupts nutrient absorption, leading to stunted growth and brown, weakened stems.
Why it happens:
- Nematodes (microscopic worms) pierce roots, causing galls or lesions that block water uptake.
- Grubs (from beetles or Japanese beetles) chew through roots, leaving behind ragged, browned tissue.
- Cutworms sever stems at the base, mimicking rot but with clean, jagged cuts.
🕵️️ How to Check: Gently dig around the base of the plant and look for:
- Tiny, thread-like nematodes (use a magnifying glass).
- White grubs or larvae in moist soil.
- Chewed roots or stem collars.
✨ Solution: Apply beneficial nematodes (Steinernema or Heterorhabditis) for pest control, or use organic sprays like neem oil. For grubs, handpick them at night (they’re most active then!) or use milky spore powder for long-term prevention.
Tomatoes are tropical plants, but temperature swings can shock their roots. Cold soil (below 50°F) slows root activity, while excessive heat (above 90°F) can scorch roots, leading to browning and wilting.
Why it happens:
- Cold soil reduces microbial activity, starving roots of nutrients.
- Heat stress causes roots to dry out quickly, even in moist soil.
- Frost or late-season chills damage root cells, making plants vulnerable to secondary infections.
🌡️ Quick Fixes:
- Mulch heavily with straw or wood chips to regulate soil temperature.
- Water deeply in the morning to cool roots (avoid evening watering in hot climates).
- Use row covers or cloches for young plants in spring/fall.
Revive Your Tomatoes Quickly
Now that you know the likely culprits behind your tomato plants turning brown at the bottom—whether it’s root rot, overwatering, poor drainage, or fungal infections—it’s time to take action. The good news? Most of these issues can be fixed with simple, practical steps.
Below, we’ll break down cause-specific solutions to nurse your plants back to health and prevent future problems. Let’s get those tomatoes thriving again! 🌱🍅
If your tomato plants are suffering from root rot or excess moisture, act fast to save them. Root rot spreads quickly and can kill plants in days if left unchecked.
🚰 Step 1: Stop Watering Immediately
- Cut off all water for at least 3–5 days to let the soil dry out.
- If the soil is soggy or smells foul, root rot is likely the issue.
- Pro Tip: 💡 Use your finger to check soil moisture—if the top 1–2 inches are damp, wait before watering again.
🌱 Step 2: Improve Drainage
- Repot the plant in fresh, well-draining soil if possible (use a mix of potting soil + perlite or vermiculite).
- If repotting isn’t an option, amend the existing soil with compost or coconut coir to improve aeration.
- Pro Tip: 🌡️ Add a 1-inch layer of gravel or sand at the bottom of the pot to prevent future waterlogging.
🧴 Step 3: Apply Fungicide (If Needed)
- If root rot is confirmed, treat with a hydrogen peroxide solution (3%) or a copper-based fungicide.
- Mix 1 part 3% hydrogen peroxide with 10 parts water and water the soil lightly (avoid over-saturating).
- Pro Tip: ✨ For organic control, sprinkle crushed cinnamon or neem powder around the base to inhibit fungal growth.
⏰ Step 4: Monitor & Adjust Watering
- Once roots recover (after 1–2 weeks), resume watering only when the top inch of soil is dry.
- Use drip irrigation or soaker hoses instead of overhead watering to keep foliage dry.
- Pro Tip: 🎯 Consider self-watering pots or moisture meters for better control.
If your tomatoes are in pots with no drainage holes, excess water pools at the bottom, leading to brown, mushy stems.
🔪 Step 1: Drill Drainage Holes (If Possible)
- Use a power drill or nail to create 2–4 holes in the bottom of the pot.
- Pro Tip: 🔥 If drilling isn’t an option, place the pot on a saucer with pebbles to elevate it slightly.
👨🍳 Step 2: Repot with Better Soil
- Remove the plant gently and rinse the roots with water to remove old, compacted soil.
- Repot in a larger container with fresh, loose potting mix (avoid garden soil—it compacts).
- Pro Tip: 🌱 Mix in orchid bark or worm castings for extra aeration.
🥘 Step 3: Elevate the Pot
- Place the pot on feet or bricks to ensure water drains away completely.
- Avoid saucers that trap excess water—opt for drip trays with holes instead.
If brown, slimy stems or black spots are present, a pathogen may be at fault.
💡 Step 1: Prune Infected Areas
- Use sterilized pruners to cut off brown, mushy stems at least ½ inch above the damage.
- Dispose of infected plant debris immediately (do not compost).
🍎 Step 2: Apply Fungicide or Bacterial Spray
- Spray with a copper fungicide or neem oil solution (1 tbsp neem oil + 1 tsp mild soap per quart of water).
- For bacterial issues, try a baking soda spray (1 tsp baking soda + 1 quart water + a few drops of soap).
- Pro Tip: 🎯 Rotate treatments every few days for severe infections.
🌿 Step 3: Improve Air Circulation
- Space plants 18–24 inches apart to reduce humidity around foliage.
- Remove lower leaves to allow better airflow to the stem.
- Pro Tip: ✨ Use a small fan on low setting near plants to keep air moving (great for greenhouses).
Once your plants recover, keep these habits to avoid future brown-bottom woes:
✅ Water wisely – Only when the top 1–2 inches of soil are dry. ✅ Choose the right pot – Terracotta or fabric pots with drainage holes. ✅ Mulch properly – Use straw or wood chips to retain moisture without suffocating roots. ✅ Rotate crops – Avoid planting tomatoes in the same spot yearly to prevent soil-borne diseases. ✅ Test your soil – Aim for a pH of 6.0–6.8 and good drainage.
With these targeted fixes, your tomato plants should bounce back in 1–3 weeks. Keep an eye on them, adjust care as needed, and soon you’ll be harvesting juicy, disease-free tomatoes instead of dealing with brown stems! 🍅🌟
Frequently asked questions
Why do my tomato plant leaves turn brown at the bottom first?
This is often the first sign of early blight or root stress. The lower leaves are closest to the soil (where pathogens live) and absorb excess moisture first. Early blight shows as dark concentric rings, while root rot causes yellowing followed by browning as roots fail to supply nutrients.
Can I save a tomato plant with brown bottom leaves?
Yes! Remove the affected leaves immediately (don’t compost them) and improve airflow. For fungal issues, spray with a copper fungicide or neem oil mix (1 tbsp oil + 1 tsp soap per quart of water). If root rot is suspected, stop watering for 3-5 days to let soil dry out.
What's the difference between brown leaves from blight vs. overwatering?
Blight shows as dark brown spots with yellow halos on lower leaves, often with concentric rings. Overwatering causes yellowing first, then brown, plus mushy stems and foul-smelling soil. Check the roots: healthy roots are firm and white; rotted roots are black and slimy.
Will pruning brown bottom leaves help my tomato plant recover?
Prune 1/3 of the foliage to improve airflow and redirect energy to new growth. Use sterilized pruners and cut 1/4 inch above brown spots. Avoid removing too much at once—focus on the bottom 12-18 inches where disease spreads fastest.
How can I prevent brown bottom leaves in future tomato plants?
Start with well-draining soil (mix potting soil with perlite) and drip irrigation to keep leaves dry. Space plants 18-24 inches apart, mulch with straw, and rotate crops yearly. For extra protection, add compost tea every 2 weeks to boost plant immunity.