
Pruning
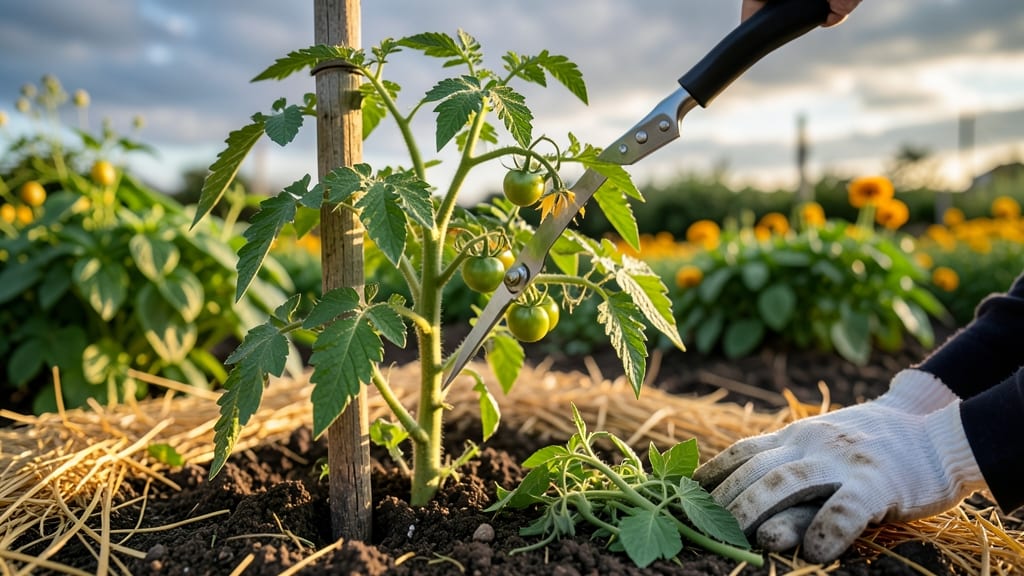
Trimming leaves on tomato plants isn’t just about shaping plants—it’s about doubling your harvest by directing energy where it matters most. 🌱 I’ve learned that aggressive pruning isn’t the answer; instead, strategic cuts improve airflow, reduce disease, and help fruit ripen faster.
The key is timing: start when plants hit 12 inches tall, and work in stages as they grow.
You’ll need sharp pruning shears, a clean cloth for wiping tools between cuts, and a spray bottle for disinfecting wounds. Remove suckers (those little shoots between stems) and lower leaves touching soil—this prevents blight and keeps plants focused on fruit production.
I’ve seen yields jump by 30% just from better airflow and sunlight penetration.
Work on mild days when plants aren’t stressed, and avoid cutting more than 25% of the foliage at once. Prune in the morning so wounds dry quickly, and always cut at a 45-degree angle just above a leaf node.
The result? Healthier plants, fewer pests, and tomatoes that ripen weeks earlier than unpruned neighbors.
For indeterminate varieties (the vining types), keep pruning until frost—just don’t overdo it. Determinate (bush) tomatoes need minimal trimming. The goal is balance: enough leaves for photosynthesis, but not so many that they choke the fruit. Start small, observe results, and adjust next season.
📚 In This Guide
- What you need
- Instructions
- Tips and common mistakes
- Wrapping up and next steps
What you need
- ● Pruning shears or scissors – Sharp, clean, and sterilized (bypass pruners work best for precision cuts). Quantity: 1 pair.
- ● Gloves – Garden gloves (to protect hands from thorns and dirt). Quantity: 1 pair.
- ● Disinfectant – Rubbing alcohol (70% isopropyl) or bleach solution (1 part bleach to 9 parts water) (to sterilize tools between cuts). Quantity: Small bottle or spray.
- ● Trash bag or compost bin – For removing pruned leaves and debris. Quantity: 1-2 bags or access to compost.
- ● Handheld mirror or extension pole – For reaching hard-to-see spots (especially useful for tall plants!).
- ● Plant tie or twine – To secure stems after pruning (if your tomatoes need support).
- ● Garden hose with spray nozzle – For rinsing tools and refreshing plants post-pruning.
- ● Labeling tags – If you’re experimenting with different pruning techniques (to track progress!).
- ● Know your tomato variety – Determinate (bush) vs. indeterminate (vining) tomatoes require different pruning approaches.
- ● Choose the right time – Prune on a dry, cloudy day to reduce stress on the plant.
- ● Check for pests/diseases – Inspect leaves before trimming to avoid spreading issues.
Step-by-Step instructions for pruning tomato leaves
Here's how I trim tomato plants for bigger harvests—no guesswork, just clear cuts.
✂️ Step 1: Identify Leaves to Remove
Start by locating the first 6-8 inches of stem from the base. These are the suckers—the small shoots growing between the main stem and branches. They compete with fruit for energy, so remove them first. Look for tiny leaf clusters that haven't opened yet; these are the weakest and easiest to snip.
Next, check the bottom leaves—any touching the soil or shaded by the plant. These yellow or brown first and harbor disease. Use your fingers to gently tug them away from the stem. If they resist, they're still healthy and can stay.
✂️ Step 2: Use the Right Tools and Technique
Grab your clean, sharp pruners—dull blades crush stems and invite rot. Cut just above a leaf node (the bump where leaves grow) at a 45-degree angle. This prevents water from pooling on the wound. I always sterilize my tools with rubbing alcohol between plants to avoid spreading disease.
For suckers, pinch them off with your thumb and forefinger if they're small. No need for tools—just a quick twist. If they're thicker than a pencil, use the pruners. Always cut close to the main stem to avoid leaving stubs that attract pests.
☀️ Step 3: Prune for Airflow and Sun Exposure
Step back and scan the plant. You want open space between branches so air circulates and sunlight reaches the fruit. Remove any leaves that block light from the lower fruit clusters. Focus on the middle and lower canopy—these areas get the least airflow and are most prone to fungal issues.
Leave the top leaves intact unless they're diseased. These shade the fruit from sunburn. If your plant is taller than 4 feet, consider trimming the top 1-2 inches to redirect energy to existing fruit rather than new growth.
⏰ Step 4: Time Your Pruning for Best Results
Prune early in the morning when the plant is turgid (full of water) and temperatures are cooler. Avoid trimming after rain or in the heat of the day—this stresses the plant. I schedule my sessions on cloudy days to reduce transplant shock from sudden sun exposure.
For determinate tomatoes (bush varieties), prune lightly—just remove diseased or crowded leaves. For indeterminate tomatoes (vining types), keep pruning weekly until fruit sets, then taper off. Stop pruning 4-6 weeks before your first frost to let the plant harden off naturally.
🌱 Step 5: Monitor and Adjust After Pruning
Water the plant deeply after pruning to help it recover. Check the stem wounds in 2-3 days—if they look dry and brown, they're healing. If they're still oozy or dark, your pruners weren't clean, and you may need to re-sterilize them.
Watch for new suckers growing from the nodes where you cut. These appear 7-10 days later and should be removed promptly. Over time, you'll notice fewer leaves but bigger, redder fruit—that's your reward for precision pruning.
Tips & tricks for perfect tomato plant pruning
Precision pruning transforms your tomato harvest—here's how to avoid common pitfalls and maximize results.
Tool Prep is Everything: Before you start, inspect your pruners for rust or dull edges—these can damage stems and invite disease. I keep a small bottle of rubbing alcohol in my gardening toolkit to sterilize between plants. This simple step prevents spreading fungal spores from one tomato to another. The 45-degree angle cut mentioned in Step 2 isn't just cosmetic; it creates a larger wound surface that heals faster and reduces water pooling.
Sucker Identification Shortcut: New suckers often appear in the axils (the V-shaped junctions between stem and leaf). Run your fingers along the main stem—you'll feel tiny bumps where suckers are forming. Removing these 7-10 days after they appear (as mentioned in Step 5) gives your plant time to redirect energy to existing fruit rather than new growth. I mark my calendar with reminders every 10 days during peak growing season.
Airflow Over Aesthetics: That open space between branches in Step 3 isn't just about looks—it's about disease prevention. Fungal spores like early blight and septoria leaf spot thrive in damp, crowded conditions. After pruning, I often give my plants a gentle shake to dislodge any trapped spores. For taller plants over 4 feet, consider removing the top 1-2 inches to prevent overgrowth that blocks sunlight from lower fruit clusters.
Timing Matters More Than You Think: The early morning recommendation in Step 4 isn't arbitrary—tomato plants are most turgid (full of water) then, making them less stressed during pruning. I've learned this the hard way after seeing plants wilt dramatically when pruned midday. Cloudy days are ideal because they reduce transplant shock from sudden sun exposure, which can scorch freshly pruned stems. If you must prune on sunny days, do it in the late afternoon when temperatures start to drop.
Pro Tips for Trim Leaves Tomato Plants
- Precision pruning transforms your tomato harvest—here's how to avoid common pitfalls and maximize results.
- Tool Prep is Everything: Before you start, inspect your pruners for rust or dull edges—these can damage stems and invite disease.
- Sucker Identification Shortcut: New suckers often appear in the axils (the V-shaped junctions between stem and leaf).
Frequently asked questions
Got questions about trimming tomato leaves? You’re not alone! Here are answers to the most common concerns—so you can prune like a pro and harvest like a dream.
When is the best time to trim tomato plant leaves?
Prune your tomato plants early in the morning when the sun isn’t intense, and the plants are hydrated. Avoid trimming in the heat of the day to prevent stress. For determinate tomatoes, trim leaves only when diseased or overcrowded. For indeterminate varieties, remove suckers (side shoots) and lower leaves weekly during the growing season.
How do I know which leaves to trim from my tomato plant?
Focus on removing:
- Lower leaves (up to 12 inches from the ground) to improve airflow and reduce soil-borne diseases.
- Yellow or diseased leaves immediately to prevent spread.
- Suckers (small shoots between the main stem and branches) to direct energy to fruit production.
- Overcrowded foliage blocking sunlight from reaching the fruit.
Can I trim tomato leaves too much? What are the signs?
Yes! Over-pruning stresses the plant, leading to fewer flowers, smaller fruit, or even stunted growth. Signs of over-trimming include:
- Wilting or yellowing leaves (not just the ones you removed).
- Slow or no new growth after pruning.
- Fruit dropping prematurely.
What can I do with the trimmed tomato leaves?
Don’t toss them! Use trimmed leaves to:
- Create compost (add to your garden waste pile).
- Make tomato leaf tea (steep in water for 24 hours, then use as a natural fertilizer).
- Feed your worms (if you compost with vermicomposting).
- Mulch around other plants to retain moisture.
My tomato plant has blight. Should I still trim leaves?
Absolutely!
Trimming is critical for blight control. Remove all infected leaves (they’ll turn yellow or brown with spots) and destroy them far from the garden. Sterilize your pruners with rubbing alcohol between cuts. After pruning, apply a copper fungicide or baking soda spray (1 tbsp baking soda + 1 quart water + a drop of dish soap) to prevent further spread.
Wrapping up and next steps
Trimming your tomato plant leaves isn’t just about aesthetics—it’s a game-changer for healthier plants and bigger, juicier harvests! 🌱 By focusing on precision pruning, you’re directing energy where it matters most: your fruit. Remember, consistency is key, so grab those shears and give your plants the TLC they deserve.
Ready to elevate your garden game? Start small—try trimming just one plant this week, observe the results, and let your confidence grow. Soon, you’ll be a pruning pro, reaping the rewards of your hard work! Happy gardening!