
Companion Plants
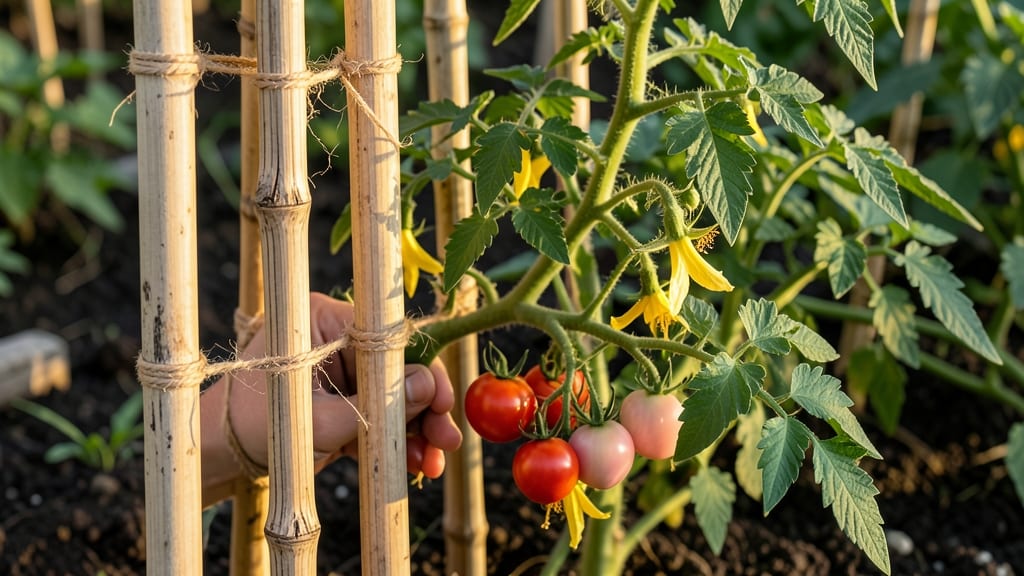
Tying tomato plants isn't just about keeping them upright—it's about unlocking their full potential. 🌱 After years of floppy, wind-battered tomatoes, I learned the right technique transforms weak stems into sturdy, disease-resistant powerhouses that produce heavier fruit. The secret lies in gentle support that guides growth without strangling the plant.
You'll need soft plant ties (not wire or tight twine), sturdy stakes (at least 5-6 feet for indeterminate varieties), and a sunny spot with good airflow. The right setup prevents broken stems, reduces disease risk, and makes harvesting easier—no more bending over or wrestling with sprawling vines.
Even my black thumb can't mess this up once you know the basics.
By the end of this, your plants will grow straight and strong, with fruit hanging where you can reach it. The ties adjust as the plant grows, so you're not stuck with permanent damage.
Plus, proper support means better air circulation, which keeps those leaves dry and disease-free all season long.
Whether you're working with indeterminate monsters or compact bush varieties, this method works. We'll cover the best stakes, how to tie without cutting into stems, and when to adjust your supports—so you end up with tomatoes that look like they belong in a catalog, not a tangled mess.
📚 In This Guide
- What you need
- Instructions
- Tips and common mistakes
- Wrapping up and next steps
What you need
- ● Tomato stakes or cages: 1–2 bamboo stakes (5–7 ft tall, ½-inch diameter) per plant (or)
- ● 1 heavy-duty metal or wooden stake (6–8 ft tall, 1-inch diameter) per plant (or)
- ● 1 tomato cage (5–6 ft tall, 18–24 inches wide) per plant
- ● Twine or plant ties: 1 roll jute twine (¼-inch width) (or)
- ● 1 pack soft plant tie strips (3–4 ft long) (or)
- ● 1 pack velcro plant ties (reusable, 12–18 inches long)
- ● Garden scissors or pruners (for trimming excess foliage)
- ● Measuring tape or ruler (to ensure proper spacing)
- ○ Gloves (optional but recommended for comfort)
- ● Soft plant tie clips (easier on stems than twine)
- ● Staple gun + plastic stakes (for a no-twine solution)
- ● Tomato clips or clips (to secure vines without cutting)
- ● Waterproof twine (if your garden gets heavy rain)
- ● Label markers (to track plant varieties)
Step-by-Step guide to properly tie tomato plants for strong, wind-resistant growth
Here's the method I've used for years to keep tomato plants upright and thriving through storms.
🪴 Step 1: Select and Install Sturdy Support Stakes
Choose 5-6 foot tall bamboo stakes or heavy-duty metal rods for each plant—one stake per tomato will prevent leaning. Drive the stake 6-8 inches deep into the soil at a 45-degree angle away from the plant, then bend it upright. This angled insertion creates better stability against lateral wind pressure.
I always place stakes 3-4 inches from the main stem when planting, so I don't disturb roots later. For indeterminate varieties that grow continuously, use T-posts with adjustable arms instead—they let you add more support as the plant grows without constant re-tying.
💧 Step 2: Begin Tying at the Base and Work Upward
Start tying when the plant reaches 12-18 inches tall—before then, the stem is too fragile. Use soft jute twine or plant-specific Velcro ties to avoid cutting into the stem. Make the first loop just above the soil line, leaving 1-2 inches of loose twine for adjustment as the plant grows.
Here's the thing—I always tie in a figure-eight pattern around both the stake and stem. This distributes pressure evenly and prevents the twine from digging into the plant as it thickens. I check ties weekly and loosen them slightly if the stem appears constricted, which happens when plants grow rapidly.
☀️ Step 3: Maintain Proper Spacing and Tension
Keep ties 2-3 inches apart vertically as the plant grows, adding new ones before the stem reaches the next tie point. You'll notice the plant naturally grows in a spiral—let it do this instead of forcing straight growth. For heavy fruit loads, add an extra tie at every 6 inches during peak production.
Never pull ties too tight. The rule I follow is "snug but not strangling"—you should be able to slide your finger between the twine and stem. Over-tightening creates pressure points that weaken the plant and make it more susceptible to diseases entering through the stem.
✂️ Step 4: Adjust and Reinforce During Storms or Heavy Fruit Loads
Before storms, I double-check all ties and add temporary zip ties at critical points if needed. For plants with heavy fruit clusters, I weave the twine through the stem in a spiral pattern to distribute the weight. This prevents the main stem from snapping under the load of a single large tomato.
Watch for wind rock—when the stake moves visibly in the breeze. If this happens, drive the stake deeper or add a second stake on the opposite side. I've seen plants survive 60 mph winds with proper staking, but without it, even gentle breezes can topple them.
⏰ Step 5: Prune and Retie for Season-Long Support
As the season progresses, prune suckers (side shoots) that grow between the main stem and branches. These compete with the main plant for energy and make tying more difficult. Remove them when they're 2-3 inches long—any longer and they'll create tangled growth that's hard to manage.
In late summer, when plants are laden with fruit, I switch to wider fabric ties that won't cut into the thicker stems. The goal is to keep the plant upright while allowing natural movement—this prevents stem breakage when winds shift suddenly.
Tips & tricks for sturdy tomato plant support
A few key adjustments can transform your tomato plants from floppy to fortress-like against wind and weather. Here's what I've learned after years of trial and error in my own garden.
Stake Placement Precision: The 45-degree angle and 6-8 inch depth for stakes in Step 1 aren't just recommendations—they're non-negotiable for serious wind resistance. I've seen stakes pulled clean out when planted vertically, even in moderate breezes. For extra security, especially in coastal areas, consider adding a second stake on the opposite side of the plant once it reaches 3 feet tall. This creates a natural tripod effect that handles gusts like a pro.
Tie Pattern Science: That figure-eight pattern in Step 2 isn't just decorative—it's structural engineering. The crossing loops create a crisscross pattern that distributes weight and pressure points. When I first tried simple loops, I noticed stems would develop pressure marks exactly where the twine dug in. The figure-eight spreads the force across more surface area, preventing those telltale constriction points that invite disease. Pro tip: Use a small piece of plastic tubing around the stem where the twine crosses—it acts as a buffer without adding bulk.
Growth Adaptation Strategy: The 2-3 inch spacing between ties in Step 3 might seem arbitrary, but it's actually based on tomato plant growth patterns. Tomatoes grow in a natural spiral, and these spacing intervals let the plant maintain its natural shape while providing support. I've found that when I try to space ties too far apart, the stem between them becomes dangerously thin and weak. For indeterminate varieties, I add an extra tie every 6 inches during peak production—this is when the plant is most vulnerable to snapping under fruit weight.
Storm-Proofing Upgrade: When storms approach, my go-to is adding zip ties at critical points as mentioned in Step 4. But here's the upgrade: I also weave the twine through the main stem in a spiral pattern for the lower 18 inches of the plant. This creates a natural cable-like structure that can handle incredible lateral force. For the top portion, I switch to wider fabric ties that can stretch slightly—this prevents stem breakage when winds shift suddenly and put unexpected pressure on different parts of the plant.
Pro Tips for Tying Tomato Plants
- A few key adjustments can transform your tomato plants from floppy to fortress-like against wind and weather. Here's ...
- Stake Placement Precision: The 45-degree angle and 6-8 inch depth for stakes in Step 1 aren't just recommendations—th...
- Tie Pattern Science: That figure-eight pattern in Step 2 isn't just decorative—it's structural engineering. The cross...
Frequently asked questions
Got questions about tying tomato plants? You’re not alone! Here are answers to the most common concerns—so you can grow strong, wind-resistant vines with confidence.
When is the best time to start tying tomato plants?
Start tying as soon as your plants reach 12–18 inches tall (about 3–4 weeks after transplanting). This prevents wind damage and encourages vertical growth. For indeterminate varieties, tie every 5–7 days during active growth. Pro tip: Use soft twine or cloth strips to avoid damaging tender stems!
What’s the right way to tie tomato plants without hurting them?
Gently wrap the twine around the main stem (not the branches) in a loose figure-8 or spiral. Avoid cutting into the plant—use soft materials like jute or old T-shirts if twine feels harsh. Troubleshoot: If stems turn white or bruise, loosen the tie immediately!
How do I secure tomato plants in high-wind areas?
Use sturdy stakes (2–3 feet tall) or cages for extra support. For heavy winds, tie the plant at multiple points (base + mid-stem) and angle stakes slightly for leverage. Alternative: Bury stakes deeper (6–8 inches) for better stability.
Can I use alternatives to twine for tying tomato plants?
Try old T-shirts, fabric strips, or even shoelaces—anything soft and stretchy works. Avoid wire or plastic ties, which can strangle stems. Bonus: Reuse materials like burlap or garden twine to reduce waste!
What should I do if my tied tomato plant looks stressed?
Check for tight ties, bruising, or wilting—these are red flags. Loosen or remove the tie if stems appear constricted. If leaves yellow or droop, it may need more water or shade** (but not less support!). Quick fix: Re-tie with softer material and monitor closely.
Wrapping up and next steps
Tying your tomato plants isn’t just about sturdy stakes and twine—it’s about giving them the support they need to thrive, especially when winds or storms roll in. 🌱 With the right techniques, you’ll protect your plants, boost yields, and enjoy healthier harvests all season long.
Now that you’re armed with the best methods, it’s time to roll up your sleeves and get tying!
Start with just one plant to practice, then expand as you gain confidence. Before you know it, your garden will be a tomato-growing powerhouse—and you’ll be the proud gardener behind it! Happy growing! 🌟