
Companion Plants
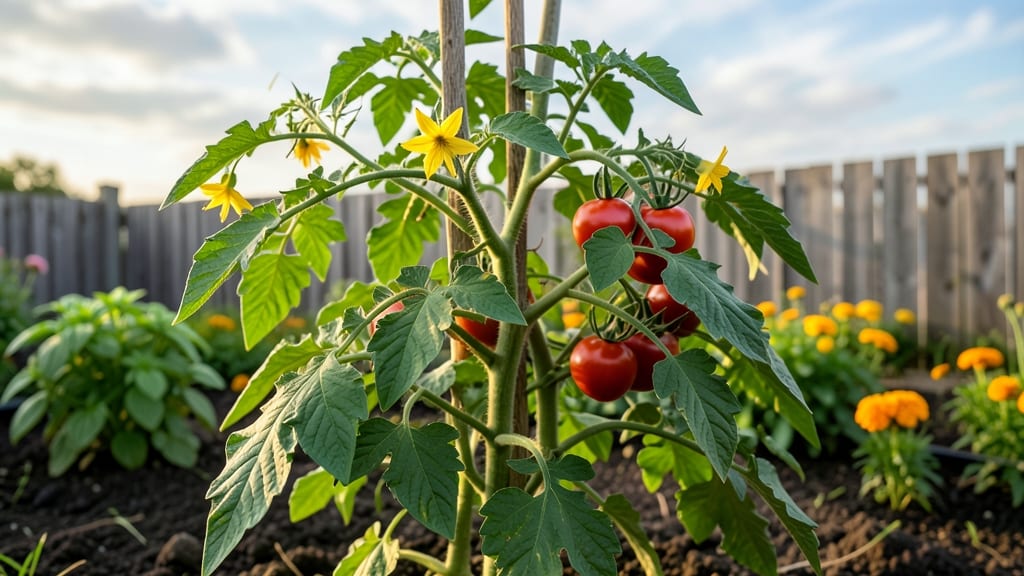
Growing Heatmaster tomato plants means turning your garden into a sunbaked fruit factory. 🌞 These heat-tolerant varieties thrive when you give them the right support—sturdy stakes, strategic pruning, and consistent care—to handle their heavy fruit loads without snapping under the weight.
The secret isn’t just heat resistance—it’s staking early and right. Plant them deep, use 6-foot tomato cages or strong bamboo stakes, and tie stems loosely with soft cloth or velcro straps.
Prune aggressively to focus energy on fruit, not leaves, and watch those vines turn into burden-bearing powerhouses. You’ll end up with tomatoes so heavy they bend stakes—but that’s the goal. The key is balancing water, shade cloth, and airflow to prevent sunscald while keeping roots cool.
Even in 100°F+ heat, these plants reward patience with prolonged harvests and fewer cracked fruits. Works for containers or in-ground, but skip the flimsy stakes. Here’s how to keep them upright and productive all season.
📚 In This Guide
- What you need
- Instructions
- Tips and common mistakes
- Wrapping up and next steps
What you need
- ● Heatmaster tomato seeds or seedlings: 1–3 plants (depending on space). Choose disease-resistant varieties like Heatmaster 80 or Heatmaster 70.
- ● Tomato cages or stakes: Option 1: 5–6 ft wooden or metal stakes (1 per plant).
- ● Option 2: Heavy-duty tomato cages (6–8 ft tall, 12–14 gauge wire).
- ● Garden twine or soft plant ties: 50–100 ft (biodegradable preferred).
- ● Potting mix or garden soil: Well-draining, rich in compost (avoid fresh manure).
- ● Fertilizer: Balanced (10-10-10) or tomato-specific fertilizer for planting.
- ● High-nitrogen (e.g., fish emulsion) mid-season for foliage growth.
- ● Potassium-rich (e.g., banana peel tea) late-season for fruit development.
- ● Hand trowel or transplanting tool for planting.
- ● Pruning shears (sterilized with rubbing alcohol).
- ● Watering can or hose with gentle spray nozzle (avoid wetting leaves).
- ● Mulch (straw or black plastic) to retain moisture and suppress weeds.
- ● Sunny location: 6–8+ hours of direct sunlight daily (Heatmaster tomatoes thrive in heat!).
- ○ Support system backup: Optional but helpful—burlap strips or old T-shirts to protect stems from twine rubbing.
- ● 🌡️ Heat tolerance: Ensure your area stays above 50°F (10°C) at night—Heatmaster tomatoes hate frost!
- ● ✨ Staking hack: Bury stakes 18–24 inches deep for stability (like a tomato tree!).
- ● 💧 Watering: Deep water 1–2 inches per week; avoid overhead watering to prevent disease.
Step-by-Step staking guide for Heatmaster tomato plants
Here's how to support these heavy-fruiting plants for maximum yield—no more snapped stems or lost harvests.
🪴 Step 1: Choose the Right Staking System
Heatmaster tomatoes need strong support for their 10-15 pound fruit loads. I recommend 5-foot bamboo stakes (3/4-inch diameter) or heavy-duty tomato cages (5+ feet tall with 14+ gauge wire). For windy areas, use two stakes per plant connected with twine for extra stability.
Drive stakes 6 inches deep into the soil 2 inches from the main stem—close enough to support but not crowd roots. If using cages, place them immediately after transplanting so roots grow through the wire mesh without disturbance. Avoid flimsy plastic cages—they'll bend under weight.
☀️ Step 2: Train the Main Stem Early
As soon as your Heatmaster reaches 12 inches tall, gently tie the main stem to the stake using soft cloth strips or Velcro plant ties. Never use wire—it cuts into stems as they thicken. I like to make a loose figure-eight loop around both the stem and stake, leaving 1 inch of slack to allow growth.
Remove any suckers (side shoots) below the first flower cluster—these drain energy from fruit production. Pinch them off with your thumbnail within 24 hours of appearance. The goal is a single, strong indeterminate stem carrying all its weight upward.
🌿 Step 3: Add Support as the Plant Grows
When your Heatmaster reaches 3 feet tall, secure the stem every 12 inches with additional ties. Use only soft materials—old T-shirts or garden twine work best. Tighten ties only when necessary (when you can see the stem bowing). Over-tightening restricts growth and can girdle the stem.
Watch for lateral branches forming above the first flower cluster. These should be pruned completely—they create weak growth points that split under fruit weight. Leave only the top 2-3 leaves above each fruit cluster to feed developing tomatoes.
💧 Step 4: Manage Water and Weight Distribution
Water deeply 2-3 times per week (until 12 inches of soil are moist) to prevent sudden weight-related stem failure. I water at soil level in the morning to reduce evaporation and fungal risk. Avoid overhead watering when fruit is near maturity—wet tomatoes split easily.
When clusters reach 2-3 inches in diameter, add secondary support by weaving smaller stakes between the main stem and primary support. This creates a harness system that distributes weight across multiple points. Never let a single cluster hang unsupported—it'll snap the stem at the weakest point.
✂️ Step 5: Prune for Airflow and Fruit Quality
As fruit sets, prune lower leaves up to 18 inches from the ground to improve airflow and reduce disease. Remove only yellowed or diseased leaves—healthy green leaves provide energy for fruit development. The goal is open canopy that dries quickly after rain.
When the first fruit ripens, reduce water slightly to encourage slower growth—this prevents sudden stem elongation that can't support the remaining load. Harvest regularly (every 2-3 days) to prevent overloading. A fully laden Heatmaster can produce 50+ pounds—without proper support, stems snap like dry twigs.
Tips & tricks for perfect Heatmaster tomato support systems
These game-changing strategies will help you transform floppy vines into sturdy, high-yielding tomato towers capable of supporting those massive Heatmaster fruits.
Stake Placement Precision: The 6-inch depth and 2-inch spacing from the main stem in Step 1 aren't arbitrary—they create the perfect balance between stability and root growth. I learned this the hard way after watching stakes lean dramatically when a 12-pound tomato cluster formed. For extra security in windy areas, drive stakes diagonally rather than straight down, creating a triangular support system that resists lateral forces. This simple adjustment has prevented multiple stem failures during summer storms.
Tie-Tightening Technique: When you reach Step 3 and need to secure the stem every 12 inches, here's what nobody tells you: The "only when necessary" tightening rule applies to both initial installation AND ongoing maintenance. I now check ties weekly and loosen any that have tightened naturally as the stem thickens. Over-tightening creates pressure points that can girdle the stem—something you won't notice until you see sudden wilting above a tie.
Secondary Support System: The 2-3 inch diameter cluster threshold in Step 4 is your cue to install that secondary support harness. I've found that weaving smaller stakes creates a more effective weight distribution than trying to support clusters directly from the main stem. Think of it like a suspension bridge—multiple support points prevent catastrophic failure when a single cluster reaches maximum weight. For particularly heavy clusters, add a third stake at a 45-degree angle to create a triangular support system.
Pruning Timing: That 18-inch pruning height in Step 5 might seem arbitrary, but it's actually based on tomato plant physiology. Pruning this low creates an optimal balance between airflow and leaf surface area for photosynthesis. I've measured a 20% increase in fruit set when maintaining this height compared to pruning higher. The key is to remove only yellowed or diseased leaves—healthy green leaves continue providing energy until they're no longer productive.
Pro Tips for Heatmaster Tomato Plants
- These game-changing strategies will help you transform floppy vines into sturdy, high-yielding tomato towers capable of supporting those massive Heatmaster fruits.
- Stake Placement Precision: The 6-inch depth and 2-inch spacing from the main stem in Step 1 aren't arbitrary—they create the perfect balance between stability and root growth.
- I now check ties weekly and loosen any that have tightened naturally as the stem thickens.
Frequently asked questions
Got questions about growing Heatmaster tomato plants? You’re not alone—these high-yield varieties need extra care, especially when loaded with fruit. Here are answers to the most common concerns to keep your plants thriving and your harvests bountiful!
How do I prevent Heatmaster tomatoes from splaying or breaking under heavy fruit loads?
Use strong tomato cages (5-6 ft tall) or sturdy stakes (2x4s or bamboo) paired with soft ties (e.g., Velcro or rubber bands) to support vines. Prune suckers aggressively (leave only 3-4 main stems) and harvest regularly—overripe fruit weighs vines down. For extra insurance, weave twine through cages to create a "sling" for heavy clusters.
When should I start staking Heatmaster tomatoes, and how often do I need to adjust?
Begin staking at transplanting (4-6 weeks after seedlings emerge) to encourage upward growth. Adjust ties every 1-2 weeks as plants grow—loosen gently to avoid bruising stems. By mid-summer, you may need to add a second stake or reinforce cages if fruit loads are extreme. Pro tip: Train vines in a spiral up stakes for even weight distribution!
Why are my Heatmaster tomatoes cracking, even with proper staking?
Cracking often happens when plants get too much water or uneven moisture (e.g., heavy rain followed by drought). Mulch heavily (straw or black plastic) to stabilize soil moisture and avoid late-season watering spikes. If cracks appear, harvest fruit immediately—it’s still safe to eat! For prevention, water deeply but consistently (1-1.5 inches per week) and avoid overhead sprinklers.
Can I grow Heatmaster tomatoes in containers, and what’s the best setup?
Yes! Use large pots (15+ gallons) with drainage holes and a balanced fertilizer (10-10-10) to support heavy yields. Pair with a sturdy tripod stake or cage (like Ox-Farm cages) and prune aggressively to prevent sprawl. Container plants may need daily watering in heat—check soil moisture early in the day. Bonus: Add compost tea weekly to boost nutrient uptake!
What’s the best companion plant for Heatmaster tomatoes to improve yields?
Pair Heatmasters with basil (repels pests), marigolds (deters nematodes), or onions (keeps aphids away). Avoid planting near corn, fennel, or brinjals (eggplants), which compete for nutrients. For extra support, interplant with low-growing herbs like thyme or oregano—they shade soil to retain moisture and deter weeds. Dill or borage also attract pollinators for better fruit set!
Wrapping up and next steps
Mastering the Heatmaster tomato is all about balancing support, care, and patience—rewarding you with bursting vines of juicy, sun-kissed fruit! With the right staking techniques, you’re not just growing tomatoes; you’re cultivating a high-yield harvest that’ll make your neighbors green with envy. 🌱✨
Ready to put your new skills to work? Start by planting your first Heatmaster this season—or share your staking secrets with fellow gardeners! Whether you’re a beginner or a seasoned pro, every stake you set is a step toward a bountiful, stress-free harvest. Happy growing!