
Planting
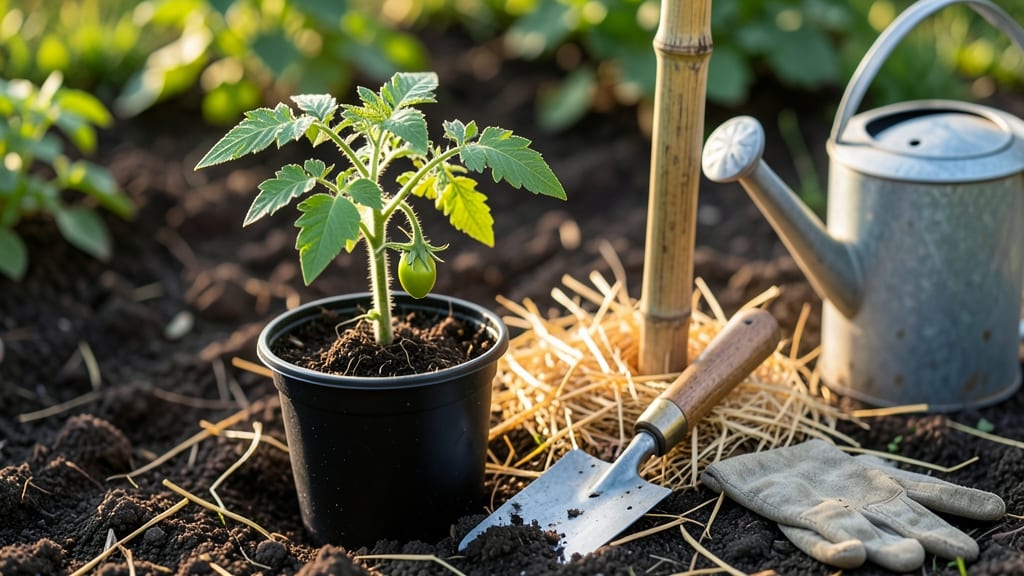
Planting tomato plants outside transforms your garden into a sun-drenched harvest factory 🌱—but timing, soil, and placement make all the difference. My first attempt ended with leggy, sunburned plants because I rushed them into the ground too early.
Now I wait for nighttime temps to stay above 55°F and soil to warm to 60°F, which usually means late May in my zone 6 garden. The payoff? Sturdy plants that start fruiting within weeks instead of struggling to recover.
Start with a spot that gets 6-8 hours of direct sun daily—tomatoes crave heat more than most veggies—and amend the soil with compost or aged manure. Dig in a handful of balanced fertilizer (10-10-10) to give roots a nutrient boost.
If your soil drains poorly, raise beds or mound soil to prevent waterlogged roots, which is the #1 killer of young tomato plants. Pro tip: Plant in the late afternoon to reduce transplant shock from afternoon sun.
Dig holes twice as wide as the root ball but no deeper—burying too much can rot stems—and space plants 18-24 inches apart for determinate varieties (bush types) or 24-36 inches for indeterminate (vining) types. Firm soil around roots and water deeply to eliminate air pockets.
Add a 3-foot-tall cage or stake at planting time (not later!) to avoid disturbing roots as plants grow. Within 10 days, you’ll see new leaves signaling healthy establishment.
After planting, mulch heavily with straw or grass clippings to retain moisture and suppress weeds—this saves 30% on watering—and keep soil consistently moist but never soggy.
Prune suckers (those little shoots in leaf axils) weekly to direct energy to fruit production, and watch for early signs of blight by removing lower leaves that brush the soil. The first ripe tomato appears around 60-70 days after planting, and that’s when the real magic begins.
📚 In This Guide
- What you need
- Instructions
- Tips and common mistakes
- Wrapping up and next steps
What you need
- ● Tomato plants: 3–6 healthy seedlings (depending on space; opt for disease-resistant varieties like Early Girl or Cherry Roma).
- ● Well-draining potting mix or garden soil: 1–2 bags (enrich with compost or aged manure for nutrients).
- ● Garden space: A sunny spot with 6–8+ hours of direct sunlight daily and at least 18–24 inches of space between plants (or 36 inches for indeterminate varieties).
- ● Fertilizer: Balanced 10-10-10 or 5-10-10 granular fertilizer (or organic options like worm castings).
- ● Watering can or hose with a gentle nozzle: For deep, even watering (avoid overhead sprinklers to prevent disease).
- ● Mulch: Straw, wood chips, or shredded leaves (2–3 inches thick) to retain moisture and suppress weeds.
- ● Support system: Cages (5–6 ft tall) or stakes (6–8 ft) for indeterminate varieties.
- ● Trellis for climbing varieties (e.g., Sungold).
- ● Pruning shears: For trimming suckers and dead leaves (sharp, clean blades only!).
- ● Soil test kit: To check pH (ideal range: 6.0–6.8; adjust with lime or sulfur if needed).
- ● Drip irrigation system: For consistent moisture (especially in hot climates).
- ● Plant collars or tomato clips: To secure stems to stakes/cages.
- ● Row covers or shade cloth: For young plants in cold snaps or hot afternoons.
- ● Epsom salt (magnesium sulfate): 1 tbsp per plant every 2–3 weeks for greener leaves.
- ● Compost tea or fish emulsion: For a nutrient boost during flowering/fruiting.
Step-by-Step instructions for planting tomato plants outside
Here's my foolproof method for transplanting tomatoes that thrive from day one.
🪴 Step 1: Prepare the Planting Site for Optimal Growth
Choose a location with full sun exposure (6-8 hours daily) and well-draining soil. Tomatoes despise soggy roots, so avoid low spots where water pools. I always test my soil first—ideal pH for tomatoes is between 6.2 and 6.8. If your soil tests lower, mix in 2-3 inches of compost to improve fertility and drainage.
Loosen the soil to a depth of 12-18 inches with a garden fork or tiller. This breaks up compacted layers so roots can spread easily. Work in 1-2 cups of balanced 10-10-10 fertilizer per planting hole to give your tomatoes a nutrient boost right away. The goal is fluffy, crumbly soil that holds moisture but drains freely—think of it as giving your plants a soft, airy bed to settle into.
☀️ Step 2: Harden Off Seedlings Before Transplanting
If you started your tomatoes indoors, they need 7-10 days of gradual acclimation before going outside. Begin by moving them to a sheltered spot like a porch or garage for 2-3 hours the first day. Watch for wilting or yellowing leaves—this means they're not ready yet. Each subsequent day, increase their outdoor time by 1-2 hours, eventually leaving them out overnight.
Here's the thing—I've seen gardeners rush this step, and the results are always sad. Hardened-off seedlings have sturdy stems and deep green leaves that bounce back when touched. If yours look limp or pale, give them another day or two. The last thing you want is transplant shock ruining your hard work.
🌱 Step 3: Plant Tomatoes at the Right Depth and Spacing
Dig holes twice as wide as the root ball but only as deep as the first set of true leaves—this prevents burying the stem, which can cause rot. For indeterminate varieties (the vining types), I like to create a small trench and lay the stem diagonally, burying it halfway up. This encourages stronger root growth along the buried portion.
Space plants 18-24 inches apart in rows 2-3 feet apart to allow airflow and easy harvesting. Crowding leads to disease, and you'll struggle to reach the middle plants. After placing each seedling in its hole, backfill with soil and water deeply to eliminate air pockets. The soil should settle around the roots, holding the plant upright without leaning.
💧 Step 4: Water and Mulch for Long-Term Success
Give your newly planted tomatoes a deep watering (1-1.5 gallons per plant) to help roots establish. Water at the base, avoiding the leaves to prevent fungal diseases like early blight. I always water in the early morning so foliage dries quickly—a wet evening invites trouble. After watering, apply 2-3 inches of organic mulch (like straw or shredded leaves) to retain moisture and suppress weeds.
This mulch layer also keeps soil temperatures stable, which is especially helpful in hot climates. Check the soil 1 inch below the surface—if it's dry, it's time to water again. The key is consistent moisture, not soggy soil. You'll know you're doing it right when your plants show new growth within 7-10 days and the soil stays evenly damp without puddling.
Tips & tricks for thriving tomato transplants
Common pitfalls—and how to sidestep every one—when transplanting your tomato seedlings for maximum success.
Soil Prep Secret: The 12-18 inch deep loosening in Step 1 isn't just about breaking up dirt—it's about creating an oxygen-rich zone for roots. I've found that adding a handful of coarse sand or perlite to the bottom of each planting hole improves drainage even further, especially in clay-heavy soils. This prevents the dreaded "soggy bottom" syndrome that stunts root growth. For container gardeners, use a high-quality potting mix with added perlite or vermiculite to mimic this loose structure.
Harden-Off Hack: That 7-10 day acclimation period in Step 2 can feel like forever, but here's the thing: the final overnight test is critical. I've seen seedlings wilt dramatically after their first full night outside—only to recover completely by morning. If this happens, give them one more day of daytime exposure before leaving them out overnight permanently. The goal is to build resilience, not rush the process. Trust me, the extra patience pays off with vigorous plants.
Planting Depth Trick: For indeterminate varieties, that diagonal trench technique in Step 3 works wonders, but here's what nobody tells you: gently scratch the buried stem with your fingers before covering it with soil. This creates micro-wounds that stimulate root growth along the entire stem. For determinate (bush) tomatoes, keep them at the original soil line—burying too deep can cause stem rot, especially in humid climates.
Watering Wisdom: Those 1-1.5 gallons per plant in Step 4 might seem like a lot, but here's the science: tomatoes need consistent moisture at the root zone, not just surface watering. I use a simple test—stick your finger 1 inch below the surface after watering. If it's damp but not soggy, you're golden. For container plants, water when the top inch feels dry, but never let them sit in standing water. The mulch layer helps maintain this moisture balance, but don't skip the deep watering—it's what establishes those critical early roots.
Pro Tips for Plant Tomato Plants Outside
- Common pitfalls—and how to sidestep every one—when transplanting your tomato seedlings for maximum success.
- Soil Prep Secret: The 12-18 inch deep loosening in Step 1 isn't just about breaking up dirt—it's about creating an oxygen-rich zone for roots.
- Harden-Off Hack: That 7-10 day acclimation period in Step 2 can feel like forever, but here's the thing: the final overnight test is critical.
Frequently asked questions
Got questions about planting tomatoes outside? You’re not alone! Here are answers to the most common queries to help you grow a thriving garden.
When is the best time to plant tomato plants outdoors?
Plant tomatoes after the last frost when soil temperatures reach at least 60°F (15°C). In most regions, this falls between mid-April and June, depending on your climate zone. Use a frost watch or local gardening guides to pinpoint the perfect timing for your area.
How do I harden off tomato seedlings before planting?
Hardening off is key! Over 7–10 days, gradually expose seedlings to outdoor conditions. Start with 1–2 hours of sunlight daily, then increase exposure. Protect them from wind and direct sun at first, and avoid watering them during this process to toughen their skin.
What should I do if my tomato plants wilt after transplanting?
Wilting is often caused by transplant shock or underwatering. Check the soil—it should be moist but not soggy. Water deeply at the base, and avoid overhead watering. If wilting persists, your plants may need extra shade for a few days to recover.
Can I plant tomatoes in containers instead of the ground?
Tomatoes thrive in 5-gallon containers or larger with drainage holes. Use a lightweight potting mix and ensure the pot gets 6+ hours of sun daily. Dwarf or bush varieties work best, but indeterminate types can also grow in containers with proper support.
How do I protect my tomato plants from pests like aphids or hornworms?
Prevent pests with neem oil or insecticidal soap for aphids. Handpick hornworms (they’re easy to spot!) or introduce beneficial nematodes to the soil. Row covers can also deter early-season pests while allowing sunlight and water through.
Wrapping up and next steps
Planting tomato plants outside can be incredibly rewarding—just follow the sunny patch secrets we’ve shared! With the right soil, spacing, and care, you’ll be on your way to a bountiful harvest that’ll make your garden (and your kitchen) the talk of the neighborhood. 🌱
Now that you’re ready to dig in, take the next step: mark your calendar for regular watering, watch for pests, and enjoy the journey. Happy planting—your future tomatoes are waiting! 🍅✨