
Planting
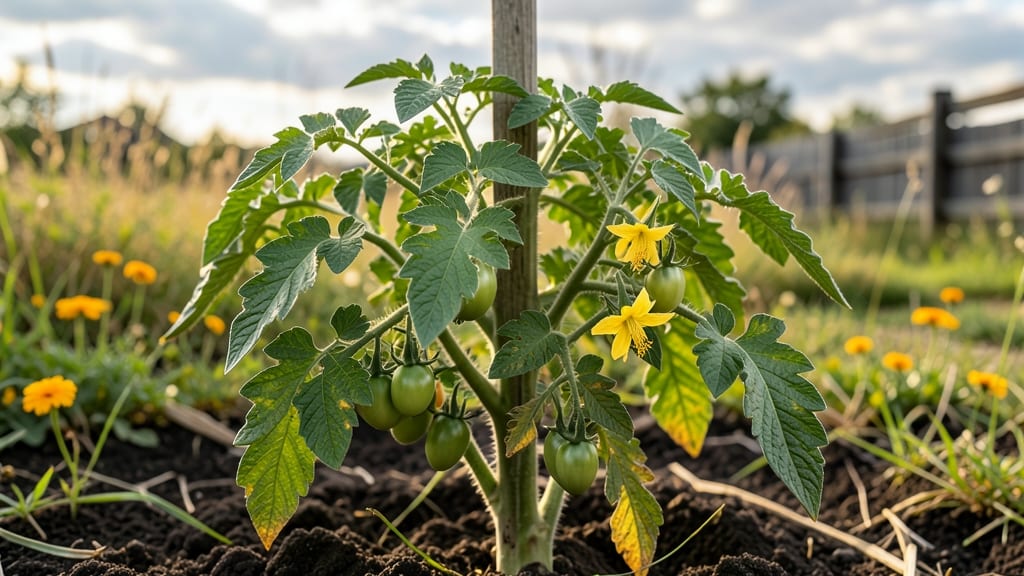
When your tomato plant’s bottom leaves turn yellow, it’s not just a cosmetic issue—it’s a cry for help from your plant. 🌱 I’ve seen this happen to even the most well-cared-for tomatoes, and the good news is that most causes have simple fixes.
The first step is identifying whether your plant is thirsty, hungry, sick, or just telling you it’s time for a little pruning.
Overwatering is the most common culprit, turning those lower leaves yellow while the soil stays soggy. But nutrient deficiencies—especially nitrogen or magnesium—can look almost identical. Don’t panic: checking the leaf undersides for spots (early blight) or tiny webs (spider mites) will narrow it down fast.
The key is acting before the problem climbs higher up the stem.
You’ll get your plant back on track with a few adjustments: let the top inch of soil dry out between waterings, feed with a balanced fertilizer, and prune away the worst-affected leaves.
Within a week, you’ll see new green growth pushing up from the stem, and those yellow leaves will start falling off naturally. A healthy plant means bigger, tastier tomatoes ahead.
Prevention is easier than fixing—mulch to keep roots cool, water at the base (not overhead), and rotate crops next season. This isn’t just about saving leaves; it’s about giving your tomatoes the strong foundation they need to thrive all season long.
Root Causes Behind Yellowing Leaves
When your tomato plant’s bottom leaves start turning yellow, it’s often a cry for help from the roots—or the plant’s overall health. Understanding the why behind this symptom is the first step to saving your harvest.
Below, we break down the most common culprits, backed by science, so you can diagnose and act fast.
Tomatoes thrive on consistency, but too much water—especially if the soil doesn’t drain well—can drown their roots. When roots sit in soggy soil for too long, they suffocate, starving the plant of oxygen and nutrients.
This triggers a cascade: the oldest leaves (those at the bottom) yellow first as the plant redirects energy to survive.
How to spot it:
- Leaves feel soggy or mushy to the touch.
- Soil stays damp for days after watering.
- Yellowing spreads upward over time.
Science behind it: Roots rely on aerobic (oxygen-rich) conditions to absorb water and nutrients. Waterlogged soil creates anaerobic zones, where harmful bacteria like Pythium or Phytophthora thrive, rotting roots and blocking nutrient uptake. The plant’s survival instinct kicks in, shedding leaves to conserve energy.
On the flip side, inconsistent watering—especially during heatwaves—stresses tomato plants. Roots can’t reach deep enough for moisture, causing the bottom leaves to yellow as they lose turgor pressure (the "plumpness" that keeps them green).
Think of it like a wilting houseplant: the oldest leaves drop first because they’re the least critical for survival.
How to spot it:
- Soil feels dry 1–2 inches deep.
- Leaves curl or feel crispy at the edges.
- Yellowing happens suddenly, often in hot weather.
Science behind it: Tomato roots absorb water through osmosis, driven by a pressure gradient. When soil dries out, this gradient collapses, and the plant can’t pull water upward efficiently. The bottom leaves, farthest from the water source (the roots), yellow first due to chlorophyll breakdown from stress.
Tomatoes are tropical plants at heart, but extreme heat—especially combined with dry soil—can scorch leaves. High temperatures (>90°F/32°C) disrupt the plant’s photosynthesis process, causing chlorophyll to degrade. The bottom leaves, exposed to the hottest air near the soil, yellow first as the plant prioritizes protecting its fruit-bearing upper leaves.
How to spot it:
- Yellowing appears suddenly during heatwaves.
- Leaves may feel crispy or develop brown edges.
- Plant looks wilted even when soil is moist.
Science behind it: Heat stress accelerates respiration (the plant’s "breathing" process), which burns through energy faster than photosynthesis can replenish it. The enzyme rubisco, critical for carbon fixation, becomes less efficient in high temps, leading to chlorophyll loss and yellowing.
Pathogens like early blight (Alternaria solani) or bacterial spot (Xanthomonas perforans) often target bottom leaves first. These diseases thrive in warm, humid conditions, entering through wounds or old leaf tissue. Yellowing is often accompanied by spots, wilting, or a foul odor.
How to spot it:
- Yellowing spreads with dark spots (early blight) or water-soaked lesions (bacterial spot).
- Leaves may crinkle or drop prematurely.
- White mold (Sclerotinia) may appear as fuzzy gray growth.
Science behind it: Fungi and bacteria disrupt the plant’s cell membranes, blocking nutrient transport and causing localized cell death. The plant’s immune system triggers hypersensitive response, where infected cells self-destruct (turning yellow/brown) to contain the spread.
Yellowing bottom leaves are a classic sign of nitrogen deficiency, the most common nutrient issue in tomatoes. Nitrogen is vital for chlorophyll production, and since older leaves have the most chlorophyll, they yellow first as the plant "steals" nitrogen from them to fuel new growth.
How to spot it:
- Yellowing starts at the leaf veins (interveinal chlorosis).
- Leaves may appear smaller or stunted.
- Growth slows, and flowers/fruit may drop.
Science behind it: Nitrogen is a building block of chlorophyll and amino acids. Without enough nitrogen, the plant can’t synthesize new chlorophyll, causing existing chlorophyll to degrade. Roots may also struggle to absorb other nutrients (like phosphorus or potassium) if nitrogen levels are low.
Pro tip: 💡 Test your soil’s pH—tomatoes need a slightly acidic range (6.0–6.8). If pH is off, roots can’t absorb nitrogen efficiently, even if it’s in the soil!
Quick Fixes for Yellowing Tomato Leaves
When your tomato plant’s bottom leaves start turning yellow, it’s not just a cosmetic issue—it’s a cry for help! 🌱 The good news? Most problems have simple, actionable solutions. Below, we’ll break down the most common causes and the easy fixes to restore your plant’s health.
Prevention tips are included so you can keep your tomatoes thriving all season long.
Signs: Yellowing leaves with a mushy texture, wilting, or roots smelling foul.
How to Fix It: 🔥 Step 1: Check the Soil
- Stick your finger 1-2 inches into the soil. If it’s soggy, your plant is getting too much water. Tomatoes prefer well-draining soil—if water pools in the pot or container, it’s time to adjust.
🍳 Step 2: Adjust Your Watering Routine
- Water deeply but infrequently—aim for 1-1.5 inches per week (more in extreme heat). Let the top 1-2 inches of soil dry out between waterings.
- Morning is best—watering in the early hours reduces evaporation and fungal risks.
👨🍳 Step 3: Improve Drainage
- If in pots, ensure they have drainage holes. Add a layer of gravel or perlite at the bottom to prevent root rot.
- For in-ground plants, amend the soil with compost or sand to improve aeration.
🥘 Step 4: Repot if Needed
- If roots are circling or the soil is compacted, repot into fresh, well-draining mix with added perlite or vermiculite.
💡 Prevention Tip:
- Use a moisture meter to track soil dampness—overwatering is the #1 killer of tomato plants!
Signs: Yellowing edges, crispy leaves, or leaves curling upward.
How to Fix It: 🔥 Step 1: Increase Water Consistency
- Tomatoes need steady moisture, especially during fruiting. If the soil is dry more than 1 inch deep, it’s time to water.
🍳 Step 2: Mulch to Retain Moisture
- Apply 2-3 inches of mulch (straw, grass clippings, or wood chips) around the base to lock in moisture and cool roots.
👨🍳 Step 3: Provide Shade in Extreme Heat
- If temps hit above 90°F (32°C), use shade cloth (30-50%) or a lightweight row cover to protect leaves from scorching.
🥘 Step 4: Water Deeply and Slowly
- Use a soaker hose or drip irrigation to deliver water directly to the roots, reducing evaporation.
💡 Prevention Tip:
- Group plants together to create a microclimate that retains humidity and reduces stress.
Signs:
- Nitrogen deficiency: Pale yellow leaves (especially older ones).
- Potassium deficiency: Yellowing edges with brown spots.
- Magnesium deficiency: Yellow patches between leaf veins (interveinal chlorosis).
How to Fix It: 🔥 Step 1: Test Your Soil
- A simple soil test kit (available at garden centers) can reveal deficiencies. If DIY isn’t an option, send a sample to a local extension office.
🍳 Step 2: Fertilize Correctly - For nitrogen: Use a balanced fertilizer (10-10-10) or compost tea.
Apply every 2-3 weeks during the growing season. - For potassium: Switch to a low-nitrogen, high-potassium fertilizer (5-10-10) when fruits start forming. - For magnesium: Sprinkle Epsom salt (1 tbsp per gallon of water) and apply as a foliar spray or soil drench.
👨🍳 Step 3: Boost Organic Matter
- Mix compost or worm castings into the top 6 inches of soil to improve nutrient availability.
🥘 Step 4: Avoid Over-Fertilizing
- Too much fertilizer can burn roots and worsen yellowing. Always follow package instructions.
💡 Prevention Tip:
- Rotate crops every 3 years to prevent nutrient depletion in the same soil.
Signs:
- Aphids/spider mites: Yellowing, curled leaves with sticky residue (honeydew) or fine webbing.
- Early blight: Yellowing leaves with concentric brown spots (target-like patterns).
How to Fix It: 🔥 Step 1: Inspect Leaves & Stems
- Check the undersides of leaves and stems for pests. Use a magnifying glass if needed.
🍳 Step 2: Treat Pests Naturally
- For aphids: Spray with soapy water (1 tsp mild soap per quart of water) or introduce ladybugs.
- For spider mites: Blast leaves with water to dislodge them, then apply neem oil (1 tsp per quart of water + a drop of dish soap).
👨🍳 Step 3: Remove Infected Leaves
- Prune yellow/diseased leaves with sterilized scissors and dispose of them in the trash (not compost).
🥘 Step 4: Improve Air Circulation
- Space plants 18-24 inches apart and prune suckers to allow airflow, reducing humidity and fungal growth.
💡 Prevention Tip:
- Rotate planting locations yearly to prevent soil-borne diseases like early blight.
Signs: Yellowing leaves within 1-2 weeks of transplanting, wilting, or stunted growth.
How to Fix It: 🔥 Step 1: Water Deeply After Transplanting
- Give your tomato a thorough watering to help roots establish. Use a root stimulator (like seaweed extract) for extra support.
🍳 Step 2: Protect from Wind & Sun
- If transplanting in hot weather, provide shade for the first few days. Use stakes or cages immediately to support the plant.
👨🍳 Step 3: Avoid Fertilizing Right Away
- Wait 1-2 weeks before fertilizing to let roots recover.
🥘 Step 4: Check for Root Damage
- If roots were bruised during transplanting, trim any black/mushy roots and repot in fresh soil.
💡 Prevention Tip:
- Hardening off seedlings (acclimating them to outdoor conditions over 5-7 days) reduces shock.
- Prune aggressively: Remove all yellow leaves to redirect energy to new growth.
- Boost humidity: Place a tray of water near the plant or use a humidifier in indoor setups.
- Monitor daily: Keep a plant journal to track improvements and adjust care as needed.
Remember: Yellow leaves are your plant’s way of communicating! 🗣️ With these fixes, your tomato should bounce back in 1-2 weeks. Stay patient, and soon you’ll be harvesting juicy, red tomatoes instead of dealing with yellow foliage.
Frequently asked questions
Should I remove yellow leaves from my tomato plant?
Yes, prune off yellow leaves to help your plant recover faster. Removing them redirects the plant’s energy to new growth and prevents diseases from spreading. Use clean scissors and cut just above a leaf node (where new leaves grow). Focus on the bottom leaves first—they’re the oldest and least critical for fruit production.
Can overwatering really kill my tomato plant?
Absolutely—it’s the #1 cause of yellow bottom leaves and root rot. Waterlogged soil blocks oxygen, suffocating roots and causing them to rot. If your soil stays damp for days after watering, let the top 1-2 inches dry out between waterings. For containers, ensure proper drainage and consider adding perlite to the soil mix.
How do I tell if my tomato’s yellow leaves are from disease or nutrient deficiency?
Check for these clues: Disease often shows dark spots (early blight) or sticky residue (aphids), while nutrient issues cause uniform yellowing without spots. For magnesium deficiency, look for yellow patches between veins. Test your soil or use a simple leaf analysis kit to confirm—most garden centers sell them for under $20.
Will Epsom salt fix my tomato’s yellow leaves?
Only if magnesium is the issue! Mix 1 tablespoon of Epsom salt per gallon of water and spray it on leaves (foliar feed) or pour it at the base. For nitrogen deficiency, switch to a balanced fertilizer (like 10-10-10) instead. Always water thoroughly after applying to avoid salt buildup in the soil.
Why do my tomato plants get yellow leaves every year?
It’s likely a recurring issue like poor drainage, compacted soil, or nutrient depletion. Rotate crops yearly to prevent soil-borne diseases, and amend your soil with compost before planting. If your yard has heavy clay soil, raise beds or use containers with well-draining mixes. Consistent care (like mulching and proper watering) can break the cycle!