
Companion Plants
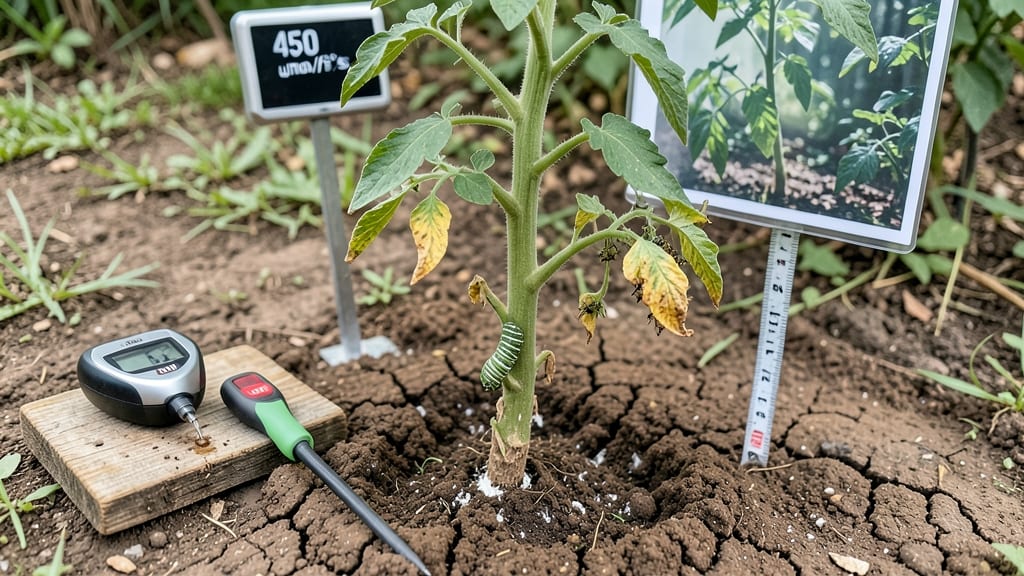
Your tomato plants stop growing—and it’s not your fault. 🌱 The culprit is usually one of three things: hidden nutrient gaps, unseen pests, or environmental stress that’s silently stalling your vines.
I’ve nursed back dozens of stunted plants using simple checks that take less than 15 minutes, and I’ll walk you through the exact steps that work.
The first clue is often in the leaves: yellowing edges mean nitrogen deficiency, while curling or spotting signals pests or disease.
My own plants hit this wall last summer after a heatwave—what saved them was a targeted fix: a balanced fertilizer boost, a thorough inspection for aphids, and moving them to partial shade during peak afternoon sun. Most gardeners overlook the environment first, but it’s usually the easiest fix.
You’ll revive your plants by week 3 with these tricks: a quick soil test (or DIY pH kit), strategic pruning to redirect energy, and a pest barrier like row covers or neem oil.
The best part? These methods work for both container tomatoes on your patio and backyard vines. No more watching your plants plateau—just steady growth and bigger harvests ahead.
Whether you’re dealing with indoor grow lights or outdoor heat stress, the same principles apply. The key is catching the problem early—before your plants give up entirely. Let’s get those vines climbing again, one targeted fix at a time.
Root Causes Behind Stalled Growth
When your tomato plants suddenly hit a growth wall, it’s rarely a mystery—just a mix of overlooked needs or unseen stressors. Understanding the why behind the stall is the first step to revival.
Below, we break down the most common culprits, explained in clear, actionable science so you can diagnose and fix the issue fast.
Tomatoes are heavy feeders, and when key nutrients run low, they’ll stop growing—even if they look healthy. Here’s what to watch for:
- Nitrogen (N) Shortage: The primary driver of leafy growth and vine expansion. If leaves turn yellow (chlorotic) starting at the oldest ones, your plant is starving for nitrogen.
This nutrient fuels cell division, so without it, new shoots stall. - Fix: Apply a balanced fertilizer (10-10-10 or higher in nitrogen) or top-dress with composted manure. For organic growers, try alfalfa meal or fish emulsion.
- Phosphorus (P) Deficit: Critical for root development and flowering. Stunted plants with dark green, purple-tinged leaves (especially on undersides) scream for phosphorus. Without it, roots can’t absorb enough water or nutrients, halting upward growth. - Fix: Use bone meal or a phosphorus-rich fertilizer (like 5-10-10).
Work it into the soil 2–3 inches deep where roots are active.
- Potassium (K) Deficiency: Acts like a growth regulator, helping plants manage water and stress. Weak stems, yellowing leaf edges, or weak vines that flop under fruit weight?
That’s potassium crying for help. - Fix: Add greensand, wood ash, or a potassium sulfate fertilizer. Banana peels (composted) are a slow-release organic option.
- Micronutrient Starvation: Even tiny deficiencies in magnesium (Mg), calcium (Ca), or iron (Fe) can stall growth.
Look for: - Magnesium deficiency: Yellow patches between leaf veins (interveinal chlorosis). - Calcium deficiency: Blossom-end rot and stunted new growth (calcium is vital for cell wall formation). - Iron deficiency: Pale yellow leaves on young growth (iron is immobile in plants, so new leaves suffer first). - Fix: Use chelated micronutrients or Epsom salt (for magnesium) applied as a foliar spray or soil drench.
Tomatoes are 95% water by weight, and their growth hinges on consistent moisture. Two extremes can halt progress:
- Underwatering: Roots dry out, and the plant shuts down growth to conserve energy. Wilting leaves that don’t perk up by evening?
The plant is in distress. - Signs: Crispy leaf edges, leaves curling inward, and a stiff, brittle stem. - Fix: Water deeply 1–2 inches per week (check soil moisture 2 inches down—it should feel damp, not soggy). Use drip irrigation to avoid wetting leaves (fungus risk).
- Overwatering: Roots suffocate in waterlogged soil, starving for oxygen. Root rot (caused by Phytophthora or Pythium) kills roots, halting nutrient uptake. - Signs: Mushy, black stems, yellowing leaves that stay limp even when watered, and a foul soil smell. - Fix: Let soil dry slightly between waterings.
Improve drainage with permaculture sand or compost. If rot is severe, prune infected roots and repot in fresh soil.
Tomatoes thrive in full sun (6–8+ hours daily) and warmth (70–85°F). Fall outside these ranges, and growth grinds to a halt.
- Insufficient Light: Plants stretch (etiolate) toward light sources, growing weak and leggy.
In shady spots, they stop producing new leaves and focus energy on survival. - Signs: Pale, sparse leaves, stems that flop, and no new flowers/fruit. - Fix: Move plants to south-facing or west-facing exposure. Use reflective mulch or a grow light (12–16 hours/day) for indoor/container plants.
- Extreme Heat: Above 90°F, tomato plants shut down to avoid heat stress.
Flowers drop (blossom drop), and new growth stops entirely. - Signs: Wilting even when soil is moist, leaf scorch (brown edges), and premature fruit drop. - Fix: Provide afternoon shade (use shade cloth or row covers).
Mulch with straw or grass clippings to keep roots cool. Choose heat-tolerant varieties like ‘Solar Fire’ or ‘Heatmaster’.
- Cold Stress: Below 50°F, growth halts as the plant conserves energy. Frost damage kills cells, and chilling injury (even without frost) can stunt roots. - Signs: Blackened leaf edges, stunted new shoots, and no new flowers. - Fix: Use row covers or cloches to protect plants.
In containers, move them to a sheltered spot or greenhouse.
Hidden invaders can sap energy from your plants, leaving them too weak to grow. Common culprits:
- Aphids, Whiteflies, and Spider Mites: These sap-sucking pests drain nutrients, causing stunted leaves and yellowing new growth. - Signs: Sticky residue (honeydew), distorted leaves, and fine webbing. - Fix: Spray with neem oil or insecticidal soap.
Introduce ladybugs or lacewings for biological control.
- Root-Knot Nematodes: Microscopic worms that attack roots, reducing water/nutrient uptake.
- Signs: Gnarled, stunted roots, yellowing leaves, and poor growth despite care.
- Fix: Plant marigolds (natural nematode repellent) nearby. Solarize soil in summer or use beneficial nematodes (Steinernema spp.).
- Fungal Diseases (Early Blight, Late Blight, Powdery Mildew): Fungi clog stomata (leaf pores), blocking gas exchange and halting growth. - Signs: Brown spots with yellow halos (early blight), white powdery coating (mildew), or rapid leaf death (late blight). - Fix: Remove infected leaves immediately.
Apply copper fungicide or baking soda spray (1 tsp baking soda + 1 quart water + few drops of soap). Space plants for airflow to prevent spread.
Sometimes, the issue isn’t biological—it’s mechanical or structural.
- Root-Bound Containers: If roots circle the pot (root-bound), they strangle each other, limiting nutrient/water uptake. - Signs: Roots growing out of drainage holes, stunted top growth, and leaves yellowing despite watering. - Fix: Repot into a larger container (1–2 inches wider) with fresh soil.
For in-ground plants, loosen soil around roots with a fork.
- Competition for Resources: Nearby plants (especially weeds or aggressive companions like corn) can steal water/nutrients.
- Fix: Remove competing plants within 18 inches of your tomatoes. Use mulch to suppress weeds.
- Transplant Shock: Disturbed roots during moving can halt growth for 1–2 weeks as the plant recovers.
- Fix: Water deeply before and after transplanting. Use root stimulator (like mycorrhizal fungi) to speed recovery.
Pro Tip 💡: Keep a growth journal! Note watering, fertilizing, and weather changes. Patterns (like stunting after heavy rain or before heatwaves) reveal hidden triggers.
Revive Your Tomatoes: Quick Fixes
When your tomato plants hit a growth slump, don’t panic—most issues have simple, actionable solutions. Below, we’ve mapped the most common causes of stunted growth to practical fixes, along with prevention tips to keep your vines thriving. Think of this as your tomato plant’s emergency repair kit!
Signs: Yellowing leaves, weak stems, slow or no new growth. Fix It:
- 🍳 Test Your Soil: Grab a soil test kit (or send a sample to your local extension office) to check pH and nutrient levels. Tomatoes thrive in slightly acidic soil (pH 6.0–6.8).
- 👨🍳 Boost Nutrients: Amend the soil with compost or a balanced fertilizer (10-10-10 or 5-10-10). For a quick fix, mix in 1–2 cups of worm castings or aged manure per plant.
- 🥘 Target-Specific Feeds:
- Nitrogen (N) deficiency? Use fish emulsion or blood meal to jumpstart leafy growth.
- Potassium (K) deficiency? Try wood ash (sprinkle lightly) or a banana peel tea (soak peels in water for 2 weeks).
- Phosphorus (P) deficiency? Use bone meal to encourage root and fruit development.
Prevention Tip: 💡 Feed regularly—tomatoes are heavy feeders! Apply a slow-release fertilizer at planting, then side-dress with compost every 4–6 weeks.
Signs: Wilting, crispy leaf edges, blossom end rot, or growth stalls during heatwaves. Fix It:
- 🔥 Deep Watering: Water deeply 1–2 times per week (instead of daily shallow watering) to encourage strong roots. Aim for 1–1.5 inches of water per week, more in extreme heat.
- 🌡️ Adjust for Weather: Use drip irrigation or soaker hoses to keep moisture consistent. Avoid overhead watering (especially in the evening) to prevent fungal diseases.
- 🎯 Mulch Like a Pro: Cover soil with 2–3 inches of mulch (straw, grass clippings, or wood chips) to retain moisture and regulate temperature.
Prevention Tip: ✨ Water in the morning to reduce evaporation and fungal risks. Let the top inch of soil dry out between waterings to prevent root rot.
Signs: Leaf curling, sunburn (white/yellow patches), or stunted growth in extreme heat/cold. Fix It:
- 🔪 Adjust Sun Exposure:
- Too much sun? Provide light shade (use shade cloth, a row cover, or plant near taller companions like corn or sunflowers).
- Too little sun? Move plants to a sunnier spot (tomatoes need 6–8+ hours of sun daily).
- 🥘 Protect from Temperature Shocks:
- Heatwaves? Mist leaves early in the day (avoid evening misting) or use reflective mulch (white plastic or aluminum foil).
- Cold snaps? Cover plants with frost blankets or cloches (glass jars or plastic bottles).
- 🌡️ Boost Airflow: Prune lower leaves to improve circulation and reduce humidity-related diseases.
Prevention Tip: 🌡️ Hardening off seedlings gradually before transplanting helps them tolerate outdoor conditions.
Signs: Chewed leaves, holes, wilting, black spots, or sticky residue (honeydew). Fix It:
- 🔥 Identify the Culprit:
- Aphids/Whiteflies? Spray with neem oil or soapy water (1 tsp mild soap + 1 quart water).
- Tomato Hornworms? Handpick them (they’re huge and easy to spot!) or use BT (Bacillus thuringiensis).
- Fungal Issues (blight, powdery mildew)? Remove infected leaves, space plants for airflow, and spray with copper fungicide or baking soda mix (1 tsp baking soda + 1 quart water + a drop of soap).
- 🍳 Strengthen Plants: Healthy plants resist pests better! Ensure proper sun, water, and nutrients.
Prevention Tip: 💡 Rotate crops yearly to prevent soil-borne diseases. Plant companion plants like basil, marigolds, or nasturtiums to repel pests naturally.
Signs: Wilting after transplanting, roots circling the pot, or no new growth for weeks. Fix It:
- 🔪 Check the Roots:
- Container-grown? Gently remove the plant and loosen circling roots before replanting in a larger pot with fresh soil.
- Garden soil? If roots are compacted, dig a deeper hole and tease out tangled roots before replanting.
- 🥘 Recovery Care:
- Prune damaged roots (use clean scissors) and trim any broken stems.
- Water thoroughly and keep soil moist for 1–2 weeks to reduce shock.
- Avoid fertilizing for 2 weeks to let roots recover.
Prevention Tip: ✨ Use well-draining soil and pots with drainage holes. For garden plants, dig holes twice as wide as the root ball to encourage root spread.
Pro Tip: 🌱 Give it time! Some stunted plants just need 2–4 weeks to bounce back with proper care. Track progress and adjust as needed.
Frequently asked questions
Why do my tomato plants suddenly stop growing even when they look healthy?
Healthy-looking plants often stall due to hidden nutrient gaps or environmental stress. Check for yellowing leaves (nitrogen deficiency) or purple stems (phosphorus shortage). Even slight watering inconsistencies or root-bound containers can halt growth. Start with a soil test and adjust care based on symptoms.
How can I tell if my tomato plant is suffering from underwatering vs. overwatering?
Underwatered plants show crispy leaf edges and wilting that doesn’t recover by evening. Overwatered plants have mushy black stems, yellow leaves that stay limp, and a foul soil smell. Press your finger 2 inches into the soil—if it’s bone dry, water more; if soggy, let it dry out before watering again.
Will pruning my tomato plant help it grow again if it’s stunted?
Pruning can actually help! Remove lower leaves to improve airflow and suckers (side shoots) to redirect energy to fruit production. Cut back any damaged or diseased foliage immediately. Just avoid heavy pruning during heatwaves—plants need all their energy to recover.
Can I save a tomato plant that’s been stunted for weeks?
Yes! With targeted care, most plants bounce back in 2–4 weeks. Focus on consistent watering, balanced fertilizer, and pest control. If roots are severely damaged (from rot or nematodes), you may need to repot in fresh soil. Don’t give up—tomatoes are resilient once their basic needs are met!
What’s the fastest way to fix a nutrient deficiency in my tomato plants?
For quick results, use foliar sprays (like diluted fish emulsion for nitrogen) or soil drenches (Epsom salt for magnesium). Mix 1–2 cups of compost into the top 6 inches of soil around the base. Organic options like banana peels (for potassium) or alfalfa meal (for nitrogen) work too—just compost them first.