
Container Gardens
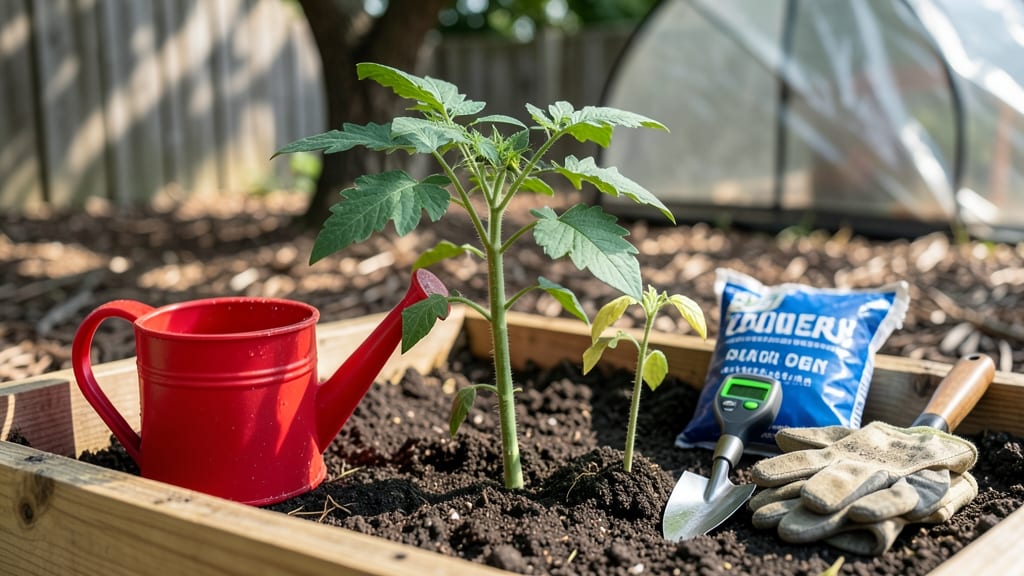
Your tomato seedlings stopped growing because root rot is silently stealing their energy. 🌱 I’ve nursed back more stunted seedlings than I’d like to admit, and the key is catching this early—before the stems turn mushy and the leaves yellow into sad, limp puddles.
The good news? You can fix it in three simple steps, no fancy tools needed.
Root rot starts when soil stays soggy for days, cutting off oxygen to the roots. Check for dark, foul-smelling soil and stems that wilt even after watering—those are your warning signs. The fix?
Gently remove the seedling, trim any blackened roots, and repot it in fresh, dry potting mix. No more guessing: stick your finger in the soil before watering. If it’s damp, wait.
After repotting, keep the seedling in bright, indirect light and water only when the top inch feels dry. Within a week, you’ll see new growth pushing through—proof the roots are healing.
The secret weapon? A 50/50 mix of perlite and potting soil to prevent future soggy soil. No more wasted seedlings.
This works for both container gardens and in-ground starts, and it’s the same fix I’ve used to save seedlings in humid summers or damp basements. The next time you see those first signs of trouble, act fast—your future harvest depends on it.
Root Causes of Stunted Growth
When your tomato seedlings suddenly hit a growth wall, it’s often a sign that something fundamental is off—whether it’s in the soil, environment, or even the plant’s own biology. Understanding these root causes (pun intended!) is the first step to reviving your seedlings.
Below, we break down the most common culprits, why they happen, and how to spot them before they derail your harvest.
Tomato seedlings thrive on consistency, but waterlogged soil is their kryptonite. When roots sit in soggy conditions for too long, they suffocate from a lack of oxygen—a condition called hypoxia. This triggers root rot, where beneficial microbes die off and harmful pathogens like Pythium or Phytophthora take over.
Why it happens:
- Compacted or clay-heavy soil repels water instead of absorbing it, creating pockets of saturation.
- Overzealous watering (especially with cold water) cools the soil too quickly, shocking the roots.
- No drainage holes in containers trap excess water, mimicking a swampy environment.
💡 Pro Tip: Stick your finger 1–2 inches into the soil—if it’s damp, wait. If it’s bone-dry, water deeply but only until moisture reaches the bottom of the pot. For containers, ensure they have drainage holes and use a well-draining mix (like 60% potting soil + 30% perlite + 10% compost).
Tomatoes are tropical plants at heart, and they hate extremes. Seedlings grown in soil below 50°F (10°C) or above 90°F (32°C) struggle to absorb nutrients, leading to stunted growth or even cell death.
Why it happens:
- Cold soil slows microbial activity, reducing nutrient availability. Enzymes in roots also become sluggish, halting growth.
- Heat stress causes wilting and leaf scorch, as plants prioritize survival over growth. High temps also increase transpiration (water loss), drying out roots faster.
- Drafty or unstable environments (like greenhouses without ventilation) create temperature swings that confuse seedlings.
🌡️ Fix It: Use a soil thermometer to monitor temps—ideal range is 70–85°F (21–29°C). For cold snaps, move pots to a sheltered spot or use a seedling heat mat (set to 70°F). In heatwaves, provide shade cloth and water in the early morning to reduce evaporation.
Seedlings need a balanced diet of macronutrients (nitrogen, phosphorus, potassium) and micronutrients (iron, calcium, magnesium). Without them, growth grinds to a halt—often with telltale signs like yellowing leaves (chlorosis) or purplish stems.
Why it happens:
| Missing Nutrient | Symptoms | Common Causes |
|---|---|---|
| Nitrogen (N) | Pale yellow leaves (starting with older ones), stunted stems | Overwatering leaches nitrogen; poor-quality soil; over-fertilizing with phosphorus/potassium-heavy feeds |
| Phosphorus (P) | Dark green/purple stems and leaves, slow root development | Cold soil (phosphorus becomes less available); using slow-release fertilizers too early |
| Potassium (K) | Yellowing leaf edges ("scorching"), weak stems, poor disease resistance | Excessive sodium or magnesium in water; leaching from frequent watering |
| Calcium (Ca) | New leaves cupped or deformed; brown spots on older leaves | Acidic soil (pH < 6.0); overwatering flushes calcium away |
✨ Solution: Test your soil’s pH (aim for 6.0–6.8) and amend with compost or a balanced fertilizer (like 5-5-5). For deficiencies, use targeted fixes:
- Nitrogen: Fish emulsion or alfalfa meal
- Phosphorus: Bone meal (sprinkle lightly and water in)
- Calcium: Crushed eggshells or calcium nitrate
Tiny invaders like aphids, fungal infections, or root-knot nematodes can silently drain a seedling’s energy, leaving it weak and stunted. Often, the damage is invisible until it’s too late.
Why it happens:
- Fungal diseases (e.g., Fusarium, Verticillium) thrive in damp, warm conditions, clogging xylem vessels and blocking water/nutrient flow.
- Nematodes burrow into roots, creating galls that disrupt nutrient absorption.
- Sap-sucking pests (like aphids or whiteflies) inject toxins and weaken leaves, reducing photosynthesis.
🔍 How to Spot Them:
- Check undersides of leaves for sticky residue (honeydew) or tiny bugs.
- Gently tug on seedlings—roots should slide easily from the soil. If they’re mushy or have knots, nematodes may be present.
- Look for moldy white fuzz on soil or stems (sign of powdery mildew or downy mildew).
🛡️ Prevention: Rotate crops, sterilize containers with a 10% bleach solution, and use neem oil or insecticidal soap as a preventive spray. For fungal issues, ensure airflow with pruning and spacing.
Even healthy seedlings can pause growth after being moved—whether to a larger pot or the garden. This transplant shock occurs when roots are damaged or the plant struggles to adapt to new conditions.
Why it happens:
- Root disturbance during repotting severs fine root hairs, reducing water/nutrient uptake.
- Root-bound seedlings (circling roots in small pots) can’t expand, leading to strangulation of new growth.
- Environmental mismatch (e.g., moving from a cozy indoor setup to harsh outdoor winds) stresses the plant.
🌱 Fix It:
Revive Your Seedlings Fast
When your tomato seedlings hit a growth standstill, acting quickly can make all the difference. Below, we’ve mapped out practical fixes for the most common causes—plus prevention tips to keep your plants thriving. Think of this as your seedling first-aid kit, tailored for container gardens.
Signs: Yellowing leaves, mushy stems, foul smell from soil, seedlings wilting despite wet soil.
Fix It in 3 Steps: 🔥 1. Drain the Damage
- Remove the seedling from its container and gently shake off excess soil to inspect roots. Healthy roots are firm and white; rotten roots are brown, slimy, or crumbly.
- If roots are severely rotted, trim away the affected parts with sterilized scissors (🔪). Keep only the firm, white sections.
🍳 2. Disinfect & Repot - Rinse the remaining roots under cool, running water for 10–15 seconds to remove debris. - Fill a clean container (or a small pot) with a sterilized, well-draining mix: 60% coco coir or peat moss + 30% perlite + 10% compost.
Avoid fresh garden soil—it may harbor pathogens. - Make a small hole in the mix, place the seedling at the same depth as before, and pat the soil lightly. Water sparingly (just enough to moisten).
👨🍳 3.
Boost Recovery - Move the pot to a bright, indirect light spot (no direct sun for 3–5 days to reduce stress). - Hold off on fertilizing for 2 weeks—rotted roots can’t absorb nutrients yet. - After 7 days, mist the leaves with a fungicide spray (like neem oil or hydrogen peroxide solution: 1 tbsp 3% H₂O₂ per quart of water) to prevent reinfection.
Prevent It:
- Water only when the top 1–2 inches of soil are dry (stick your finger in to check!).
- Use containers with drainage holes—no exceptions. Elevate pots on saucers to catch excess water.
- Avoid soggy soil by mixing in perlite or vermiculite (20% of your potting mix).
- 💡 Pro Tip: If your seedlings are in a tray, never let them sit in standing water—even for a few hours. Drain trays immediately after watering.
Signs: Crispy leaf edges, wilting even when soil is dry, seedlings leaning toward light sources, slow or no new growth.
Fix It in 3 Steps: 🥘 1. Rehydrate Gently
- Bottom-water your seedlings: Place the pot in a shallow tray of room-temperature water for 10–15 minutes. Let the soil absorb moisture from below—this prevents shocking the roots.
- If the soil is bone-dry, soak it gradually over 20 minutes instead of dumping water all at once.
🌡️ 2. Adjust Light & Temperature - Move seedlings to a location with 6–8 hours of indirect sunlight (a south-facing window with sheer curtains works).
Direct sun can scorch stressed plants. - If temperatures exceed 85°F (29°C), provide shade cloth or move them to a cooler spot (like a garage with natural light). - Avoid cold drafts (e.g., near AC vents or open windows at night).
✨ 3. Encourage Growth
- After 24 hours, apply a diluted seaweed fertilizer (like MaxSea) at half-strength to kickstart recovery.
- If seedlings are leggy (stretched and weak), bury them deeper up to their first true leaves—this stabilizes them and encourages root growth.
Prevent It:
- Water consistently—stick to a schedule (e.g., every 2–3 days in warm weather, every 4–5 days in cooler temps).
- Mulch the soil surface with a thin layer of perlite or straw to retain moisture.
- Use a humidity dome (or a plastic bag with holes) for the first week to help seedlings acclimate.
- 🎯 Pro Tip: Group seedlings together to create a micro-climate that retains moisture and humidity.
Signs: Yellowing between leaf veins (chlorosis), stunted growth, purplish stems (phosphorus deficiency), or slow leaf production.
Fix It in 3 Steps: 📊 1. Test Your Soil (DIY Style)
- Grab a handful of soil and mix it with water in a jar. If it smells sour or chemical-like, it’s over-fertilized. If it’s barely moist and crumbly, it’s nutrient-poor.
- For a quick check, press a soil sample into a damp paper towel. If it’s grayish or lacks texture, it’s time to refresh.
💪 2. Fertilize Smartly - For nitrogen deficiency (yellow leaves): Use a balanced liquid fertilizer (like 10-10-10) at half-strength.
Apply every 7–10 days. - For phosphorus deficiency (purple stems): Switch to a phosphorus-rich fertilizer (like 5-10-5) for 2 weeks. - For micronutrient issues (slow growth): Add chelated iron or Epsom salt (1 tbsp per gallon of water) to the soil.
🥗 3. Boost Soil Health
- Mix in 1–2 tbsp of worm castings or compost per pot to improve microbial activity.
- Avoid over-fertilizing—more isn’t better! Follow package instructions closely.
Prevent It:
- Start with high-quality potting mix—avoid cheap, peat-heavy blends that deplete nutrients fast.
- Rotate fertilizers every 4–6 weeks to prevent imbalances.
- 💡 Pro Tip: If your seedlings are in small containers, refresh the soil every 3–4 weeks with a top-dressing of compost.
Signs: Holes in leaves, sticky residue (aphids), white mold (powdery mildew), or wilting despite healthy soil.
Fix It in 3 Steps: 🔪 1. Remove the Threat
- Handpick pests (like aphids or spider mites) with a spray bottle of soapy water (1 tsp mild soap per quart of water).
- Prune infected leaves immediately and dispose of them in a sealed bag (not the compost!).
🍎 2. Treat Naturally - For fungal issues (mildew, rot): Spray with a baking soda solution (1 tsp baking soda + 1 quart water + a drop of dish soap).
Reapply every 5–7 days. - For pests: Use neem oil (2 tsp per quart of water) or insecticidal soap. Spray early in the morning to avoid burning leaves.
🛡️ 3. Prevent Reinfection
- Space seedlings at least 6 inches apart for airflow.
- Avoid overhead watering—water at the base to keep leaves dry.
- Rotate pots occasionally so all sides get even light and air exposure.
Prevent It:
- Inspect seedlings daily for early signs of pests or disease.
- Keep tools clean—sterilize scissors or pruners with rubbing alcohol between uses.
- 🌡️ Pro Tip: Preventative spray—once a month, mist seedlings with a neem oil-water mix to deter pests before they arrive.
Signs: Wilting, yellowing leaves, stunted growth within 1–2 weeks of repotting, roots circling the pot.
Fix It in 3 Steps: 🌱 1. Check the Roots
- Gently remove the seedling from its pot. If roots are circling tightly or matted, it’s root-bound. Trim the outer 1–2 inches of roots to encourage outward growth.
🏡 2. Repot with Care
- Choose a container 2–3 inches larger than the current one (too big = soggy soil).
- Use a **fresh, sterile
Frequently asked questions about stalled tomato seedlings
Why do my tomato seedlings stop growing after transplanting?
This is often transplant shock—roots get damaged when moving containers, and the plant needs time to recover. Check for circling roots (a sign of being root-bound) and trim any tangled growth before repotting. Use a container just 2-3 inches larger than the current one to prevent soggy soil.
How can I tell if my seedlings have root rot vs. just needing water?
Root rot shows as mushy, black stems and a foul smell from the soil, while thirsty seedlings have crispy edges and dry soil. Gently tug on the seedling—if it pulls out easily, it’s likely rot. Healthy roots should resist slightly when gently moved. Trim blackened roots and repot in fresh, dry mix.
What’s the best way to revive leggy tomato seedlings?
Leggy seedlings need more light and deeper planting. Bury them up to their first true leaves to stabilize stems, then move to bright indirect light (like a south window with sheer curtains). Use a grow light 2-3 inches above them for 12-14 hours daily if natural light is insufficient.
Can I save seedlings that stopped growing due to cold temperatures?
Yes! Move them to a warmer spot (above 60°F/15°C) and avoid drafts. Use a seedling heat mat if temps drop below 50°F (10°C). Gradually reintroduce sunlight (1-2 hours daily) to prevent shock. Growth should resume within 5-7 days once conditions improve.
How often should I fertilize seedlings that just started growing again?
Wait 2 weeks after reviving them, then use a diluted balanced fertilizer (5-5-5) at half-strength. Over-fertilizing can burn weak roots! Feed every 2-3 weeks with a seaweed extract or compost tea for gentle nutrition. Avoid phosphorus-heavy fertilizers early—they encourage roots, not top growth.